How to alter the Jocko pullover

Ready to sew's patterns are drafted for an average hight of 165cm so if you differ from that, you might need to do some pattern adjustments.
On this tutorial, we will go throught the process of lengthening and shortening the Jocko pullover pattern and blending between sizes.
Lets start with the shortening/lengthening adjustment first.
First, let's have a look at the different lengthening/shortening lines on the pattern.
Lengthening and shortening your pattern pieces is pretty straighforward, find the lengthen / shorten lines and apply your length changes between them. In the case of the Jocko pullover I’ve included two lengthen/shorten lines, this way you can adjust and keep your proportions.
- The top line: you will want to work from this line if need only a small alteration because your hight does not differ a lot from the pattern hight.
- The bottom line: You will want to work from this line AND the top line if to make important alterations. You can also use this line to emphasize the length difference between the front and the back.
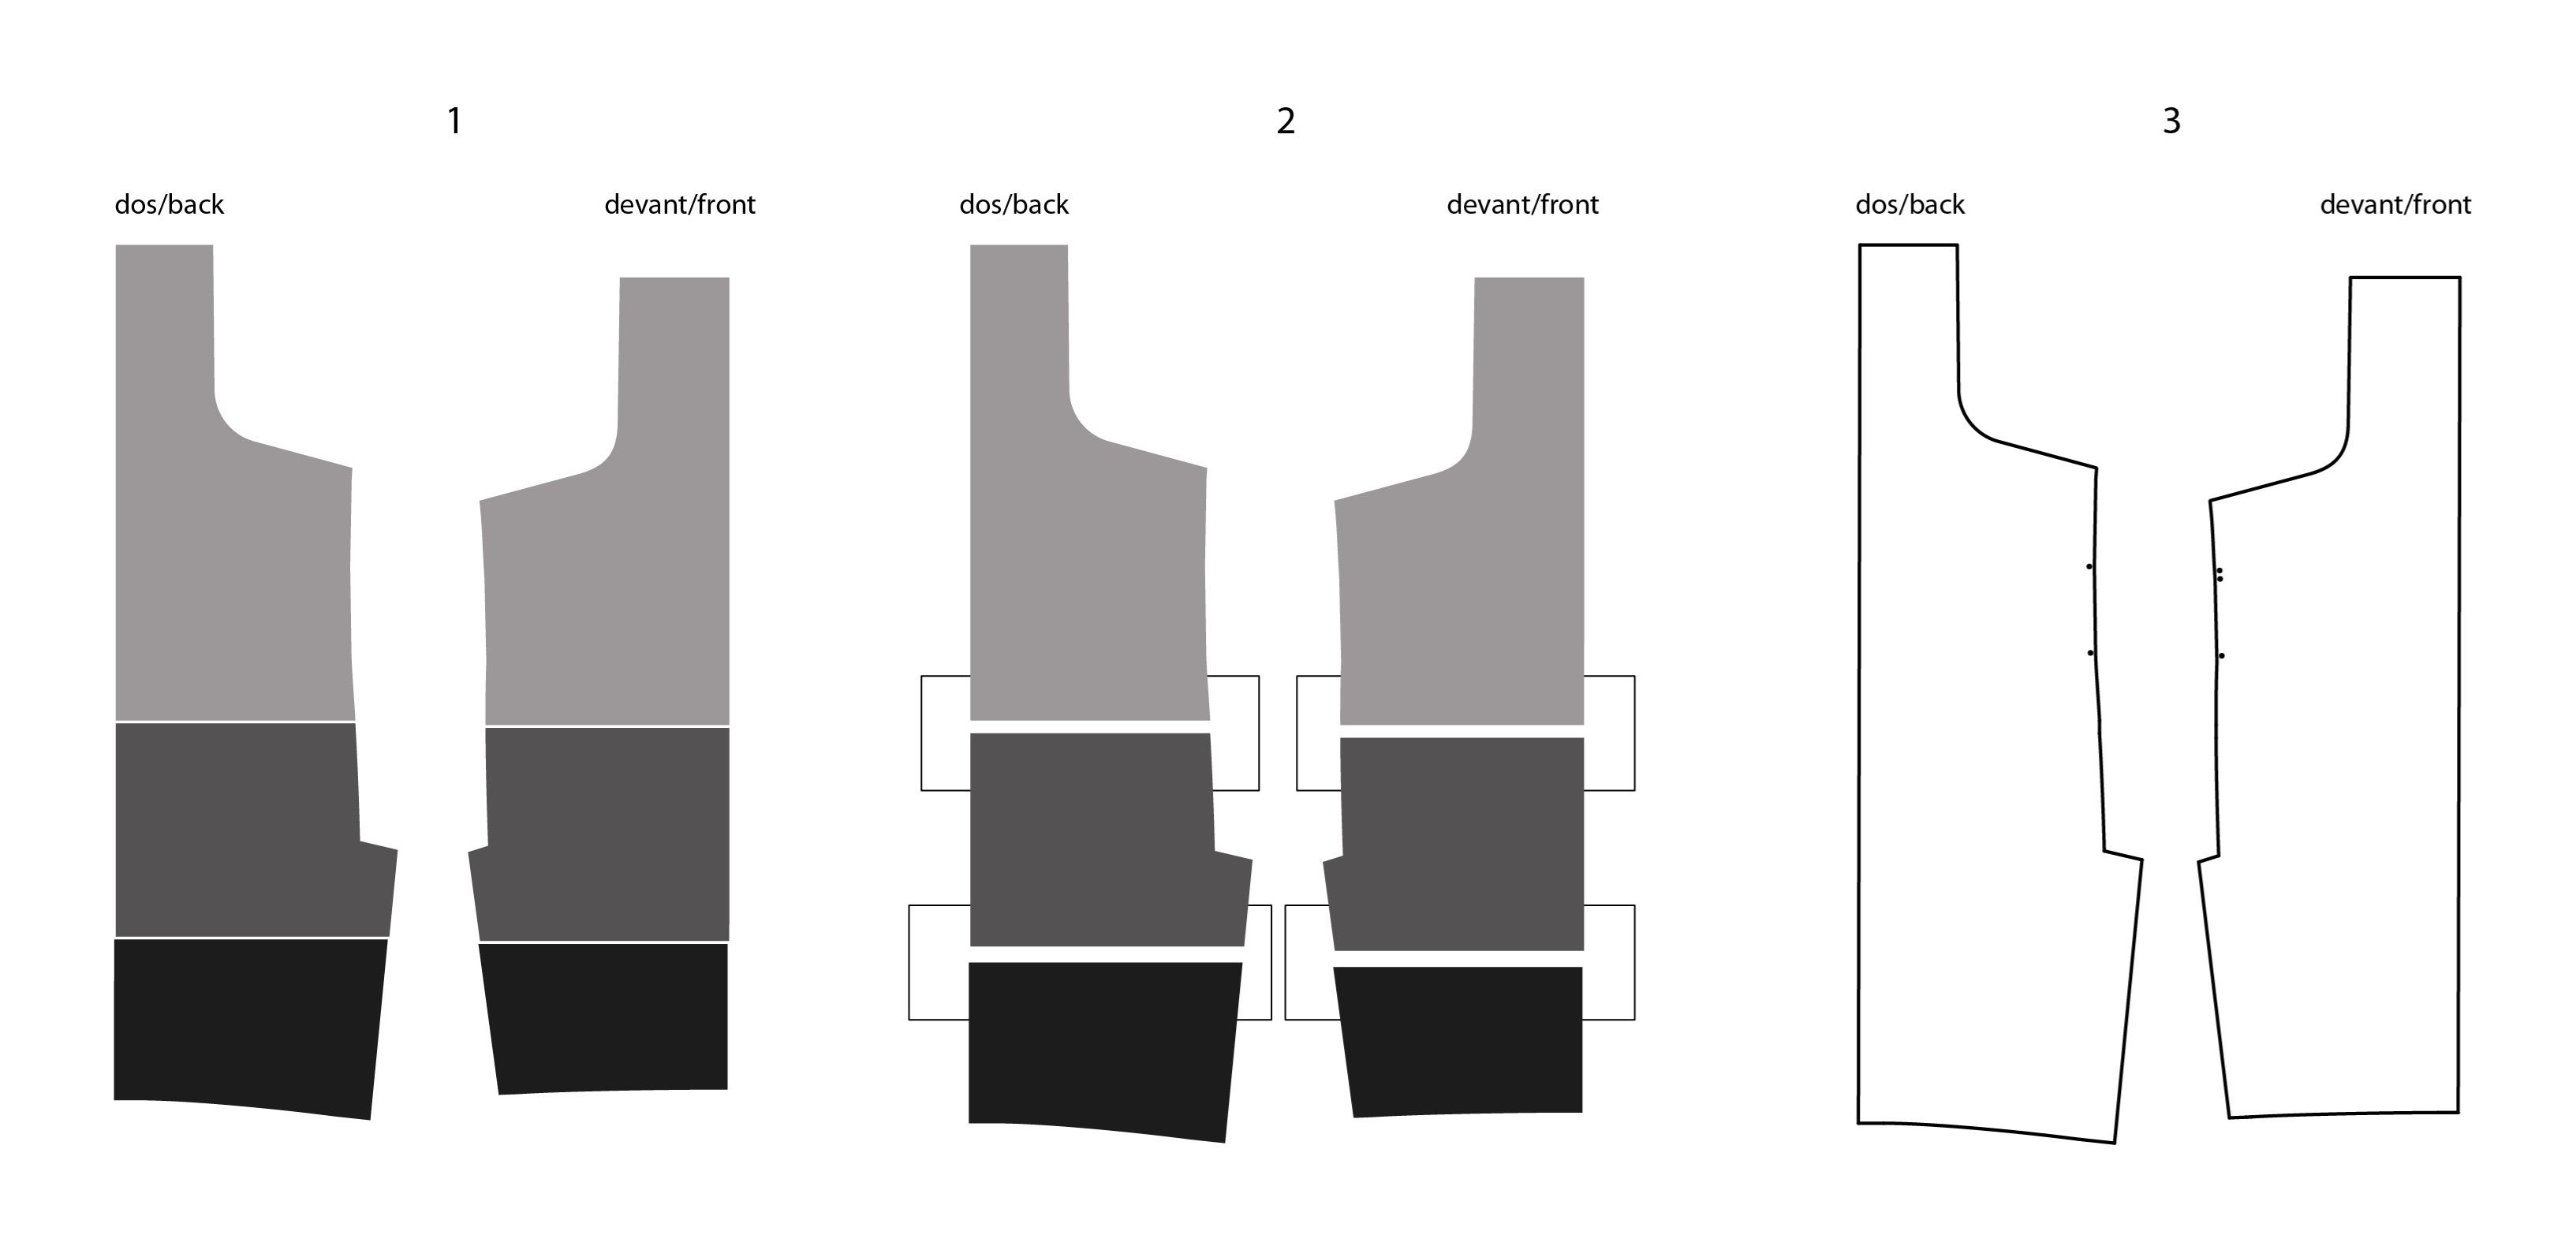
Cut between the lengthen/shorten lines marked on the pattern. With a piece of paper underneath the pattern, spread the two sections the amount you need to lengthen your piece, making sure to keep the grainline of the two pieces aligned. Trace your piece off onto the paper and re-blend any gagged edges along the side seam.
If you’re shortening the all pattern, the same steps apply only rather than spreading the pieces apart, you’ll be overlapping them the amount you need to shorten the pattern.
2 - llustrated below is the method you will use if you need to blend between sizes.
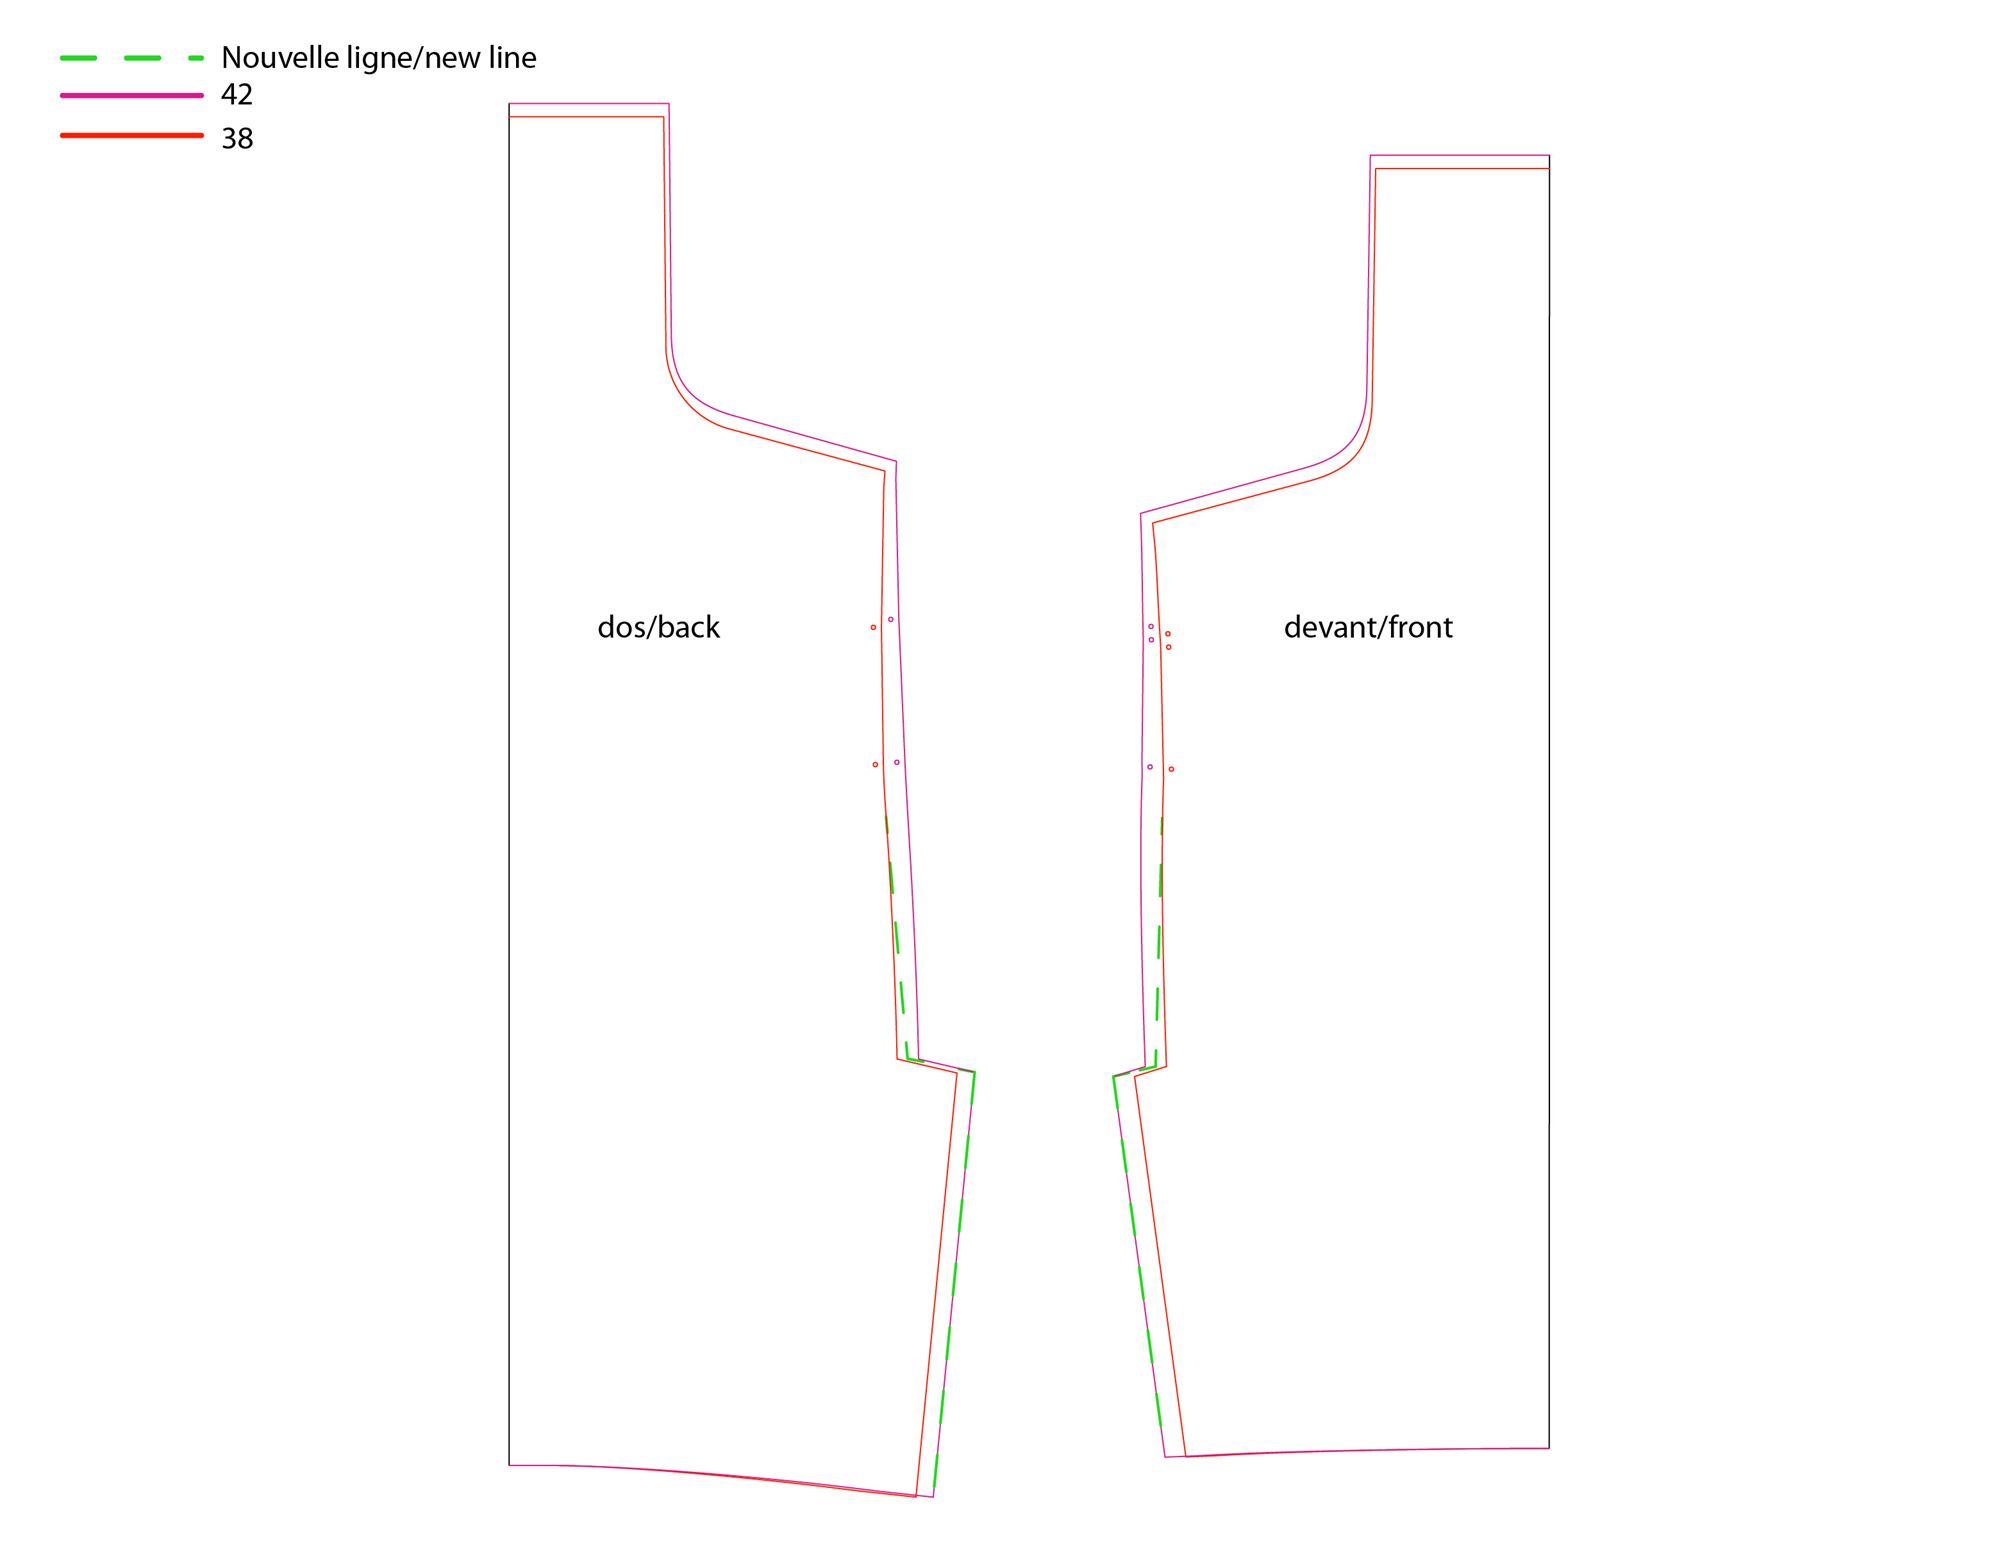 In this exemple, I’m blending from a 38 at the bust to a 42 at the full hips (I’ll be disregarding the waist measurement because the pattern has a pretty straight fit). Trace a line from the armpit circle to the beginning of the side vent from a size 38 to a size 42. Keep in mind that you may be able to choose your size only based on the bust measurement because of the important ease include in the pattern.
3 - Illustrated below is the method you will use if you want a narrower neckline.
 - Extend your front and back shoulder line by a maximum of 1,5cm. This is the height of the neckline edge at the shoulder.
- From that point, draw a curve from shoulder point to original curve at the Center Front.
- Cut your fabric using the new front pattern piece. The back bust and sleeve will remain the same. The only other change you will need to make is the length of the neck binding.
- Your new neckband length will be approx 85% of the total (front+back) circumference plus 6mm to accommodate the seam allowance. Cut the new neck binding using the new length but keeping the width suggests in the pattern.
If you’re enlarging the neckline, the same steps apply only rather than extending the shoulder line, you’ll be going in the amount you need to open the neckline.
4 - Illustrated below is the method you will use if you need to lower the neckline.
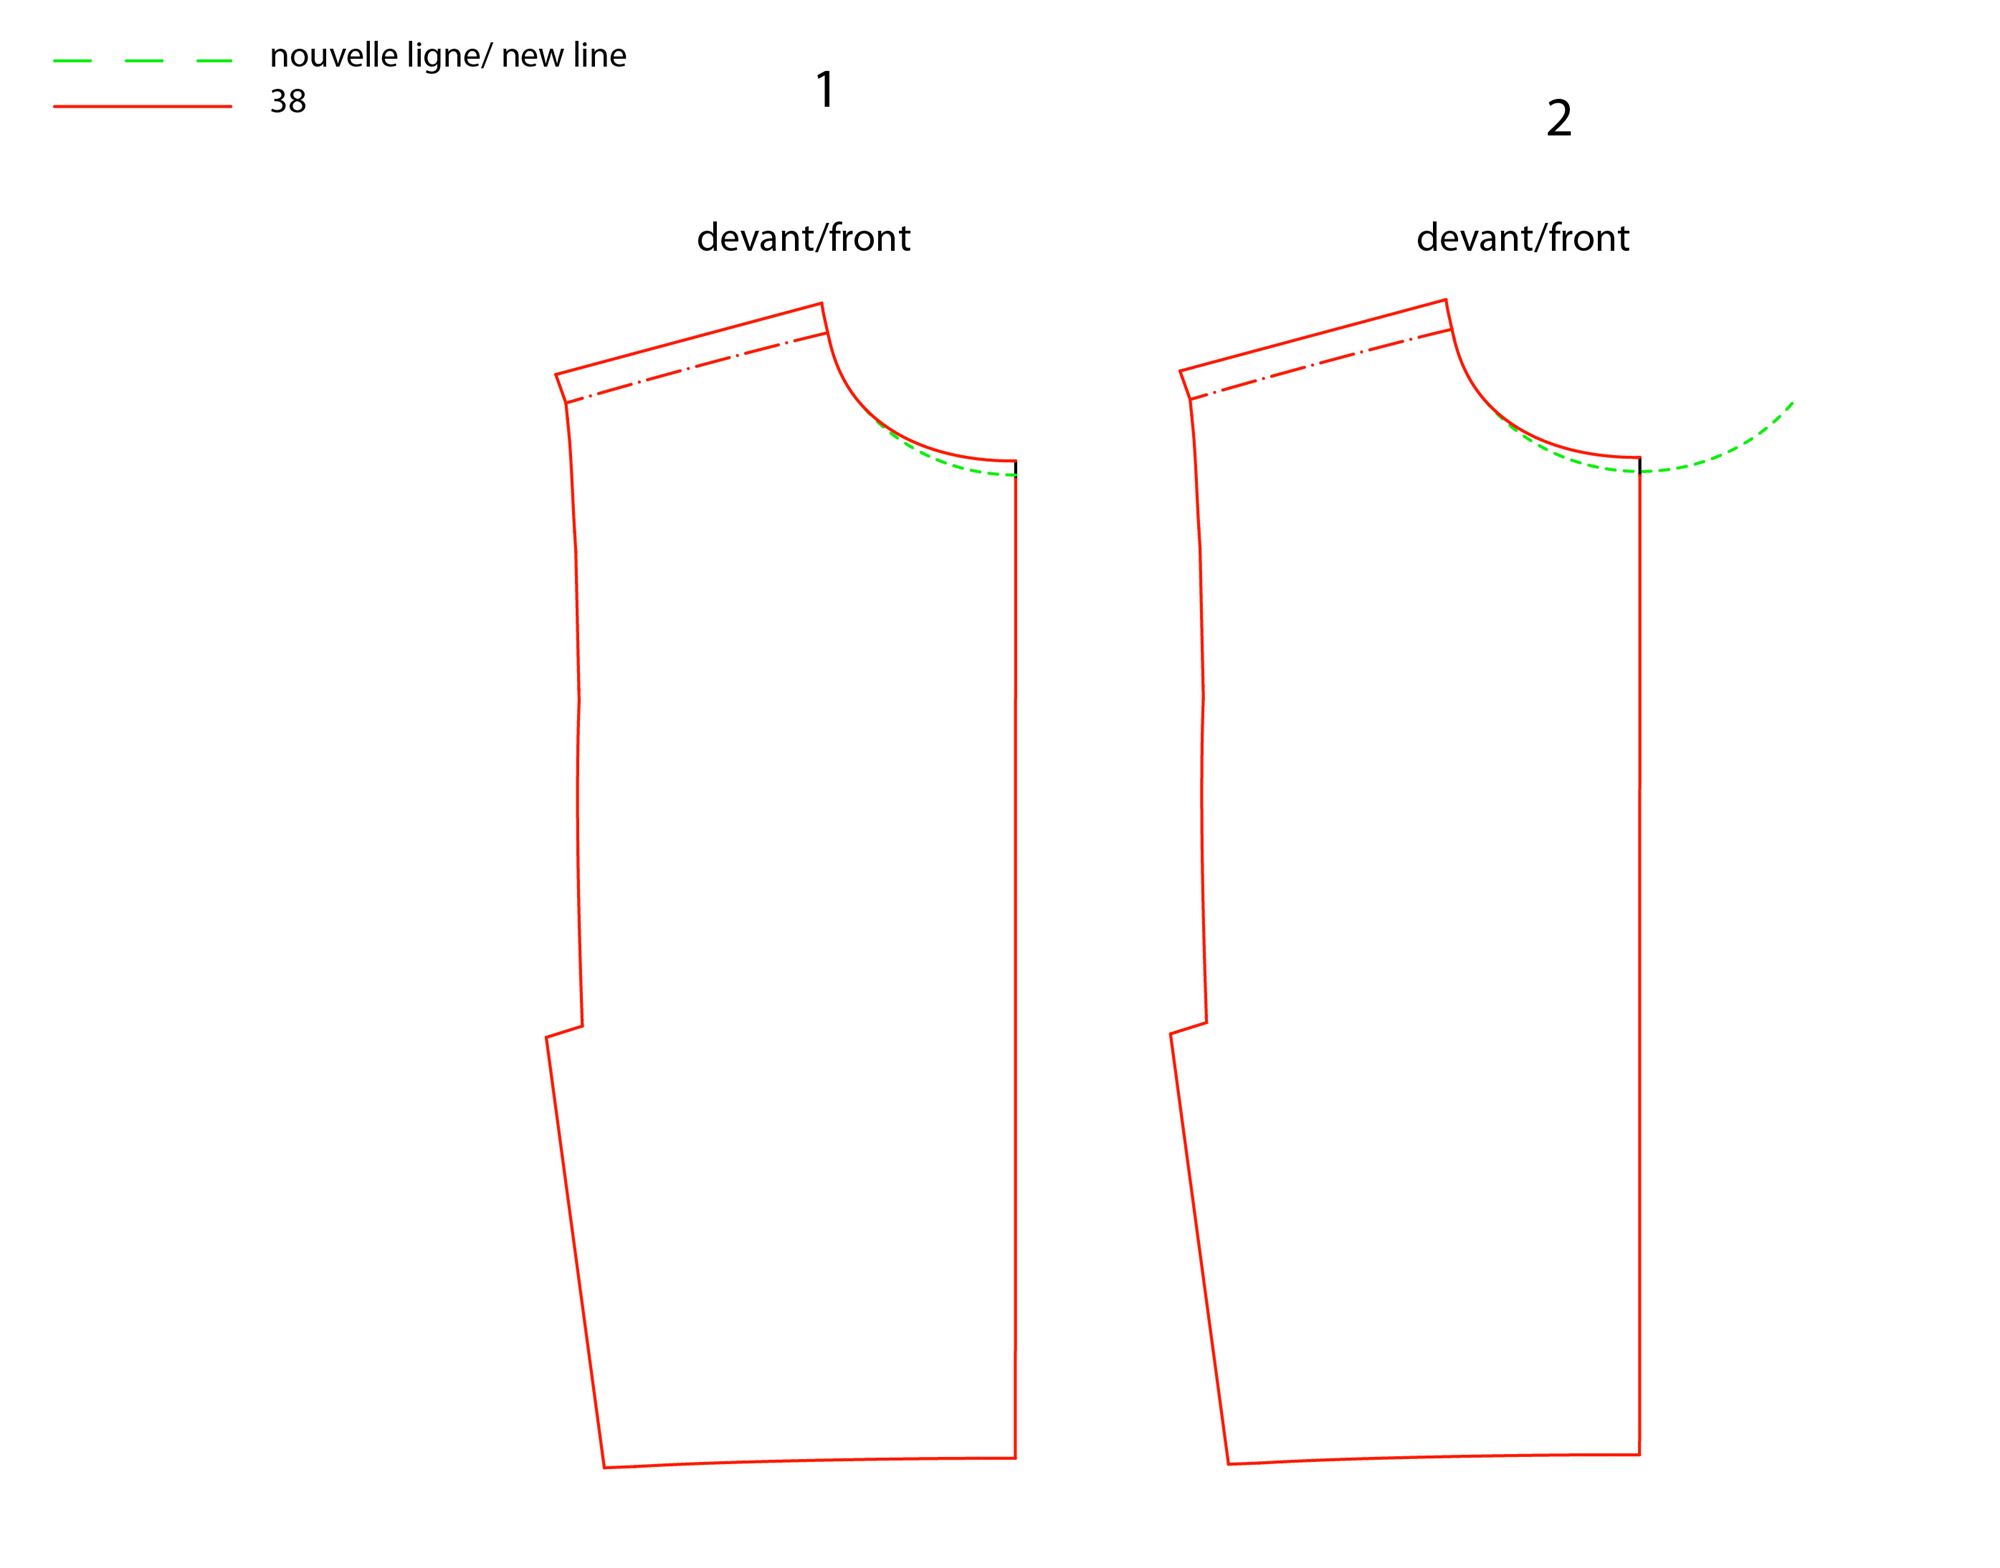 - For lowering the neckline you will need to mark on the center fold where you would like the new neckline to be. Using a French Curve draw a curve similar to the original one from your mark to the inner shoulder point.
- Cut your fabric using the new front pattern piece. The back bust and sleeve will remain the same. The only other change you will need to make is the length of the neck binding.
- Your new neckband length will be approx 85% of the total (front+back) circumference plus 6mm to accommodate the seam allowance. Cut the new neck binding using the new length but keeping the width suggests in the pattern.
If you’re raising the front neckline, the same steps apply only rather than lowering the center line, you’ll be raising the amount you need to change the neckline.
5 - Illustrated below is the method you will use if you need to enlarge the armscye (If your arm circumference is larger than the pattern is drafted for).
If your Jocko sweater fits perfectly at the bust, hips and neckline but your biceps are a bit tight, you probably need to deepen the armhole.
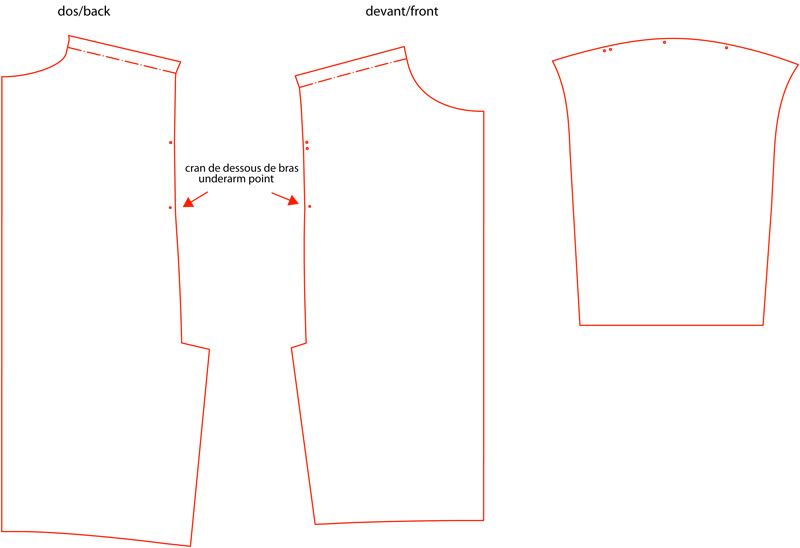
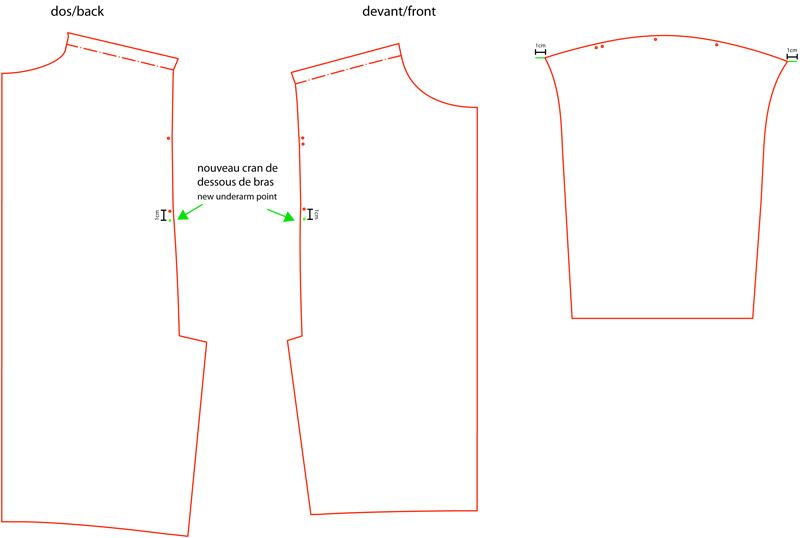
Ex: If you need 2cm ease at the biceps, you will want to drop the underarm point by 1cm on the front and back bodices. (1cm front + 1cm back = total 2cm). To match the sleeve cap head to your new armcyse length you need to extend each side of the sleeve head by 1cm. I recommand not going further 1,5cm (total of 3cm).
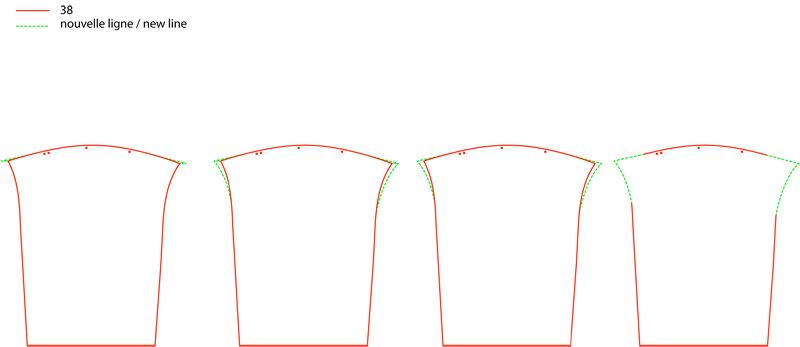
Draw your neew sleeve cap and side sleeve lines.
Comments
No comment at this time!
Leave your comment