Sew along, the Paulin smock

Welcome to the Paulin smock step-by-step sew along, a tutorial that will guide you through every step of sewing the garment. Paulin is a relatively simple garment to make, the only slightly technical step is the topstitching of the facing. To help you, baste the facing and trace its outline on the right side of the garment, never topstitch the garment on the wrong side even if it seems easier to you at the time because the stitches are always more beautiful on the right side.![]()
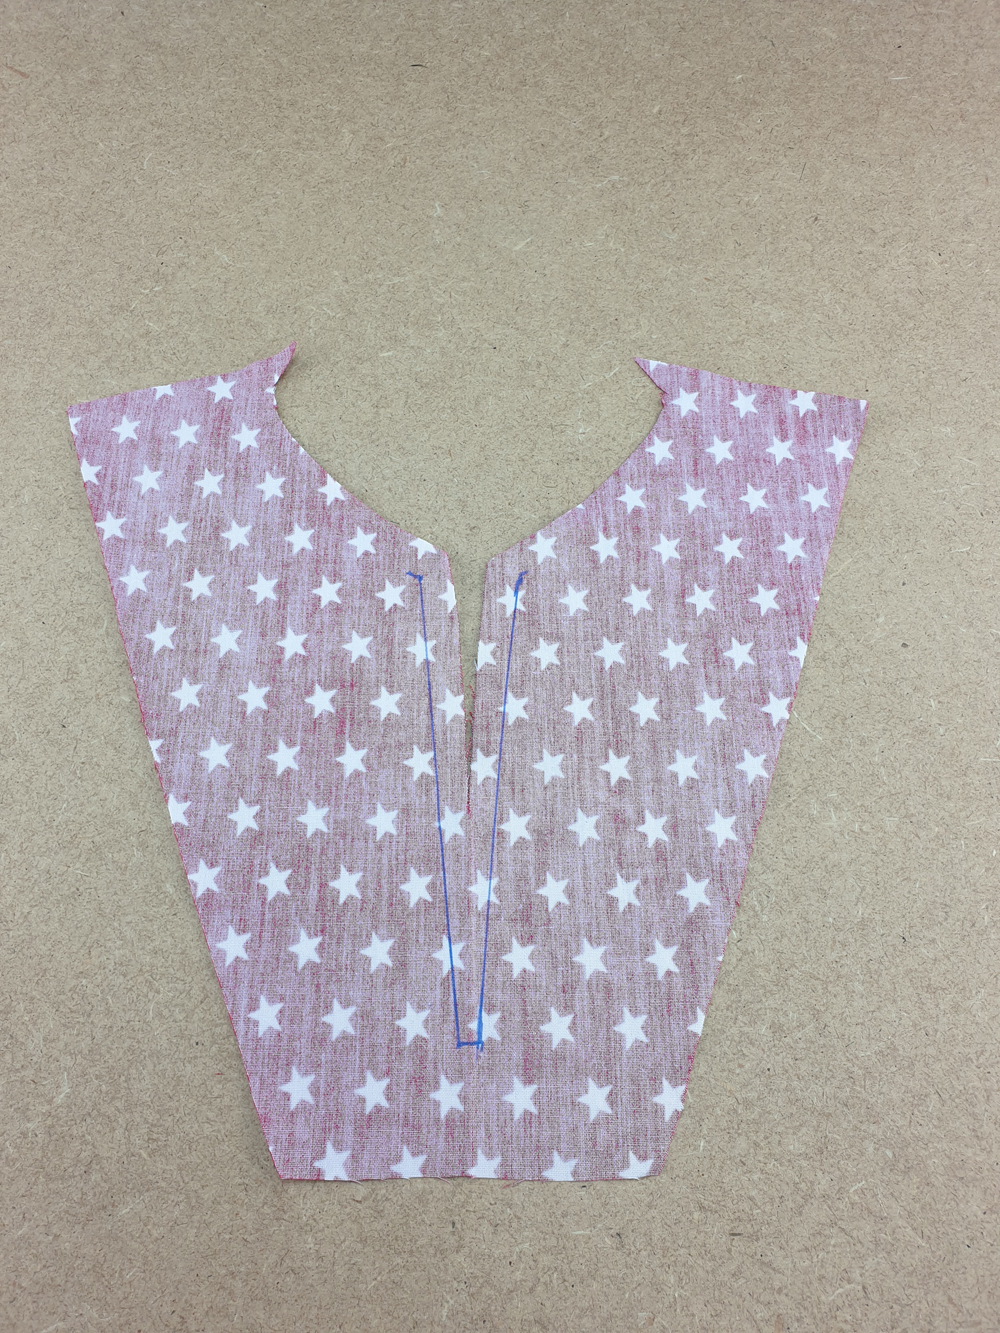
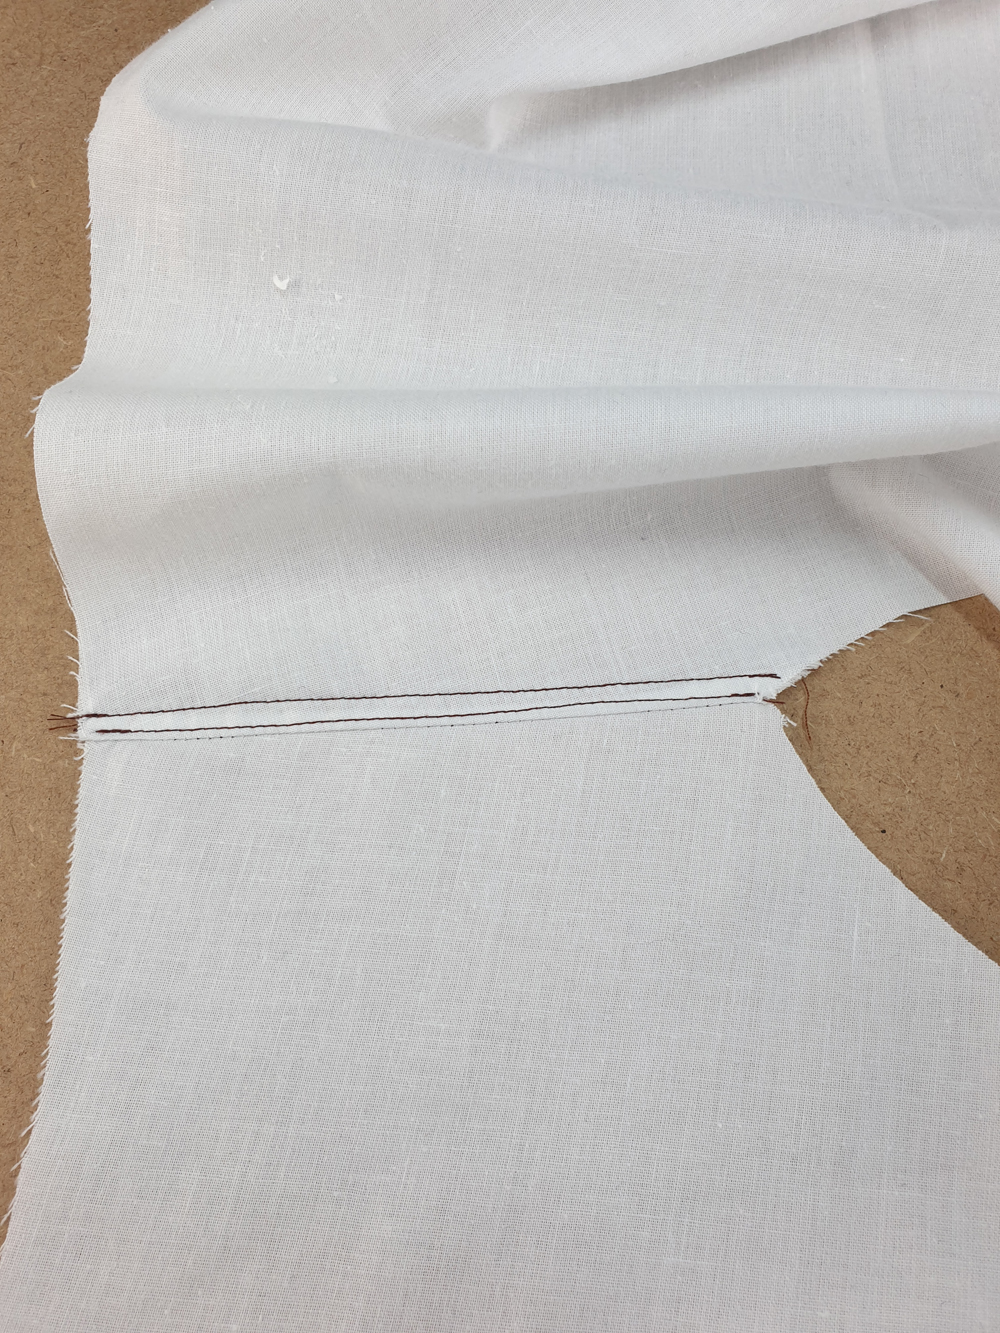
Using a disappearing ink marker or tailors’ chalk, transfer the slit markings to the wrong side of the front facing (H).
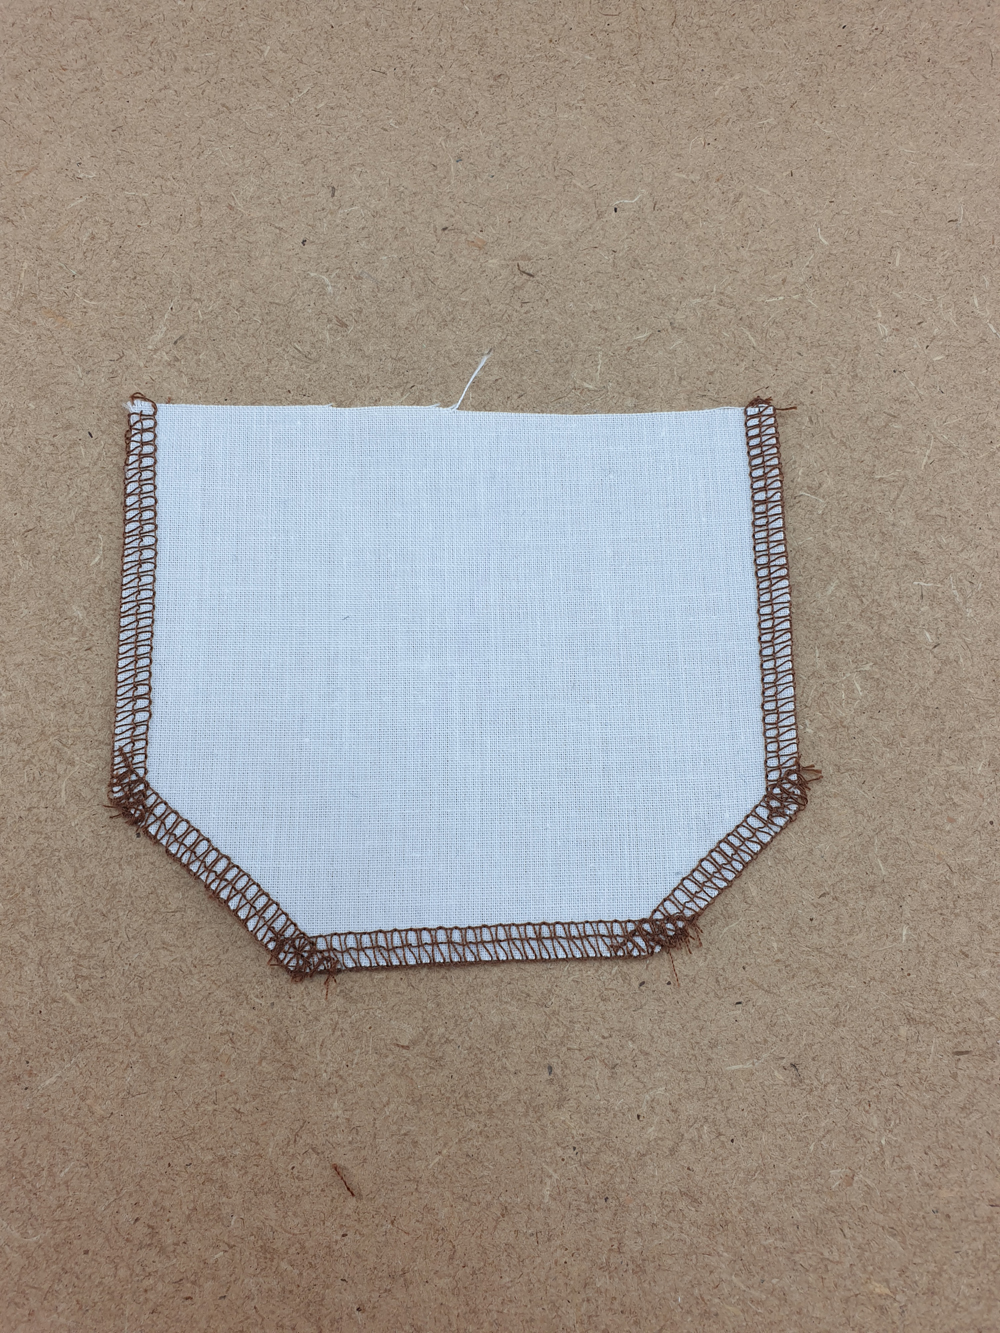
Finish the three edges of the pockets (E), leaving the top unfinished.
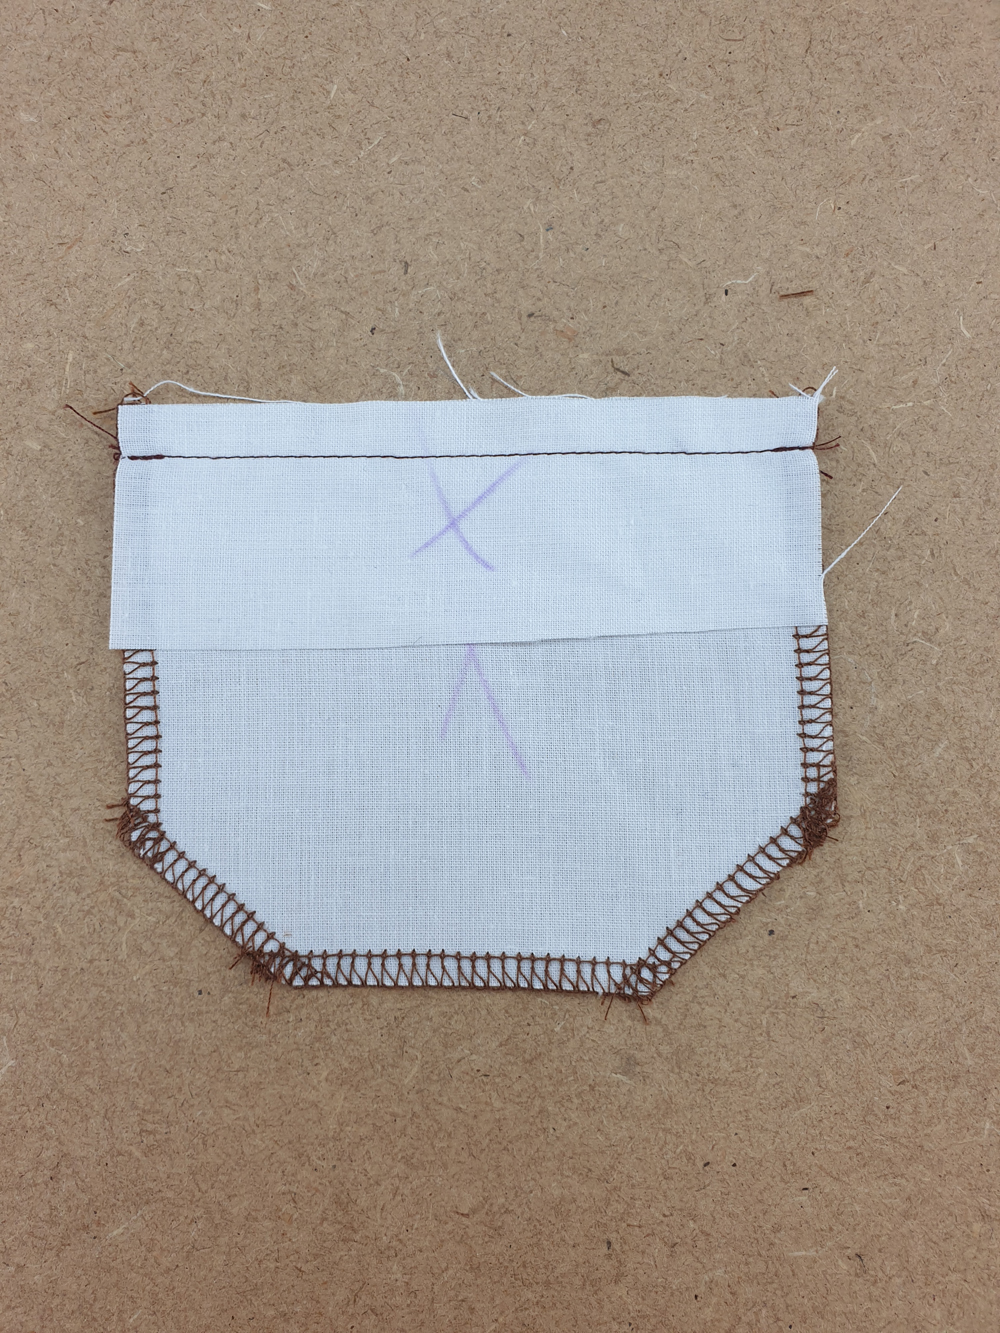
Place the pocket facing (F) on the top of the pocket, with the right side of the facing against the wrong side of the pocket. Pin in place and sew.
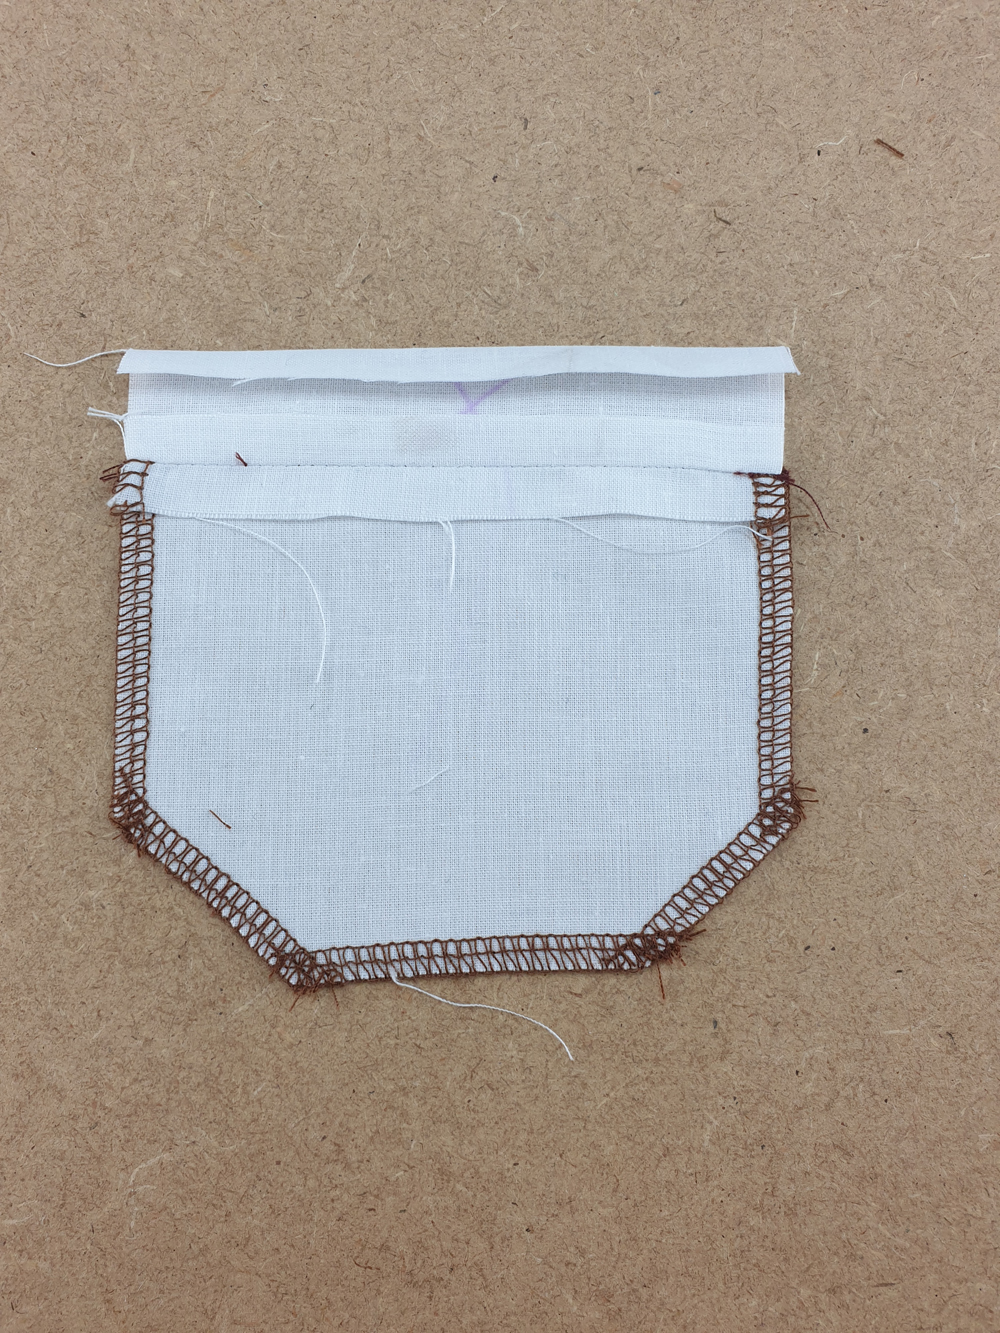
Press the seam allowance open. Fold the top edge of the facing 1cm to the wrong side.
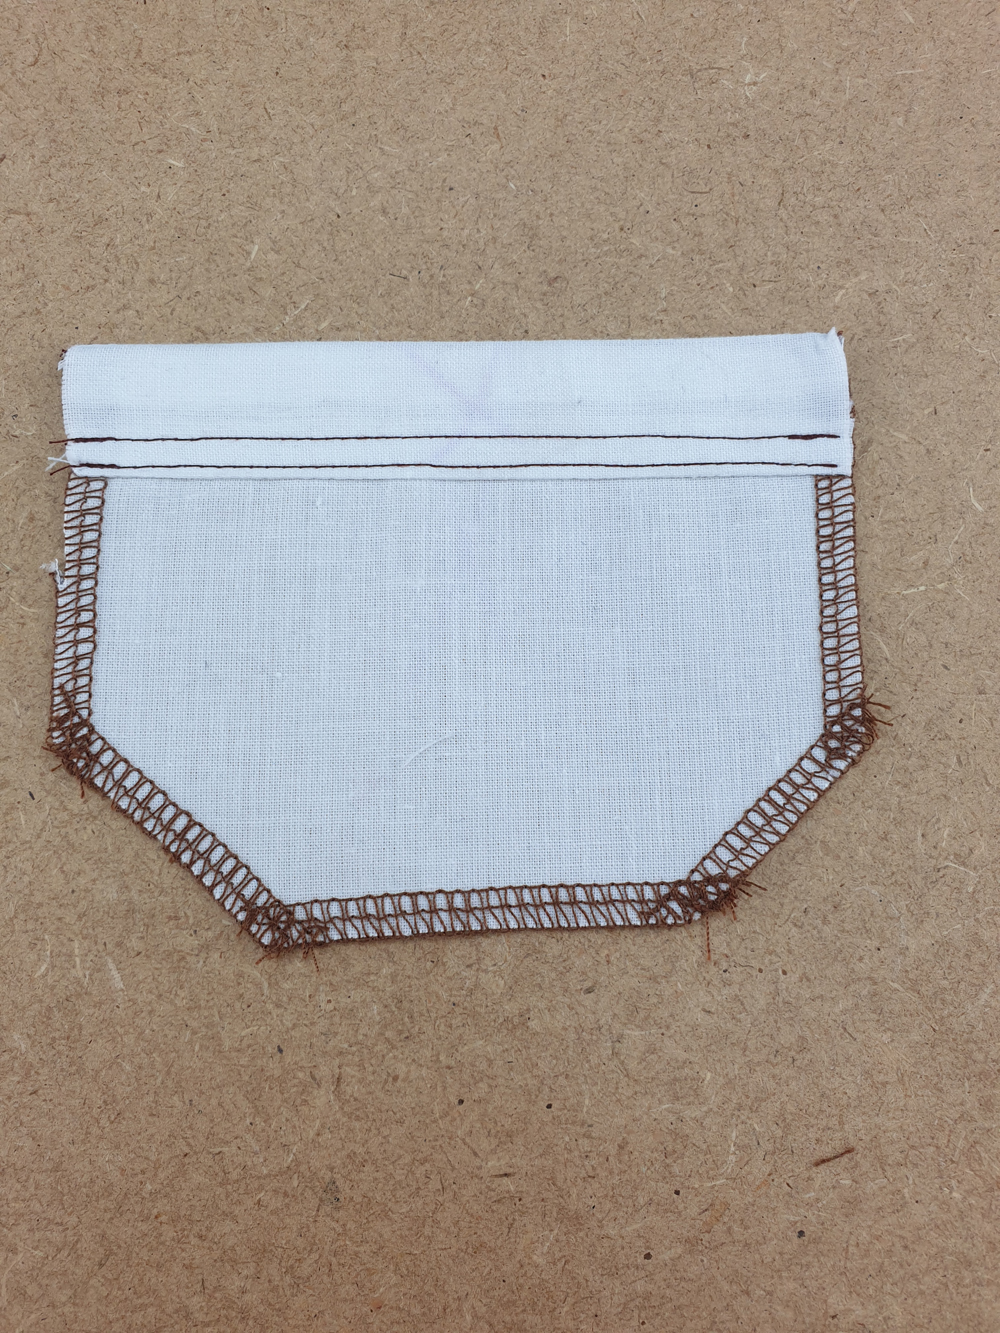
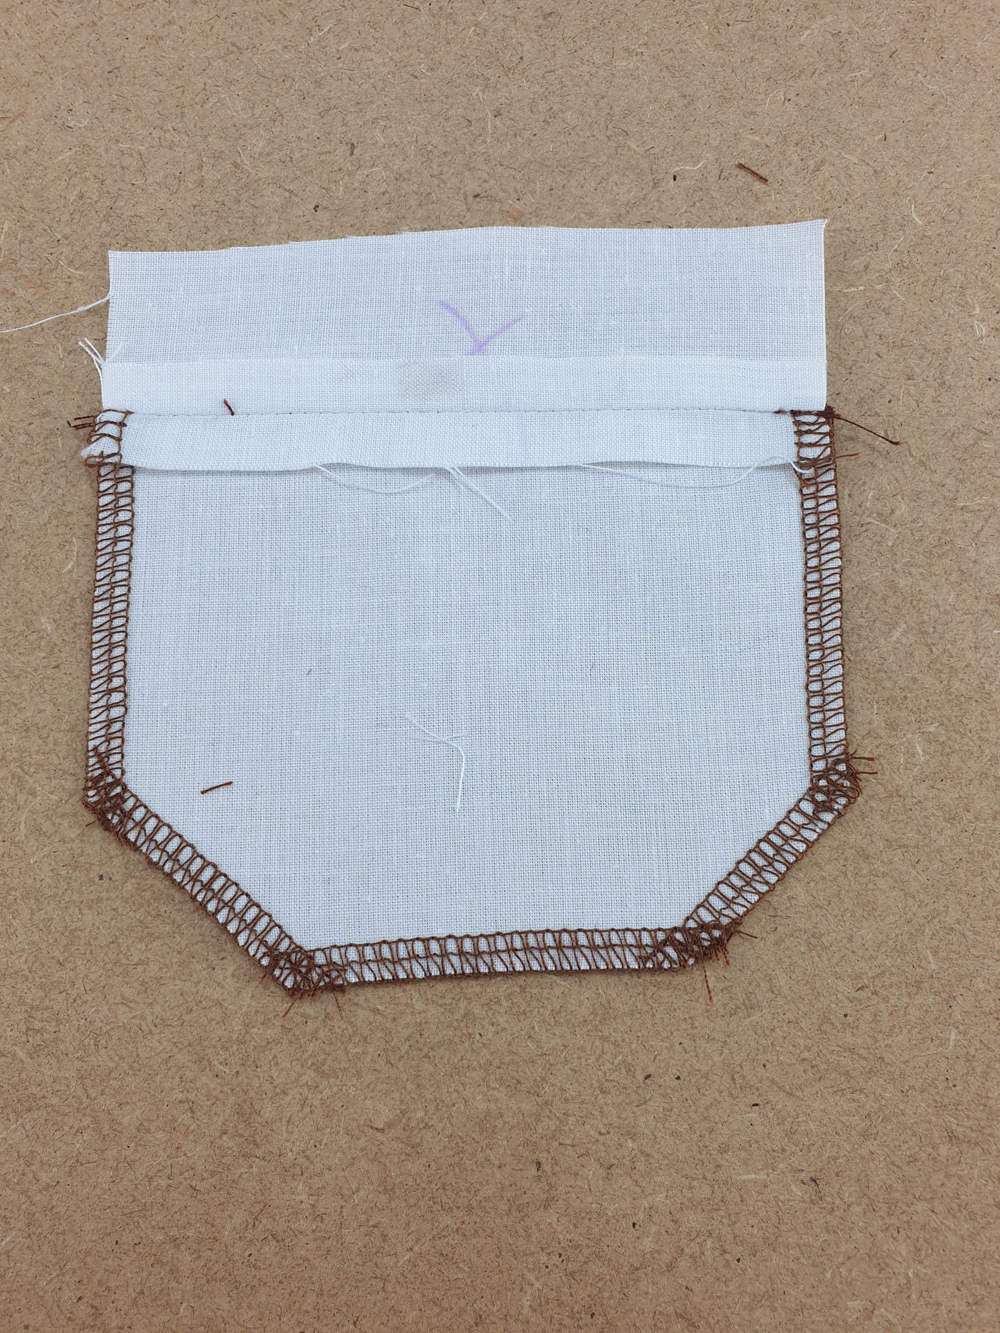
Flip the facing onto the pocket and topstitch, first at 2 mm from the folded edge then again 6 mm from the edge.
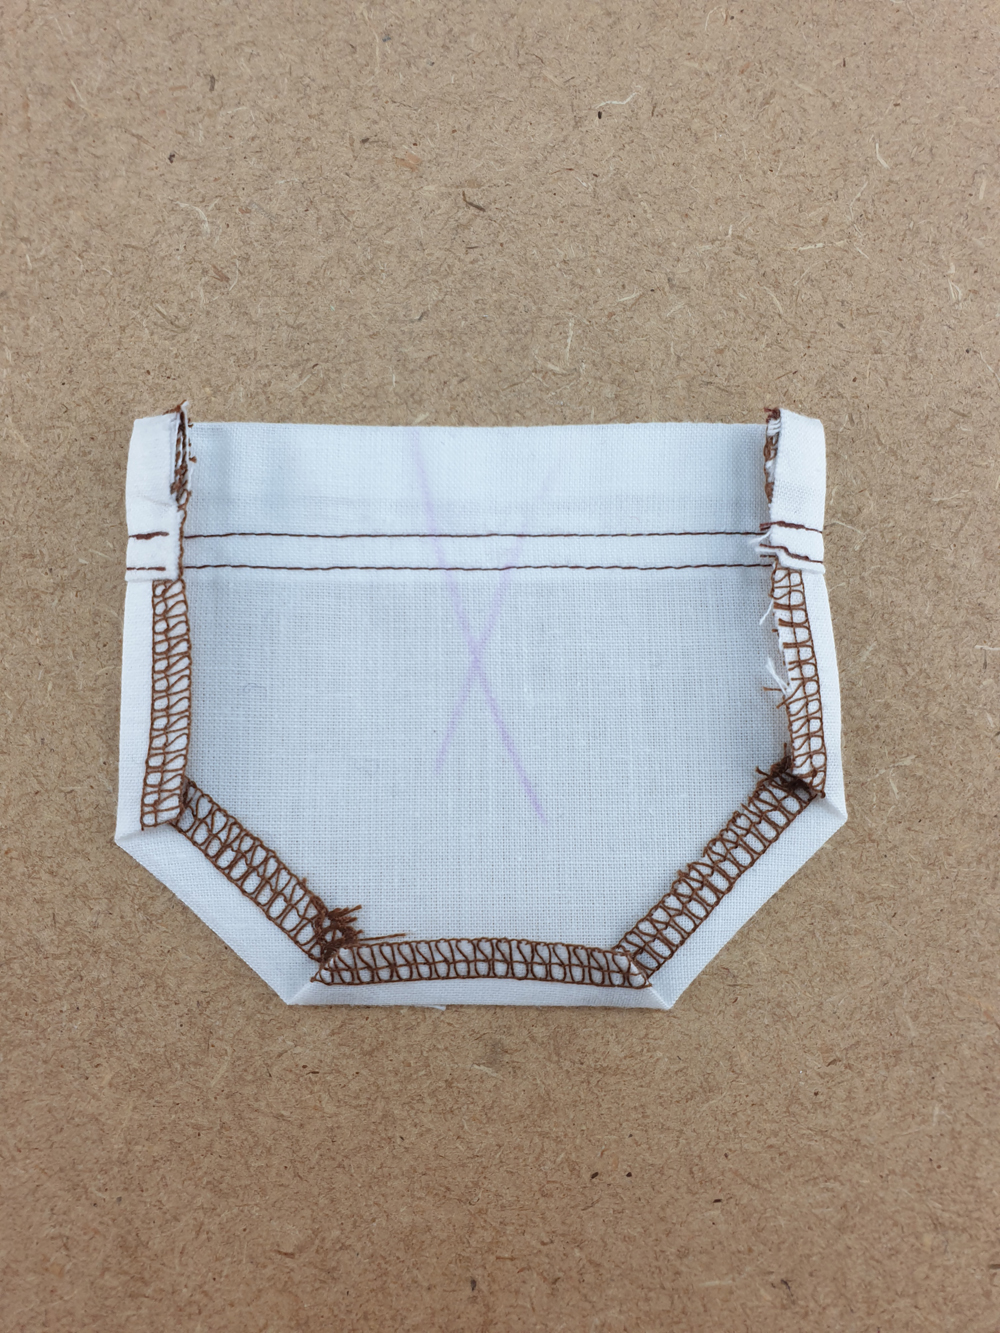
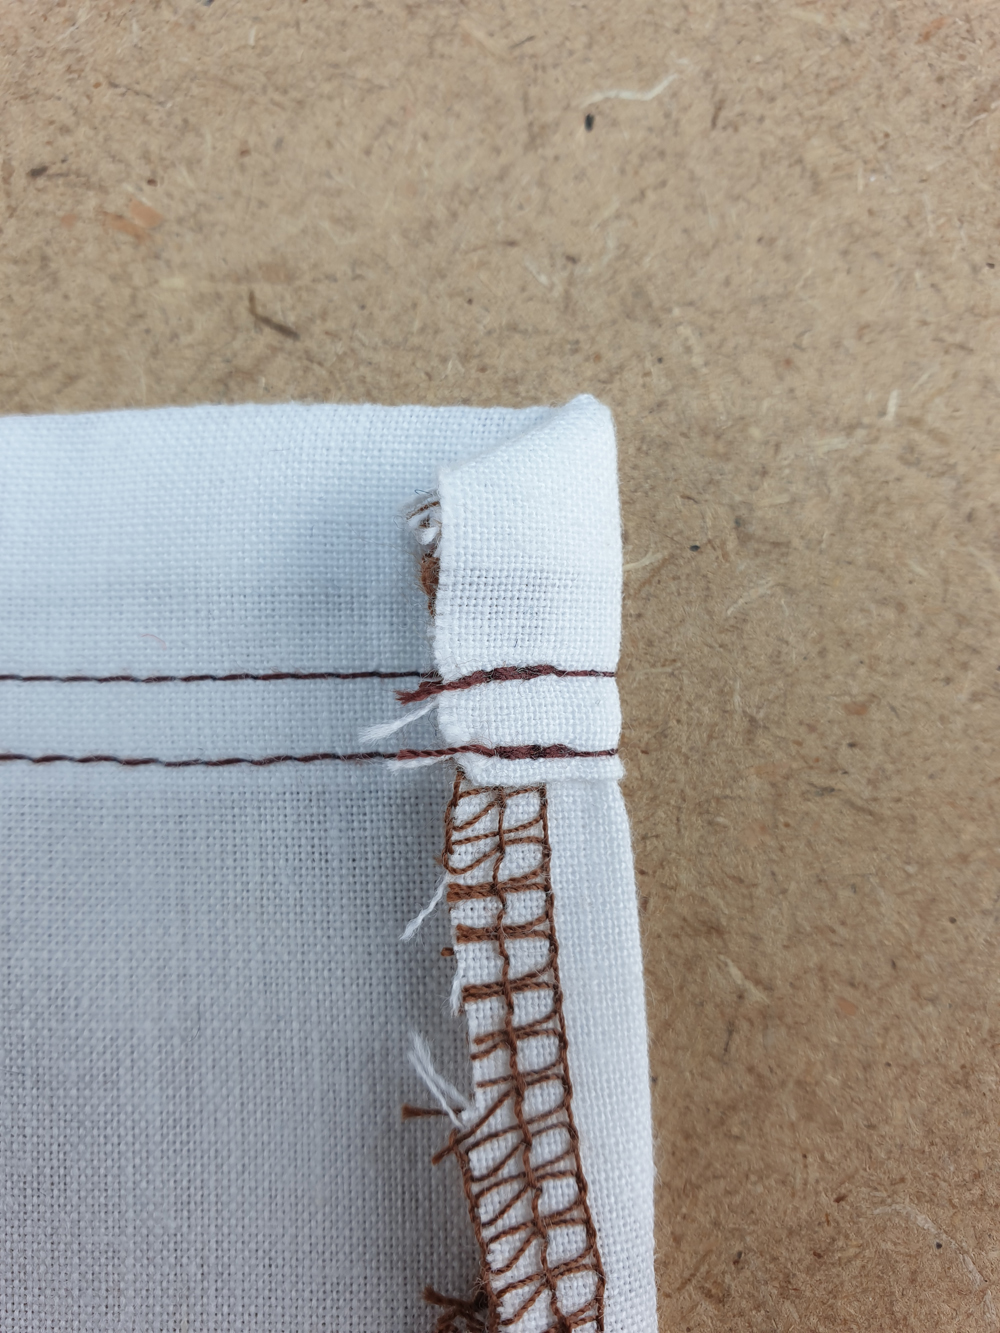
Beginning with the small slanted sides, fold the sides of the pocket 1 cm toward the inside. If your fabric isn’t too thick, you can fold the top corners of your pocket seam allowance.
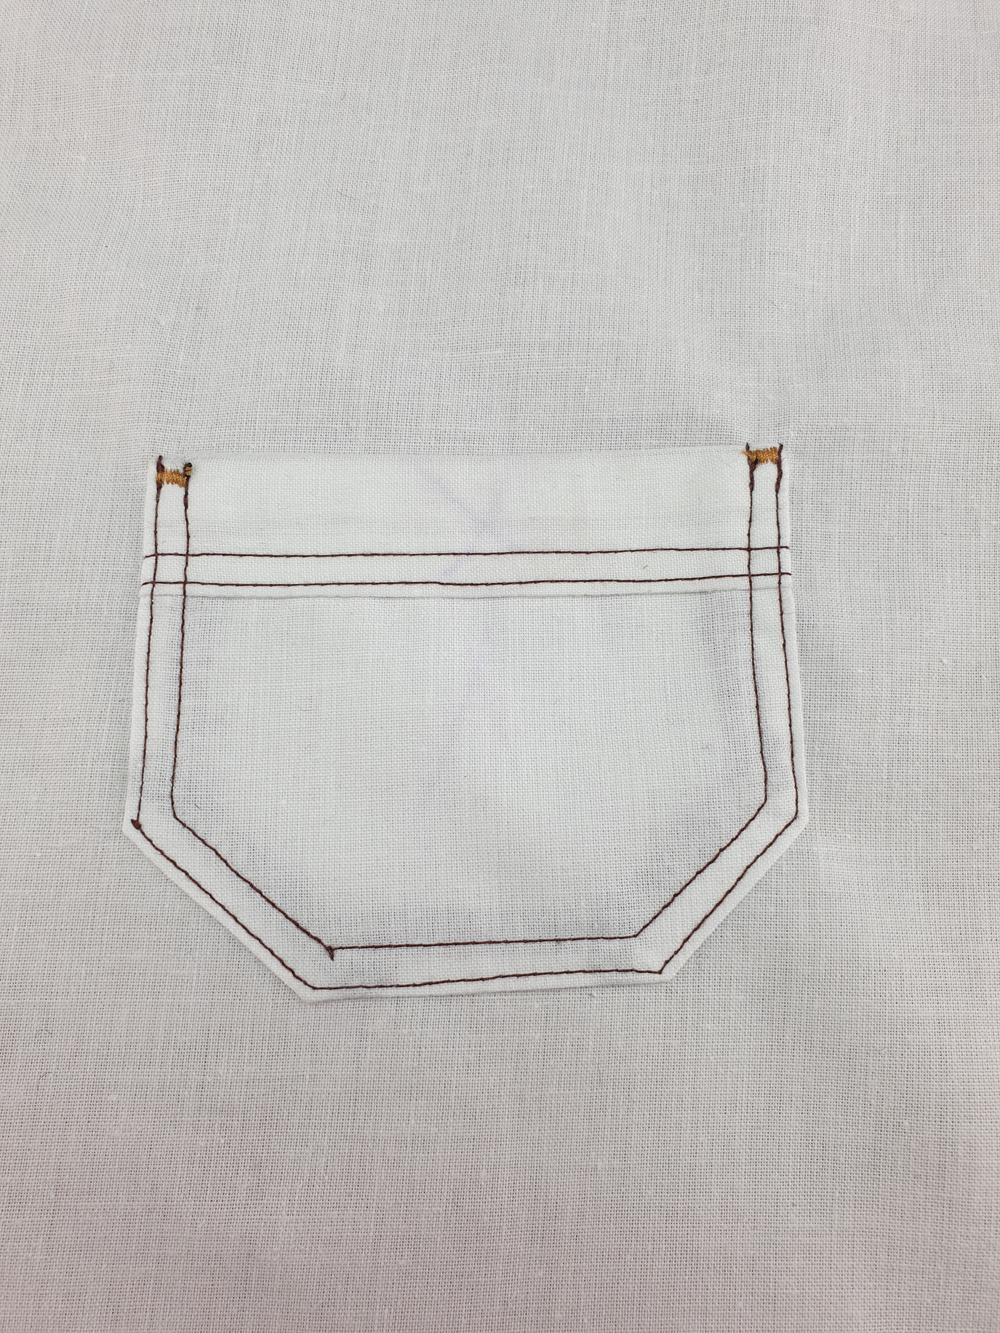
Following the markings, place and pin your pocket on the right or left arm. Sew the pocket in place by topstitching, first at 2 mm then again at 6 mm from the edge. To reinforce the opening, sew a bartack (small, tight zigzag stitch).
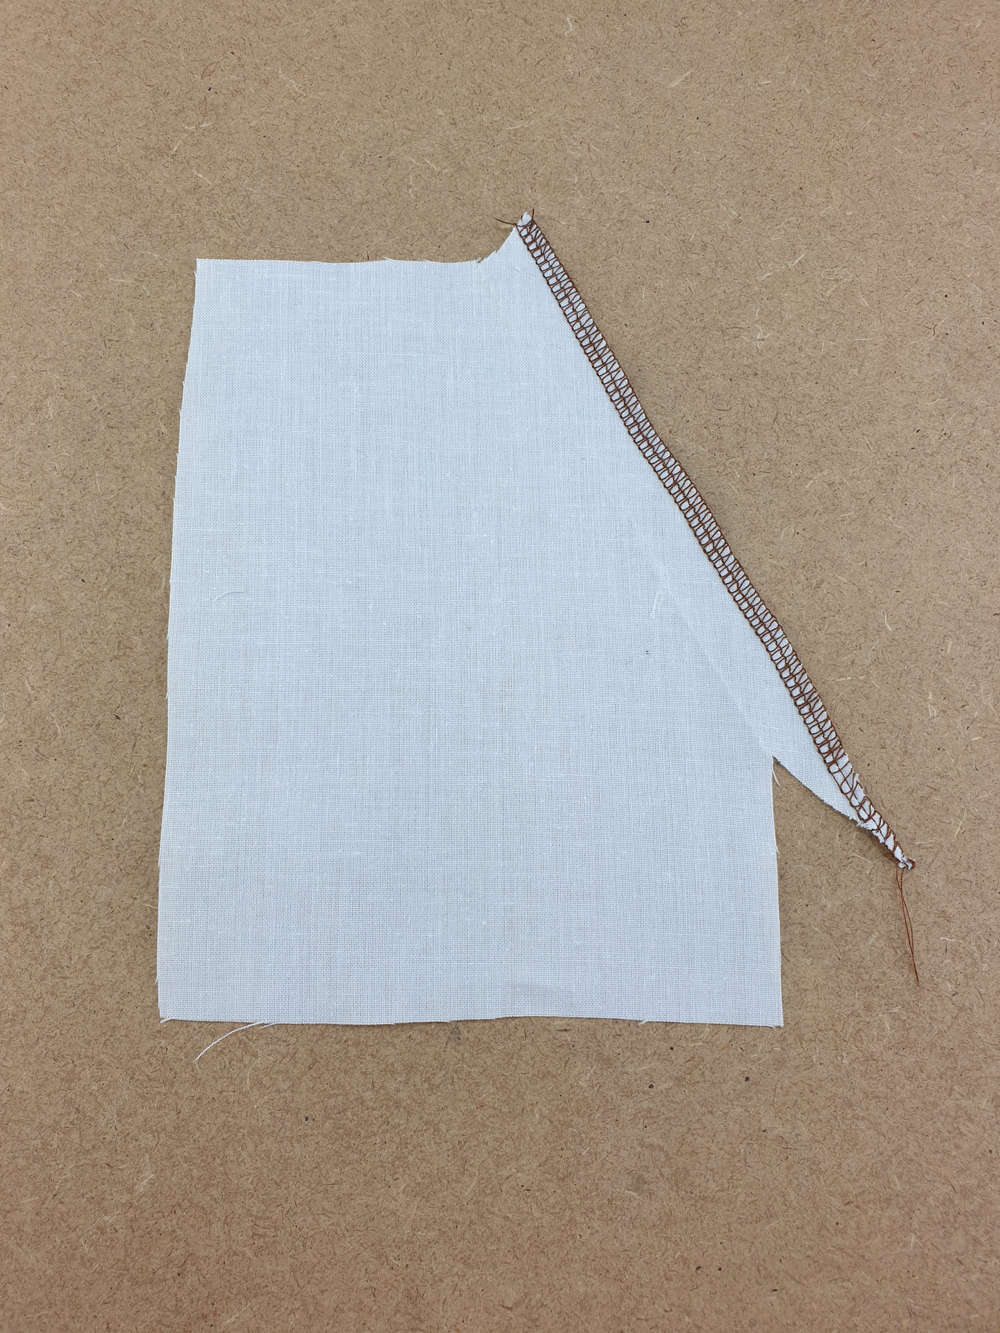
Serge the diagonal top edge of the pocket (D).

Fold the top edge toward the wrong side by 1.5 cm and press. Then serge the top, bottom and small side of the pocket. Repeat for the other piece (D).
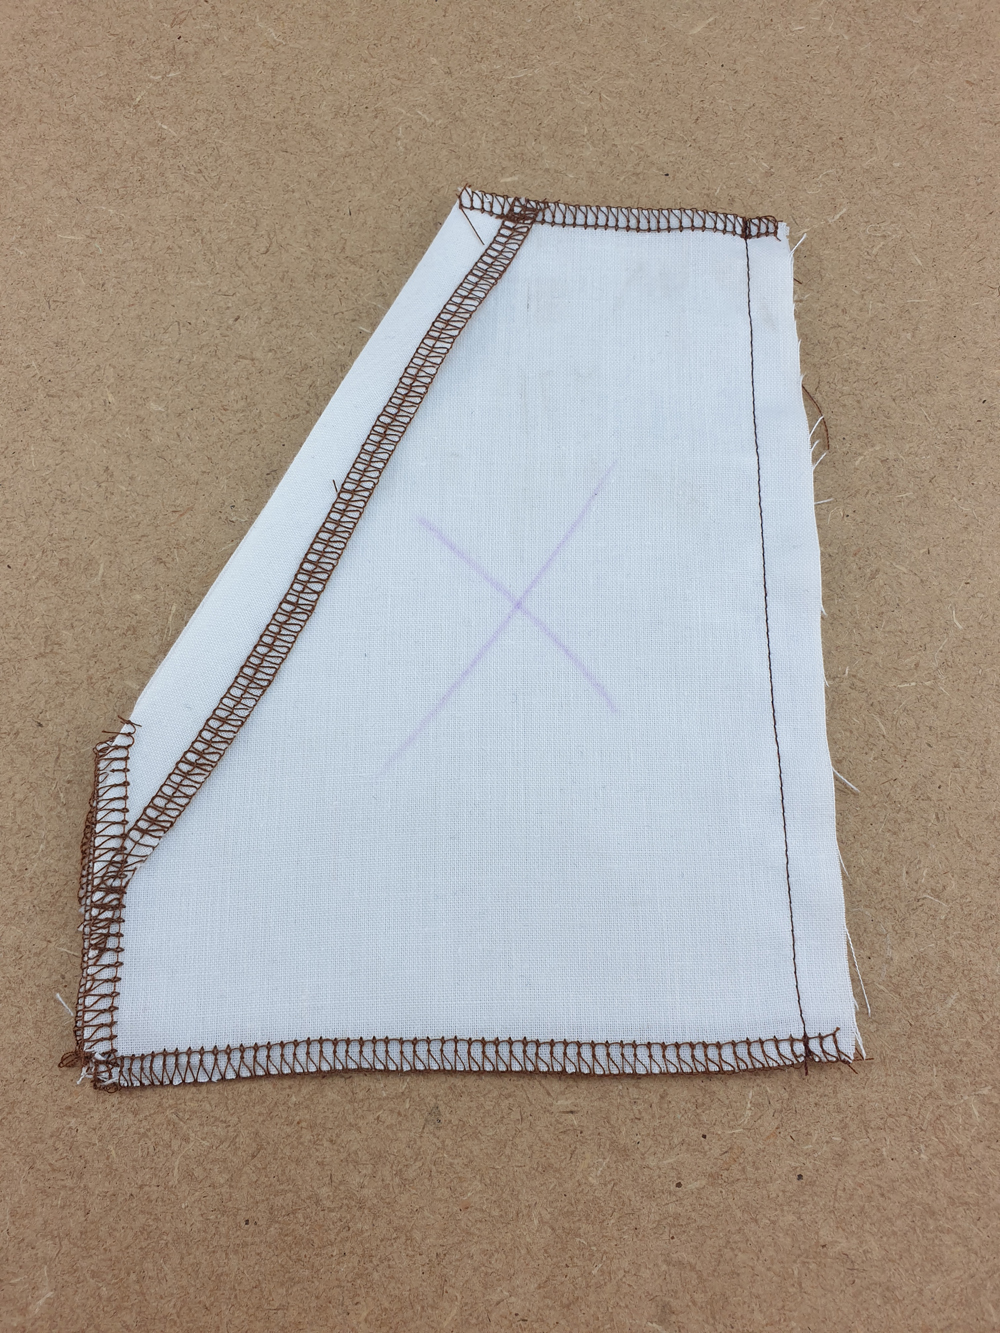
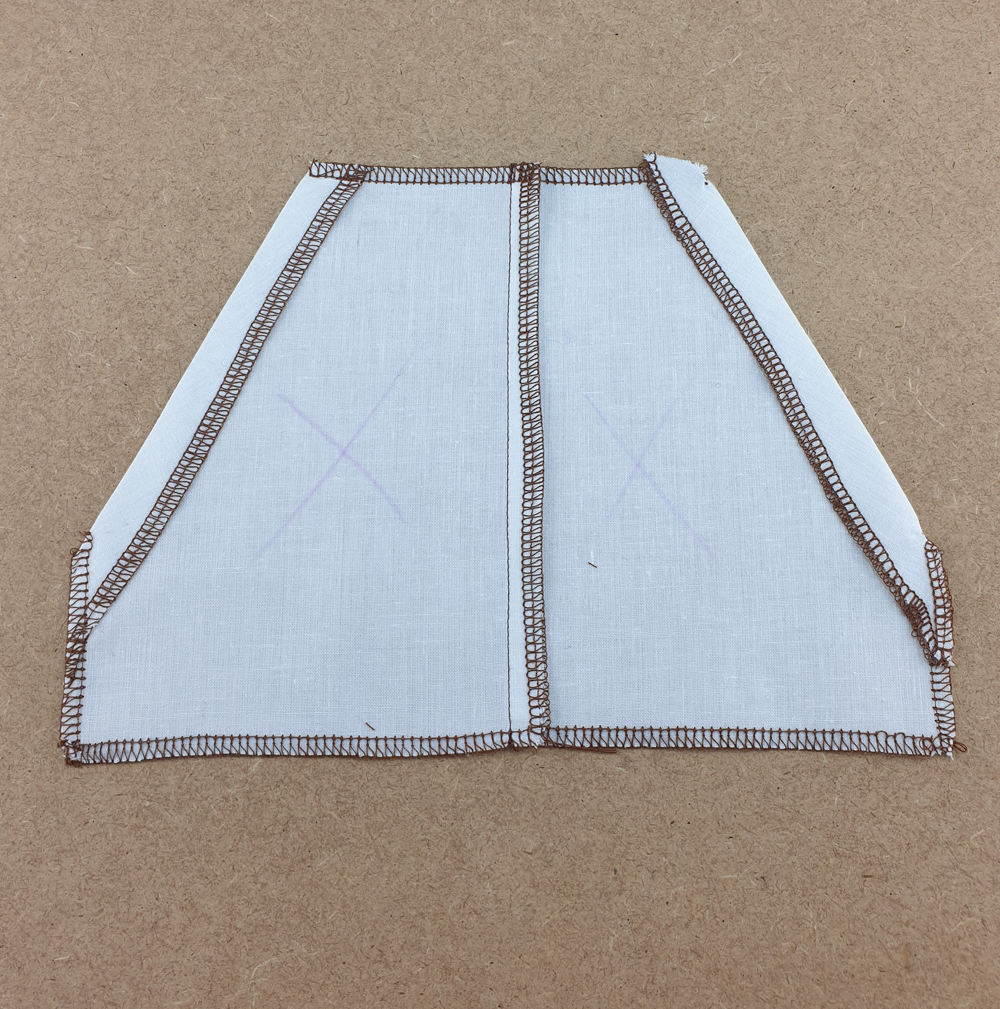
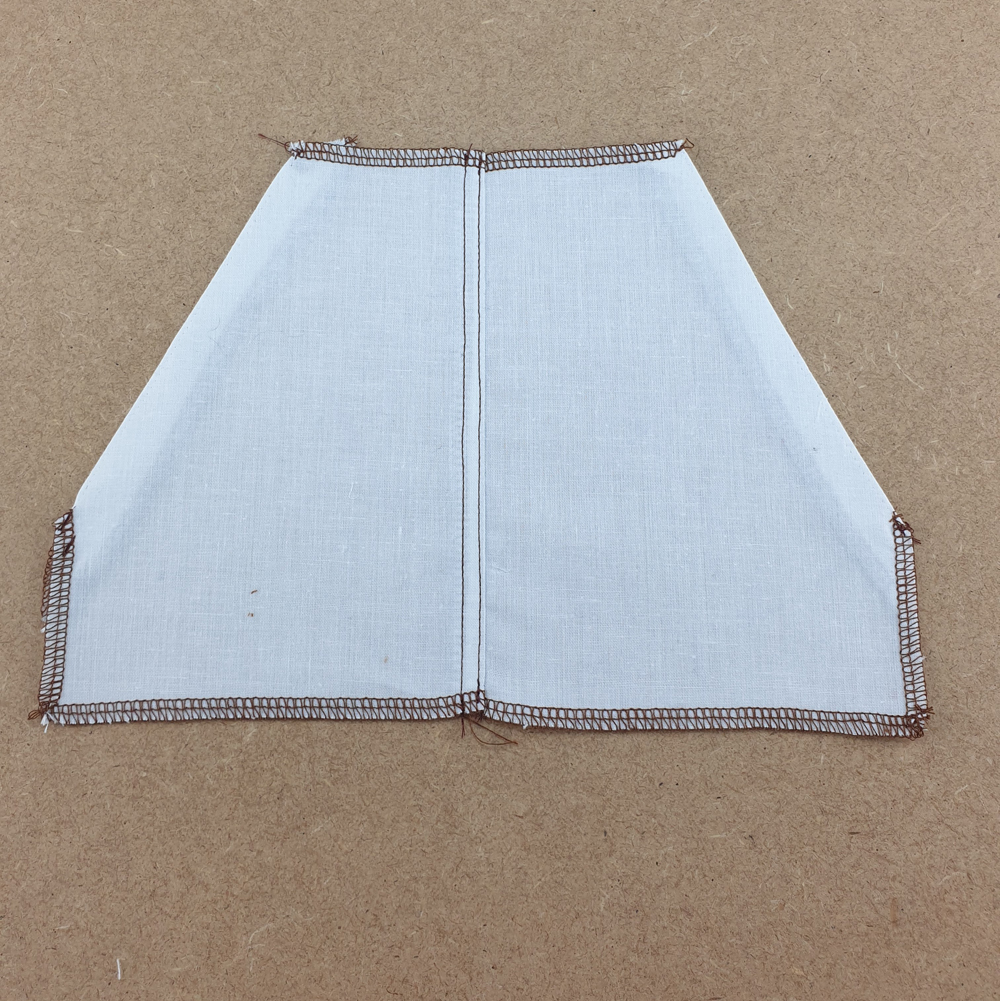
With right sides together, pin and sew pocket pieces (D).
Finish the edge together and press the seam allowance to one side.
With the right side facing up, topstitch the seam allowance first at 2 mm then again at 6 mm from the seam.
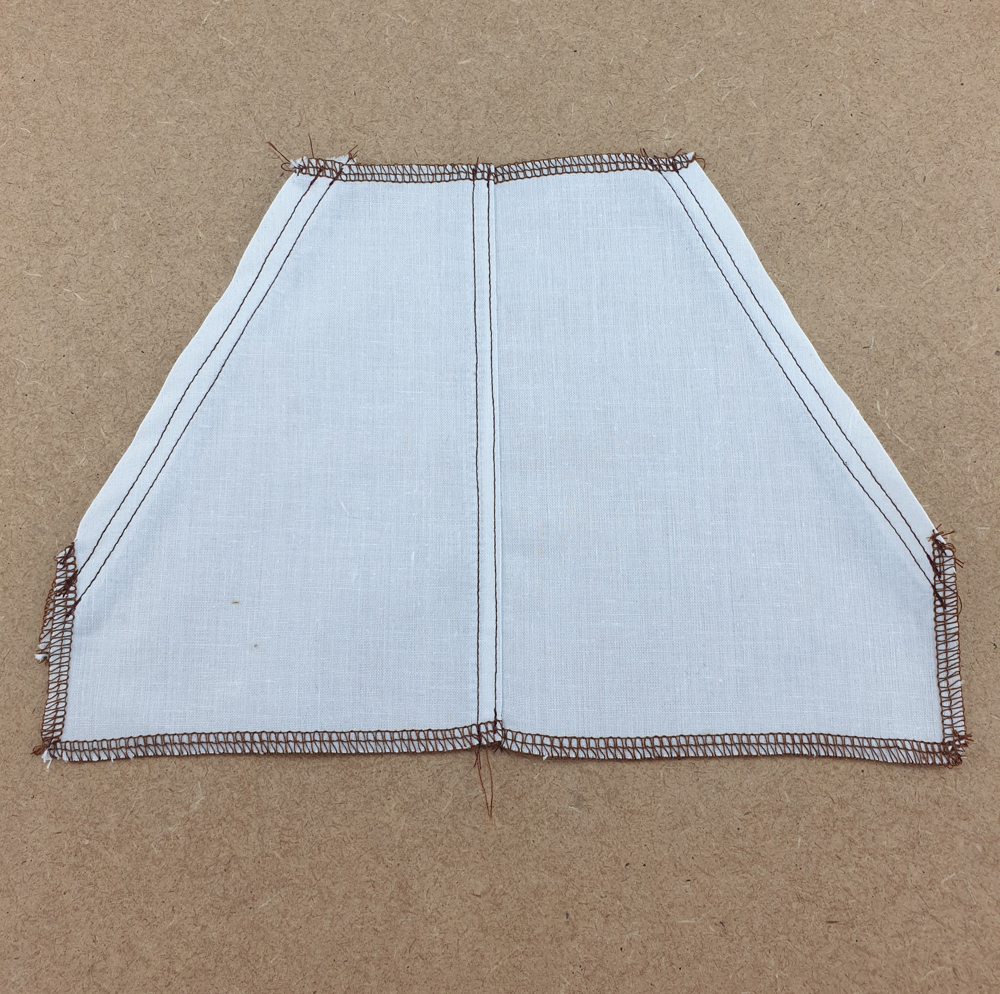
Topstitch the slanted opening of the pocket first at 8 mm then again at 12 mm from the edge.
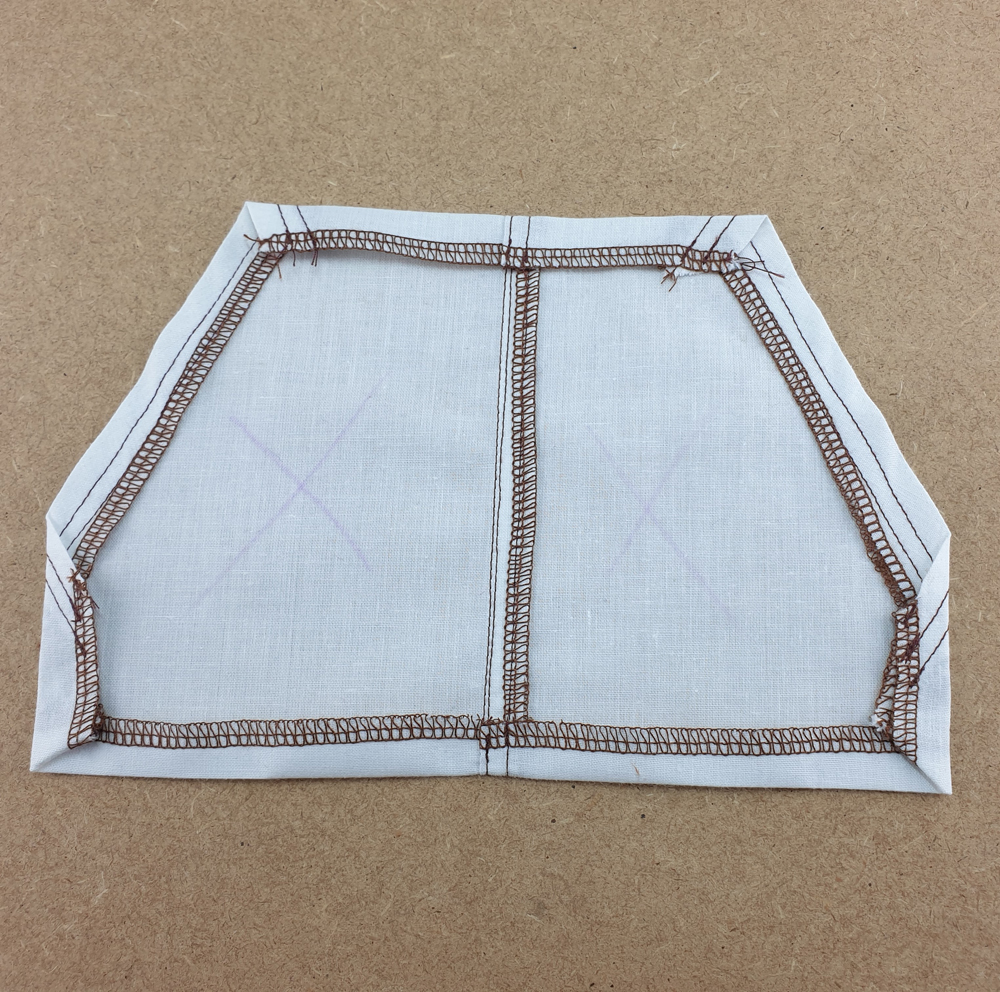
Beginning with the top and bottom of the pocket, turn the edges 1cm to the wrong side and press. Next turn the short sides to the wrong side and press.
If your fabric isn’t too thick you can fold inward the bottom corners of your pocket seam allowance.
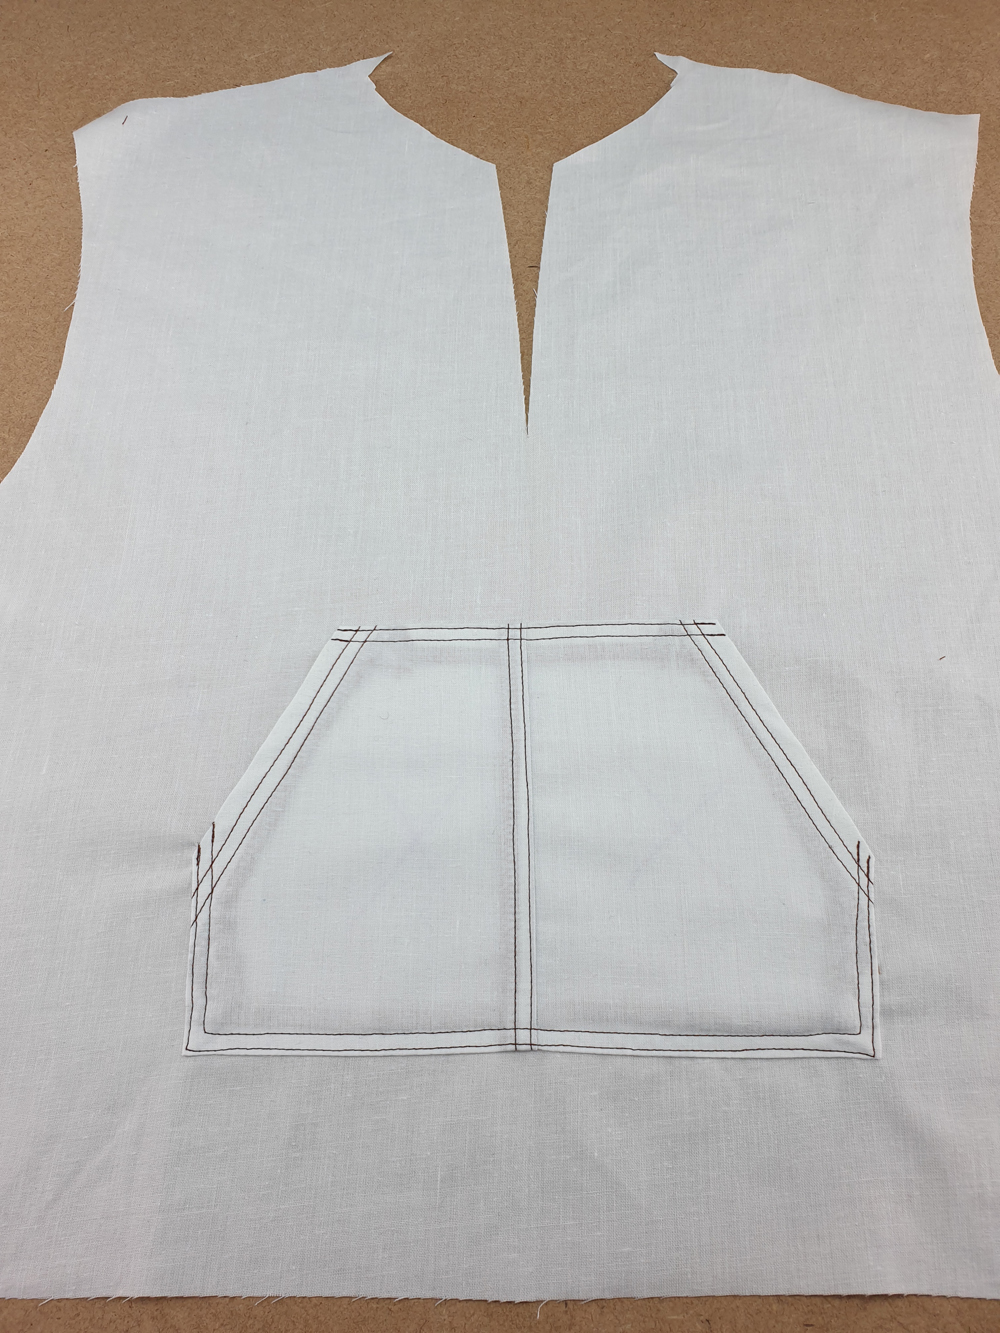
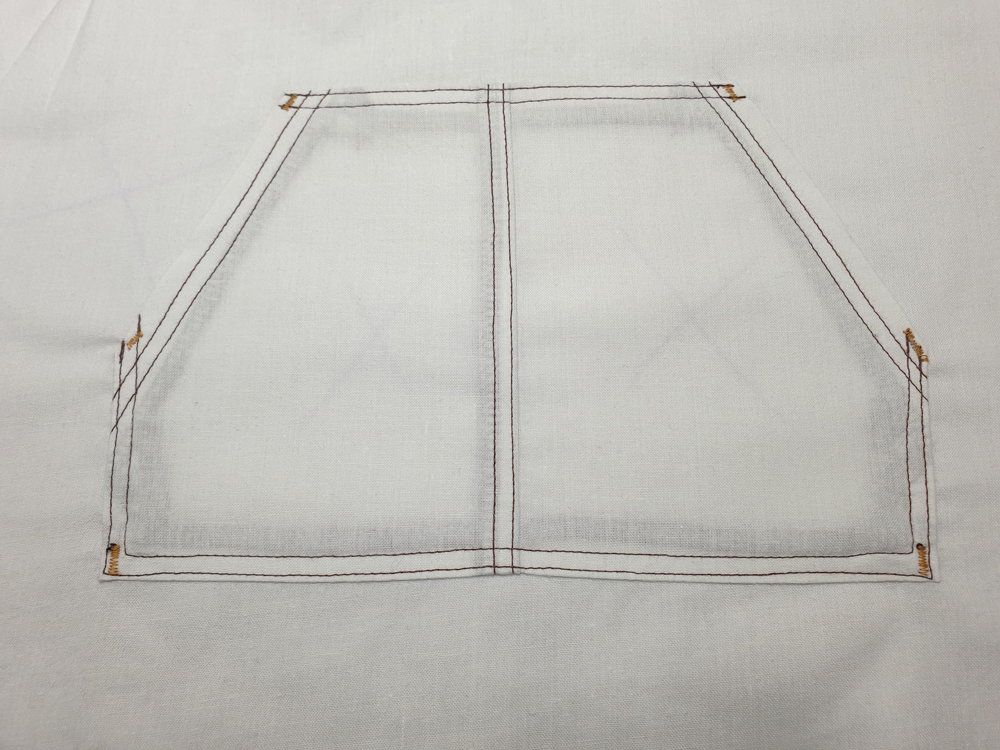
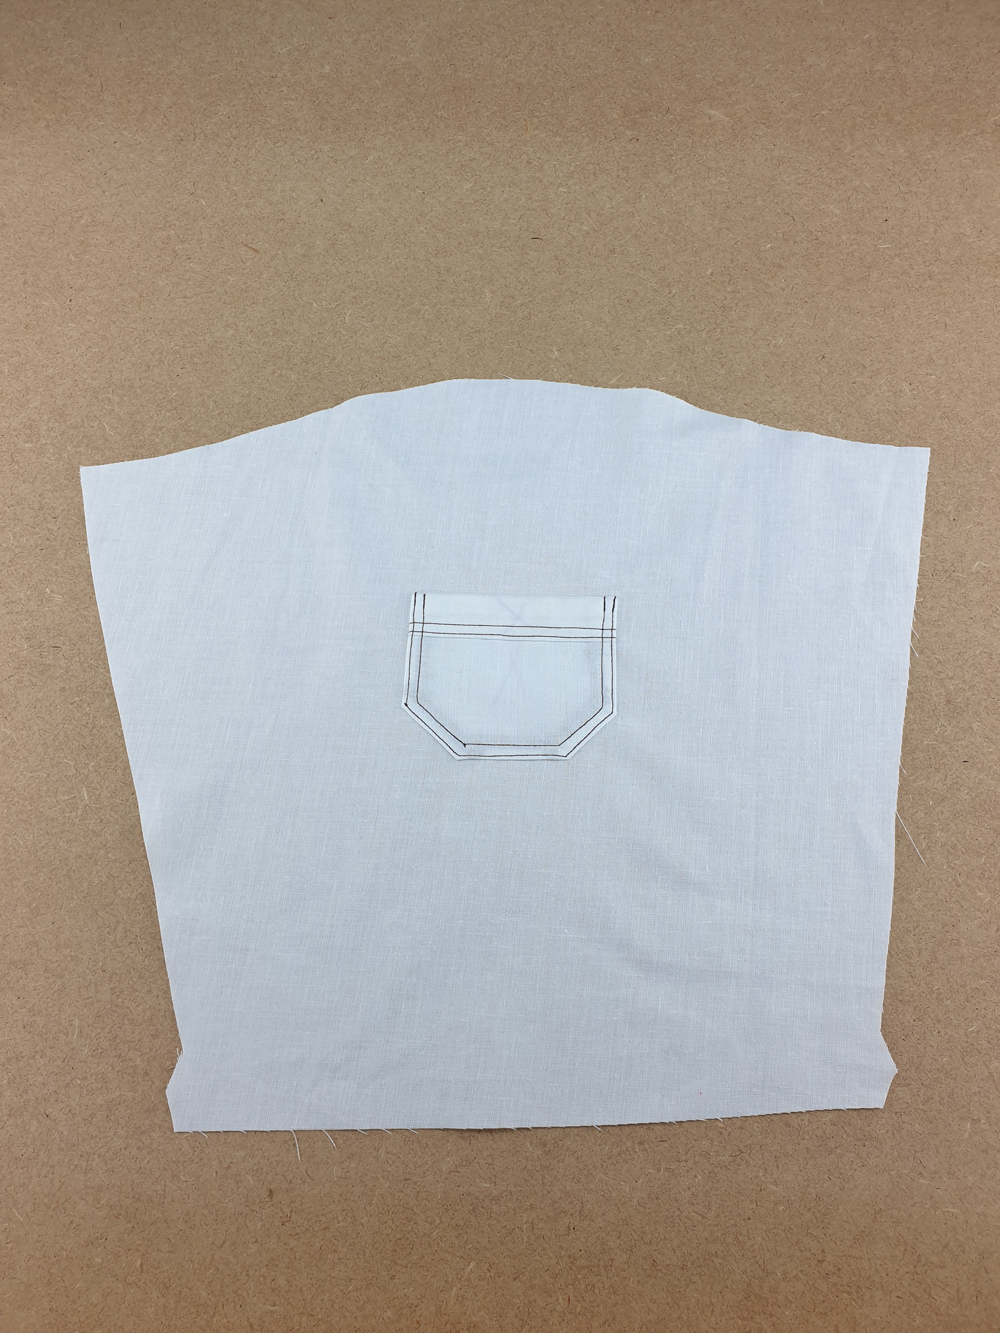
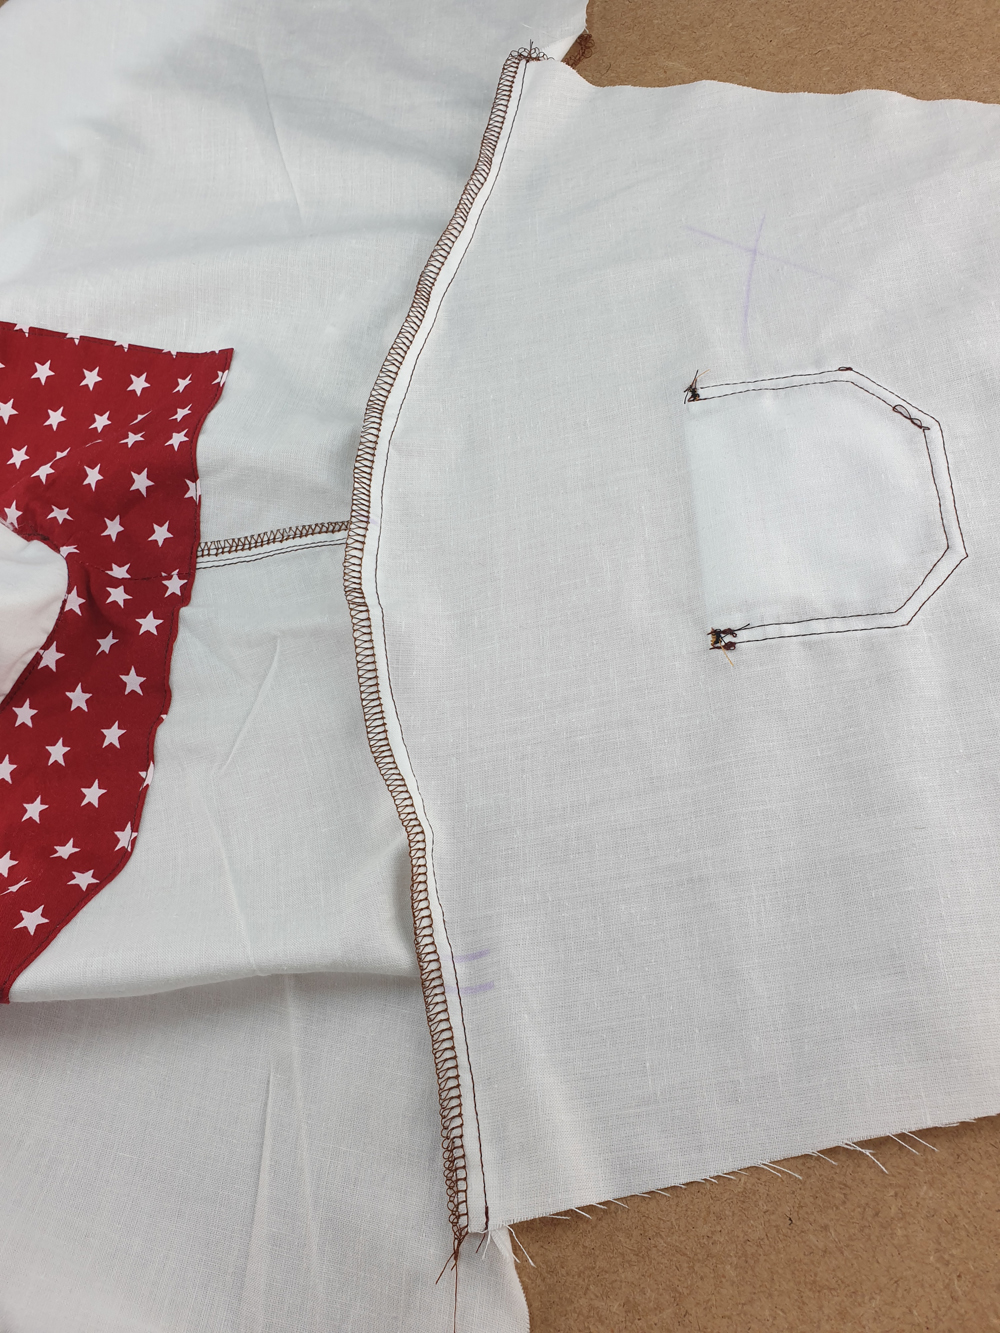
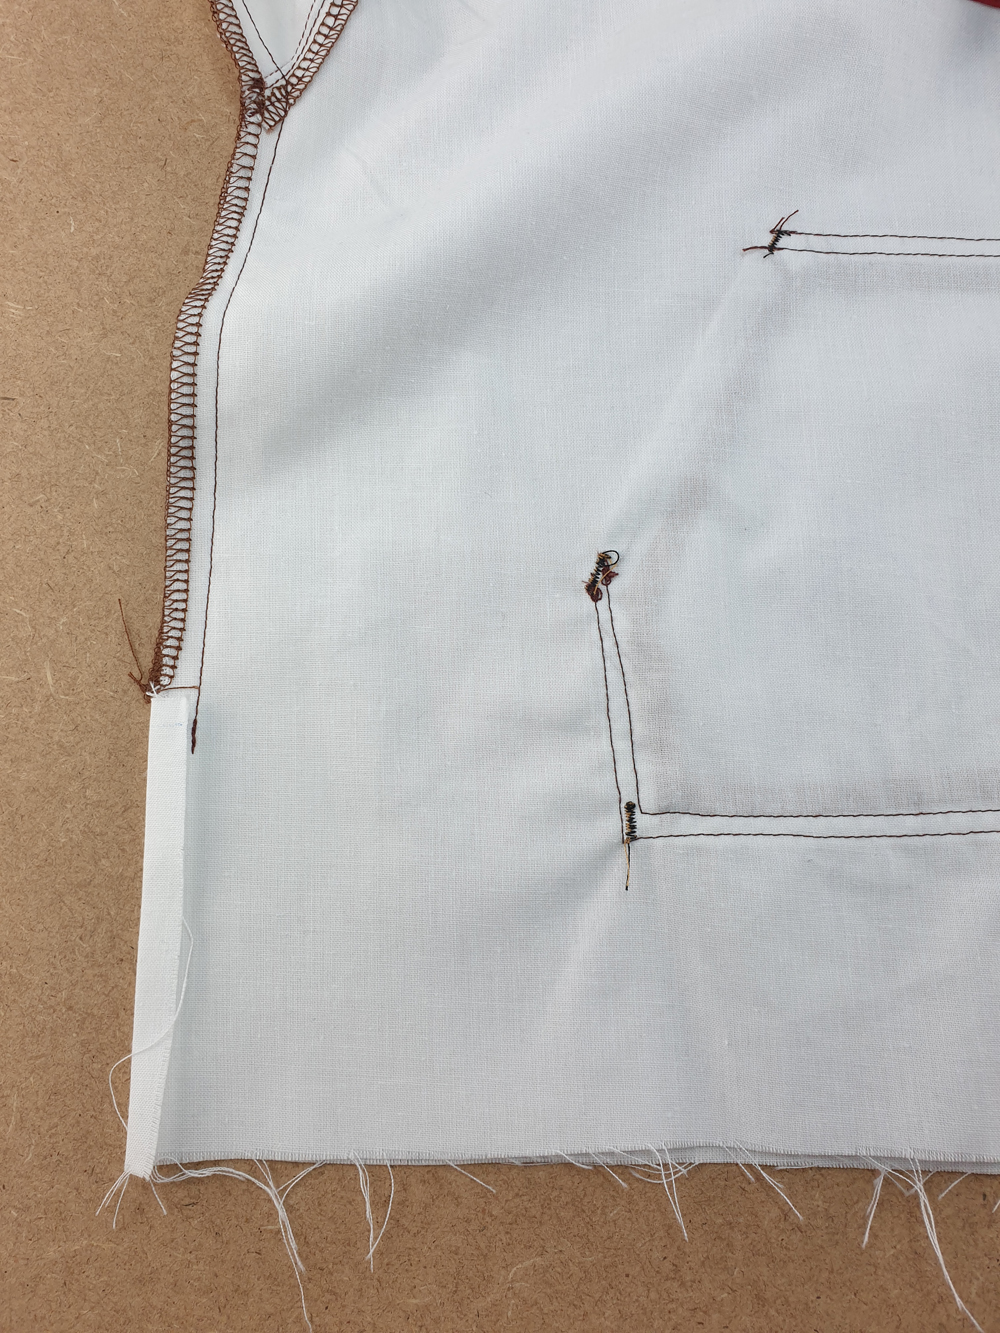
Using the markings pin the pocket to the front bodice piece (A). Topstitch the pocket in place, first at 2 mm then again at 6 mm from the edge. To reinforce the pocket, sew a bartack at each of the corners.
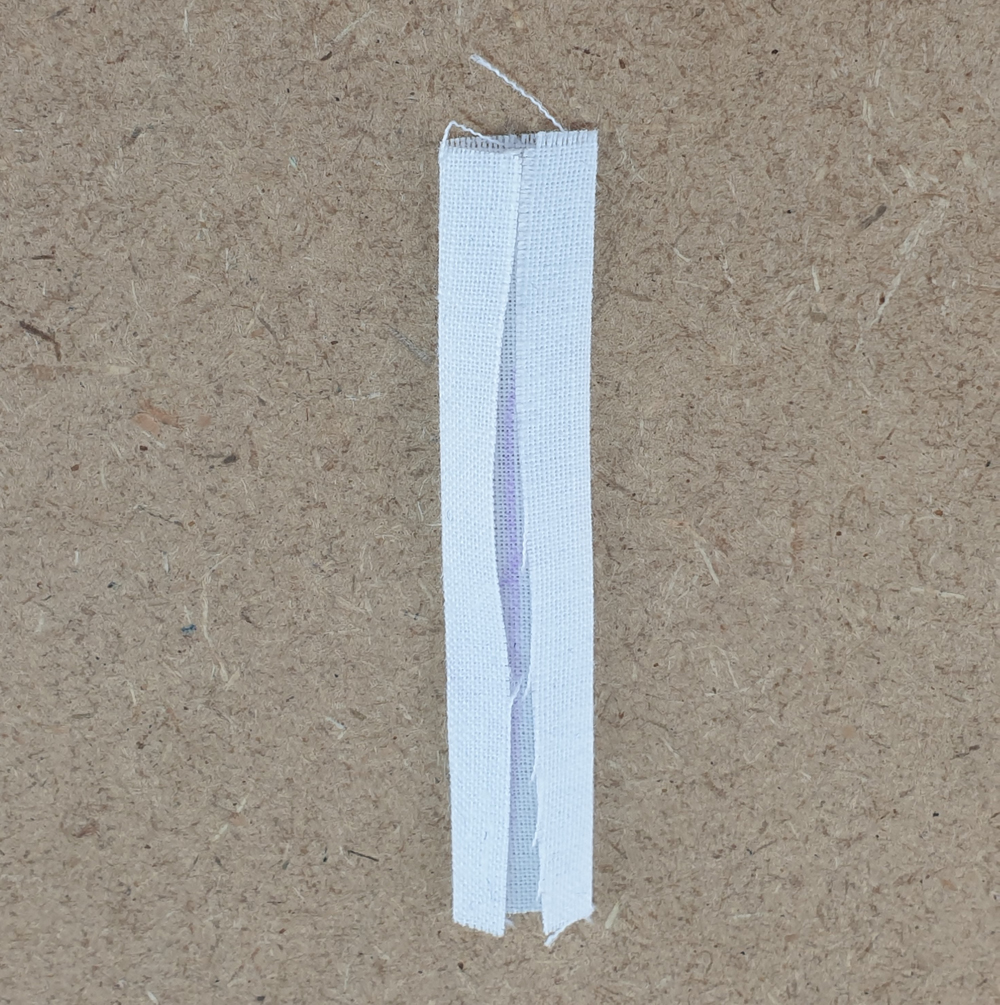
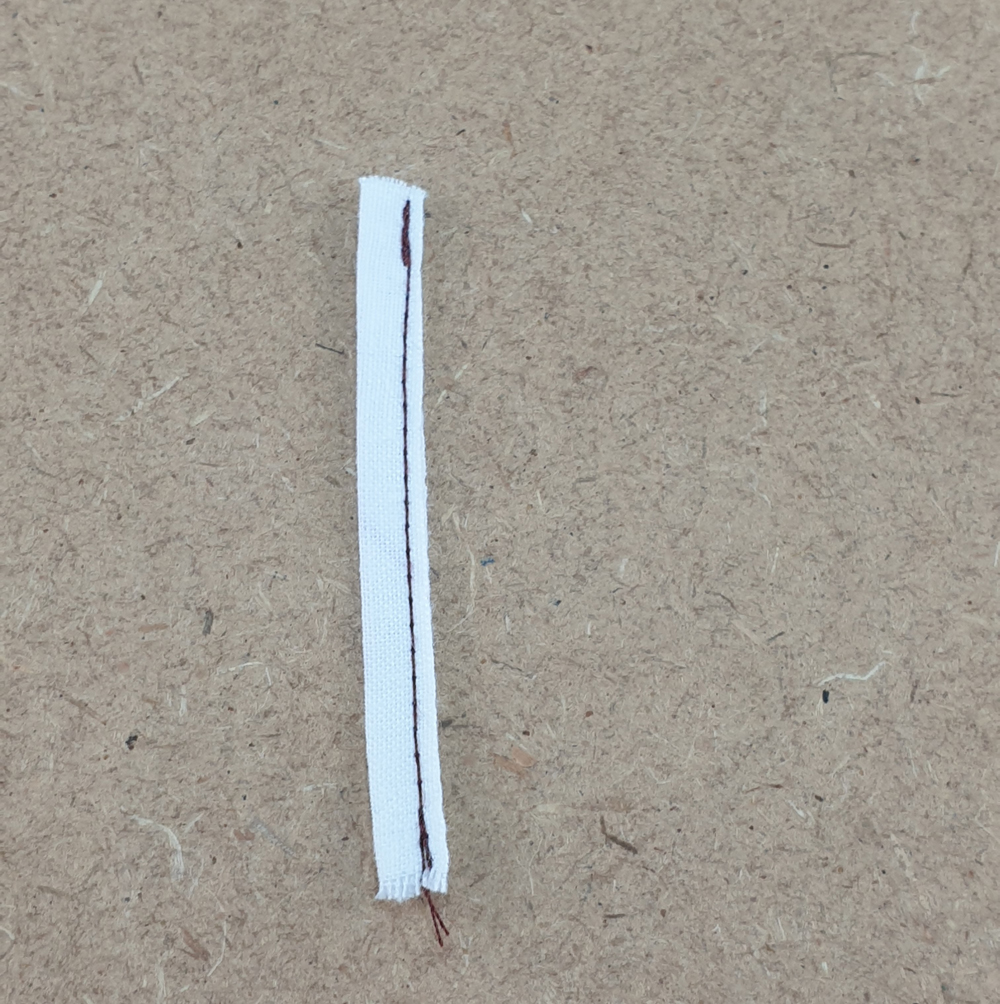
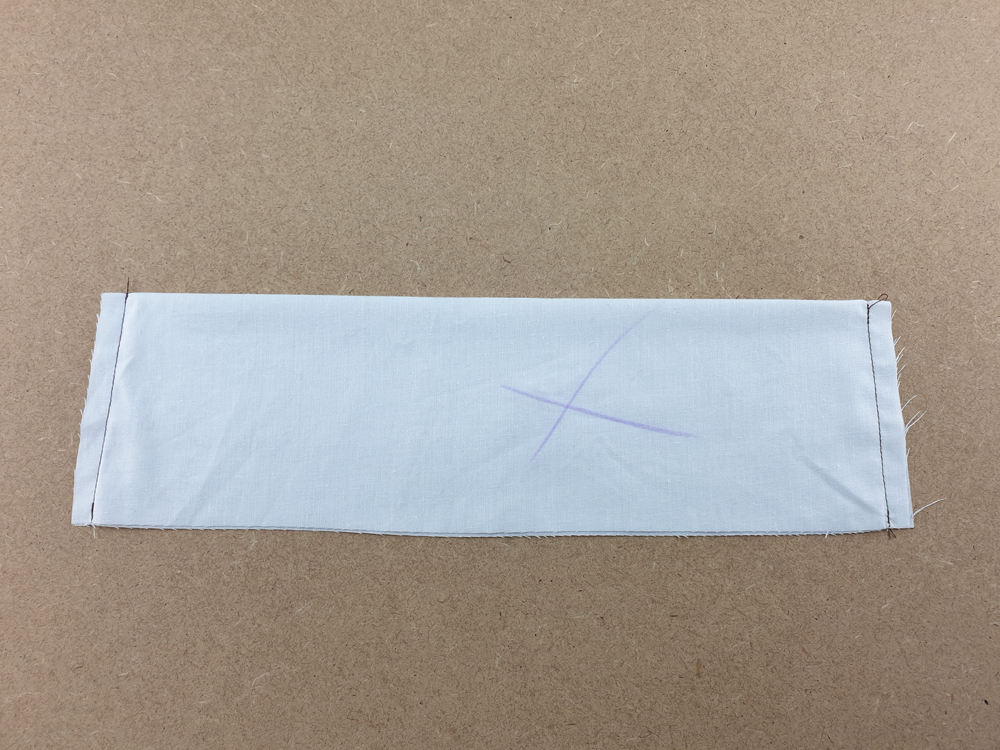
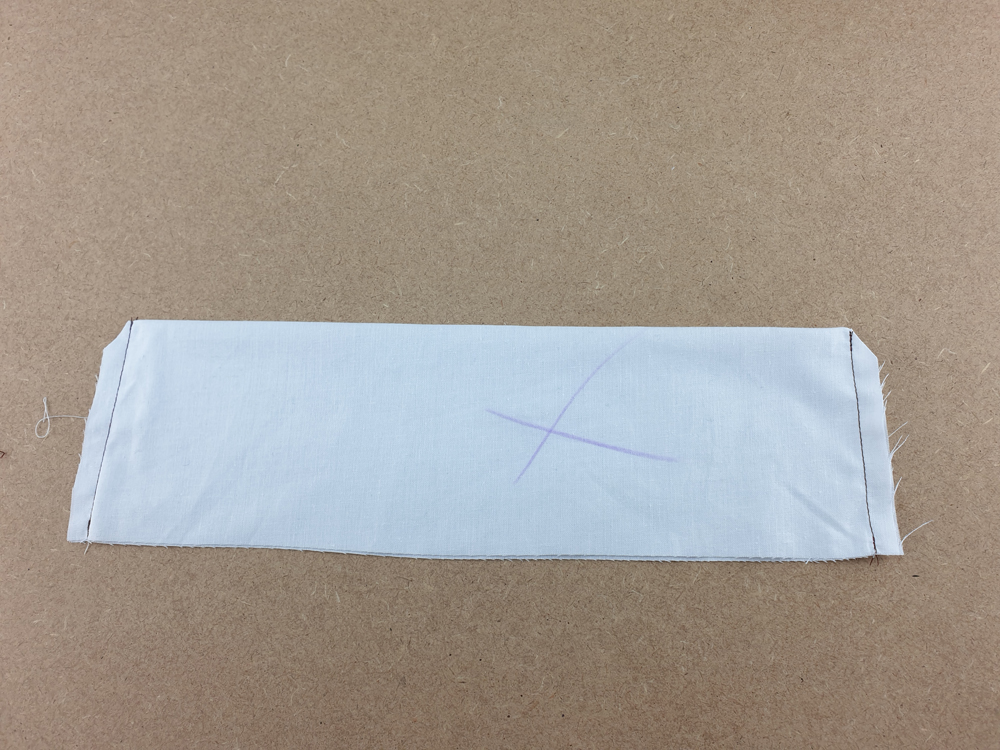
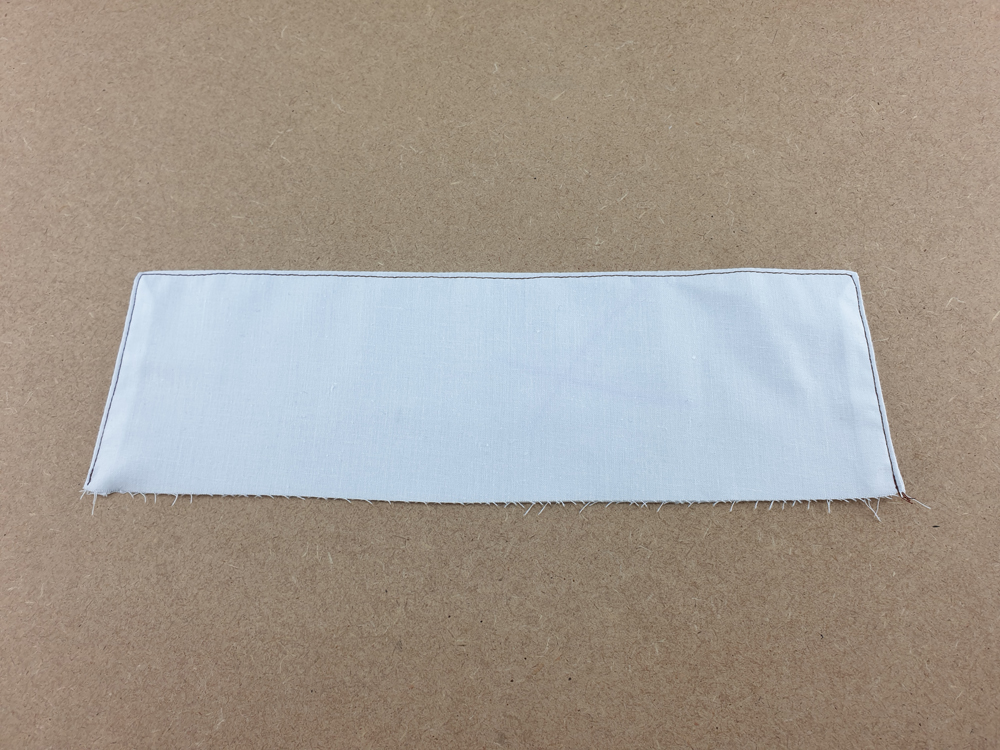
Button loop (J) : Use a rectangle of 4 x 8 cm. Fold the long sides of the rectangle in half with the wrong sides together and press. Next, fold each long edge to meet in the middle crease and press again. Topstitch both of the long edges 2 mm from the edge. 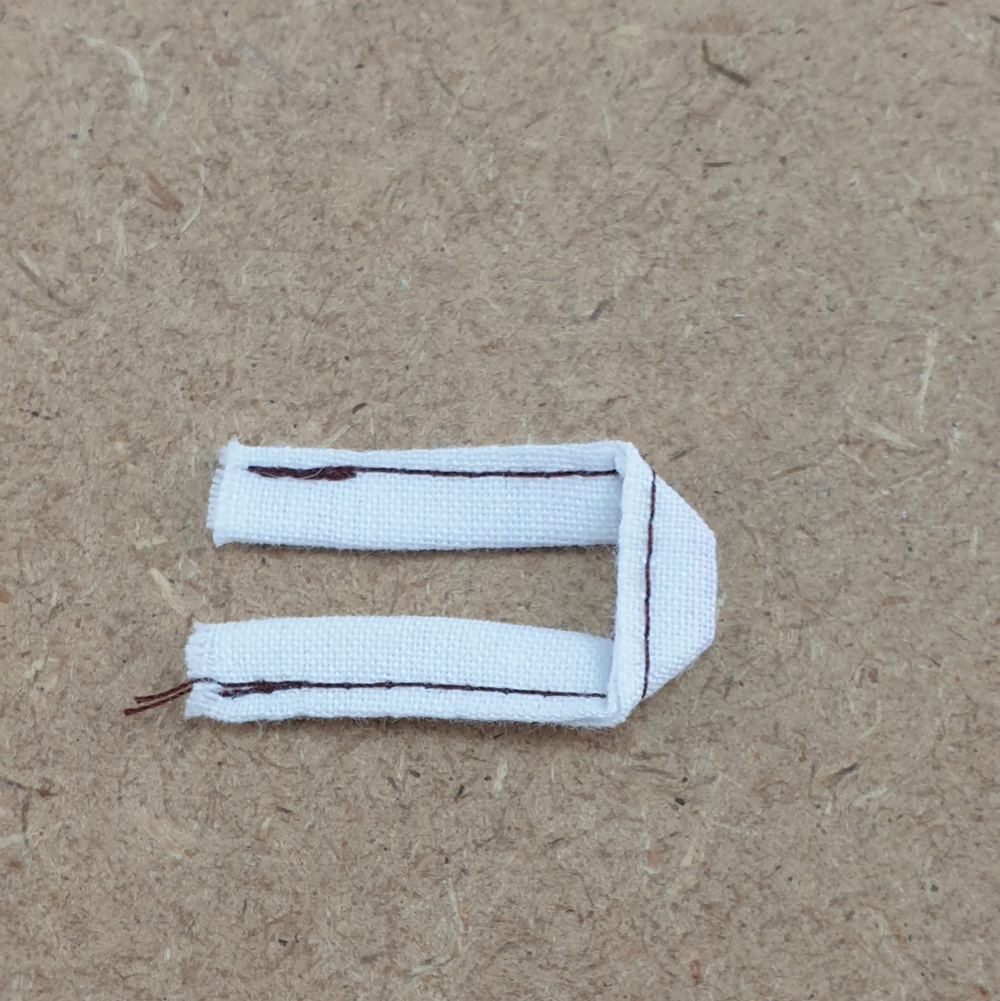
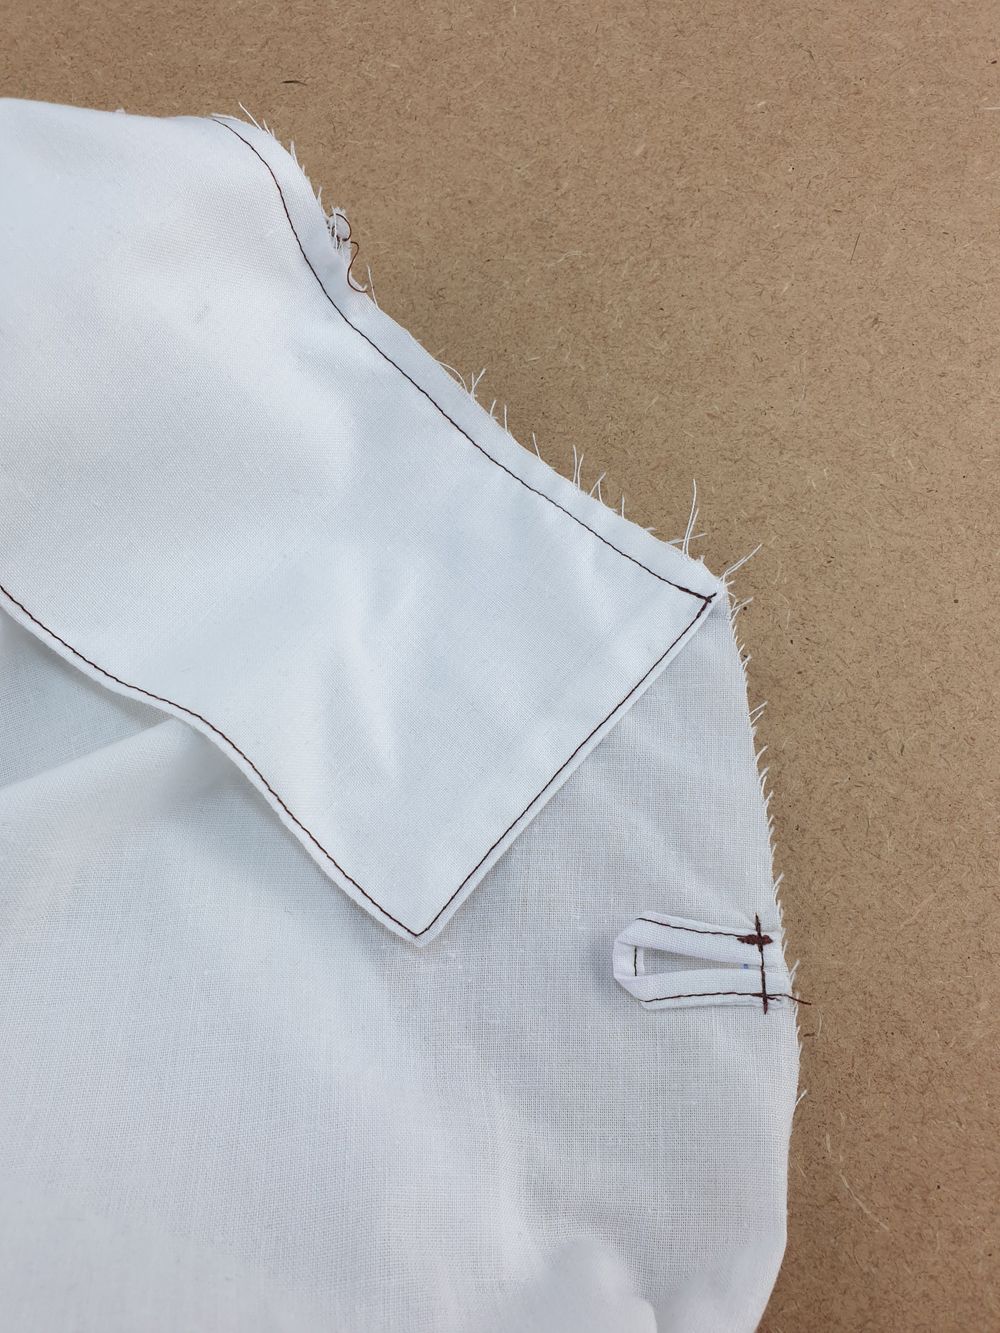
Fold the button loop so it resembles the photo above.
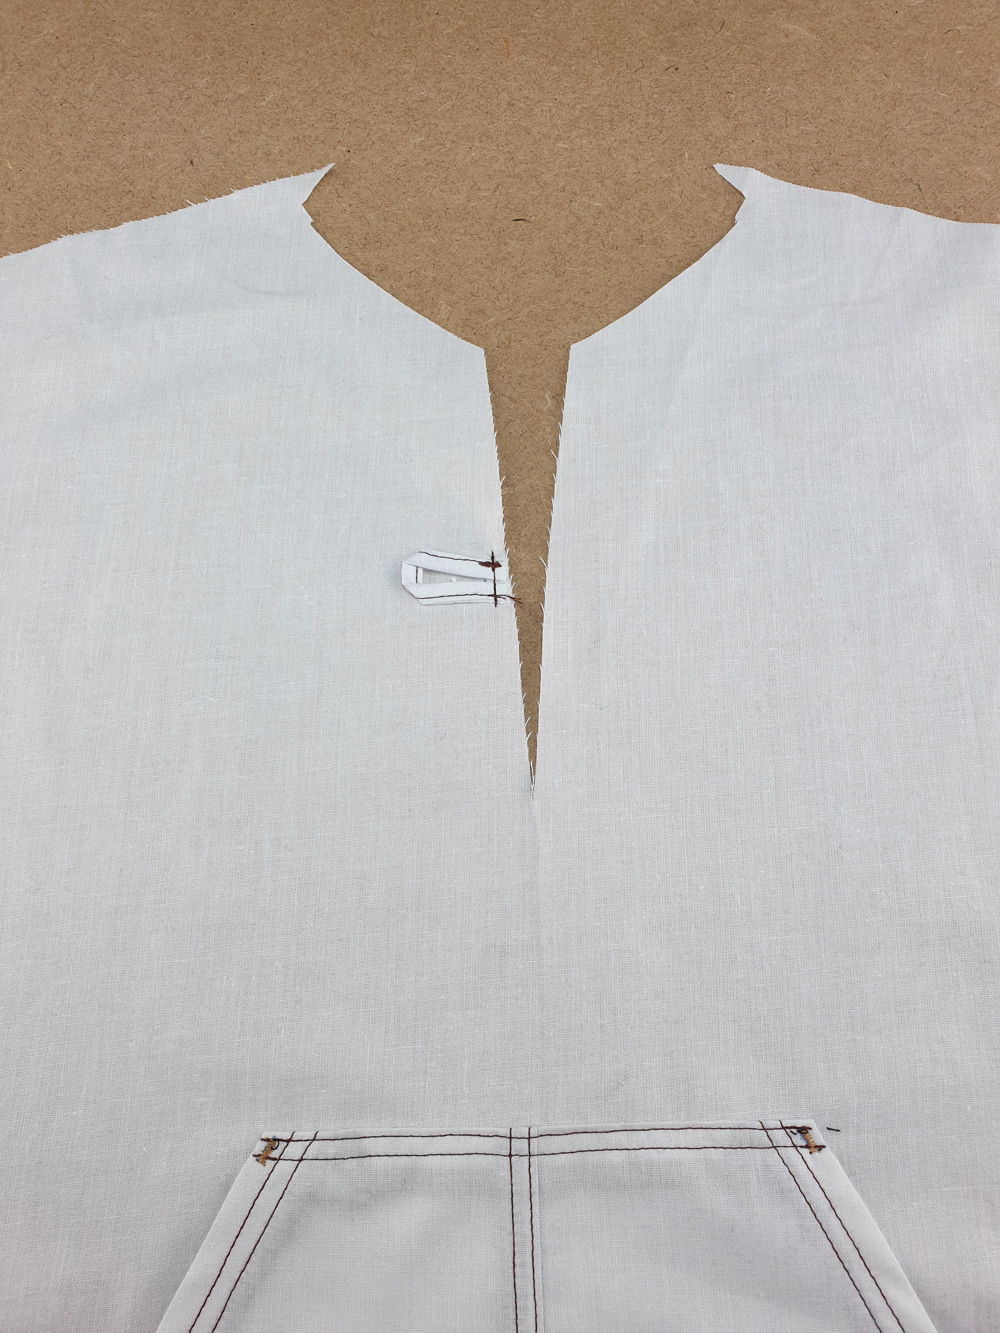
Place the button loop at the top of the marking, with the wrong side of the loop against the right side of the bodice. In general, the button loop should be installed on the right side (as worn) for girls, and on the left side for boys. Sew the button loop in place with a long basting stitch.
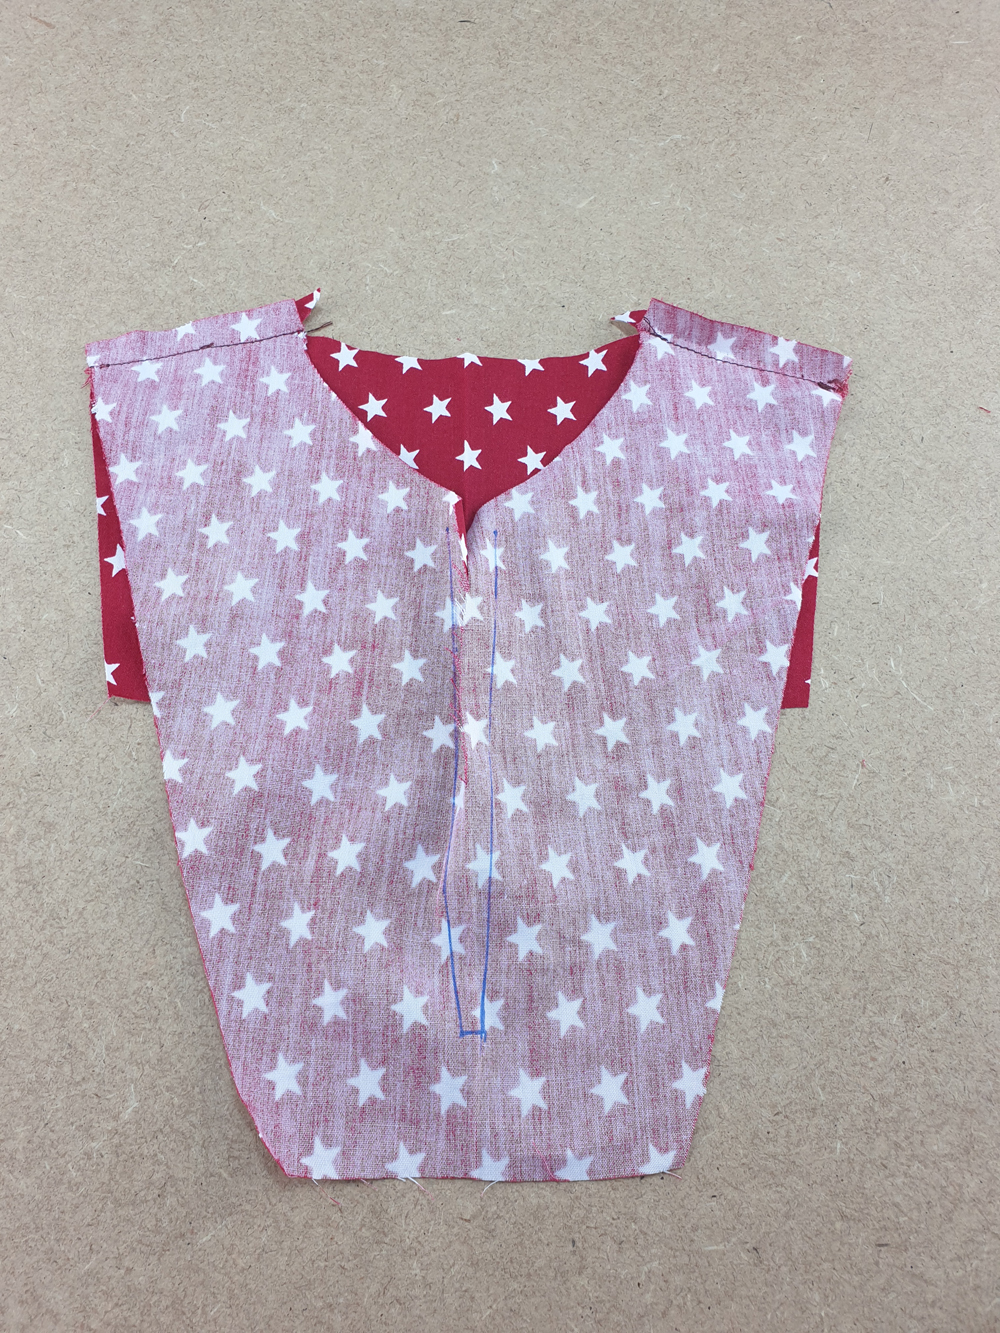
Pin and sew the front and back facings at the shoulders. Press the seam allowance open.
Fold the bottom edge of the facing 1 cm to the wrong side and press.
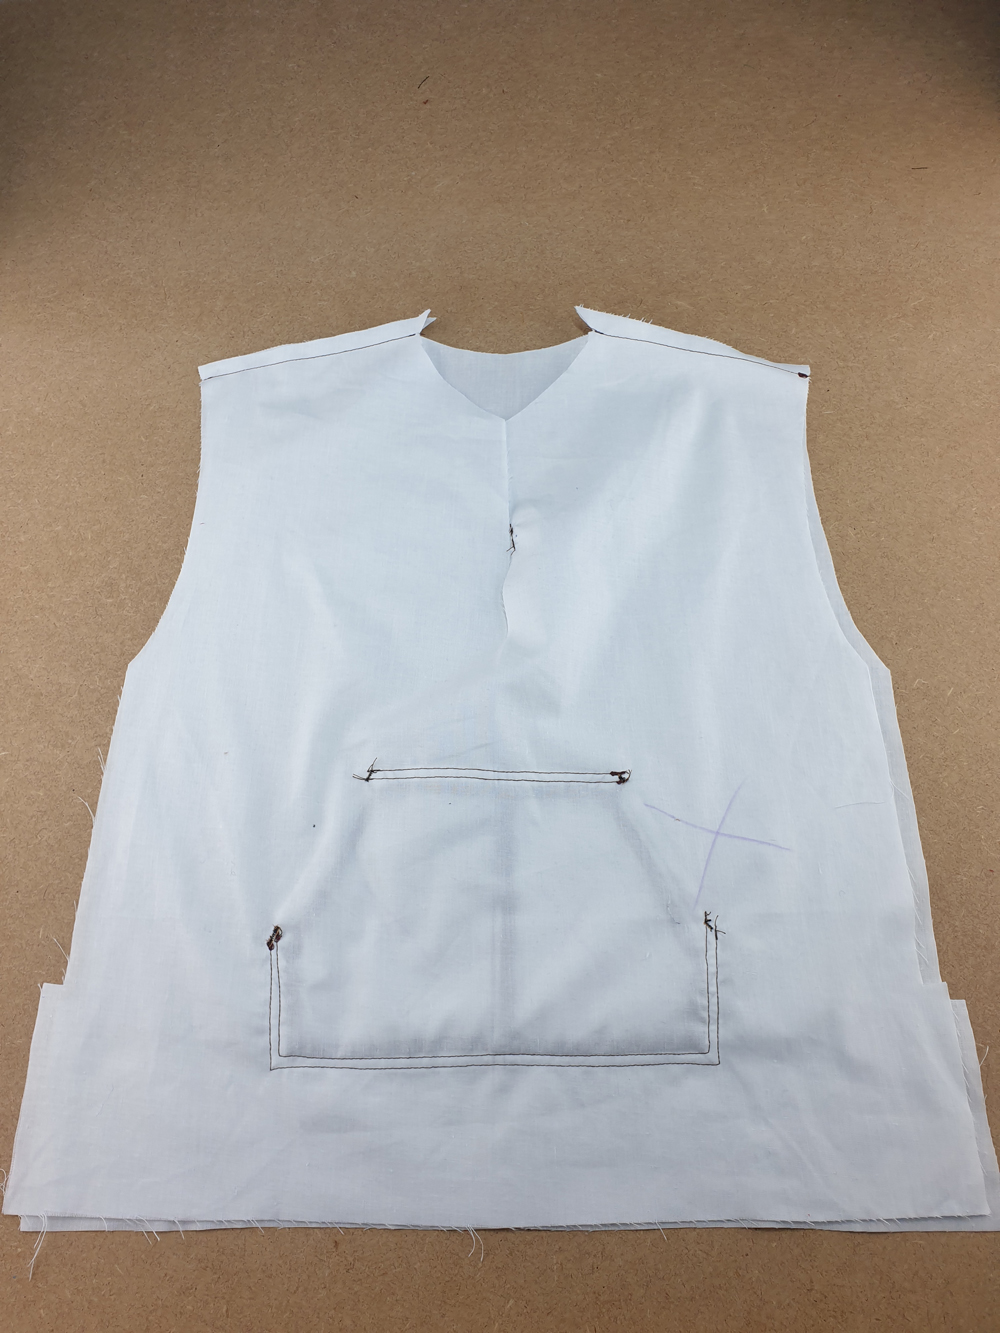
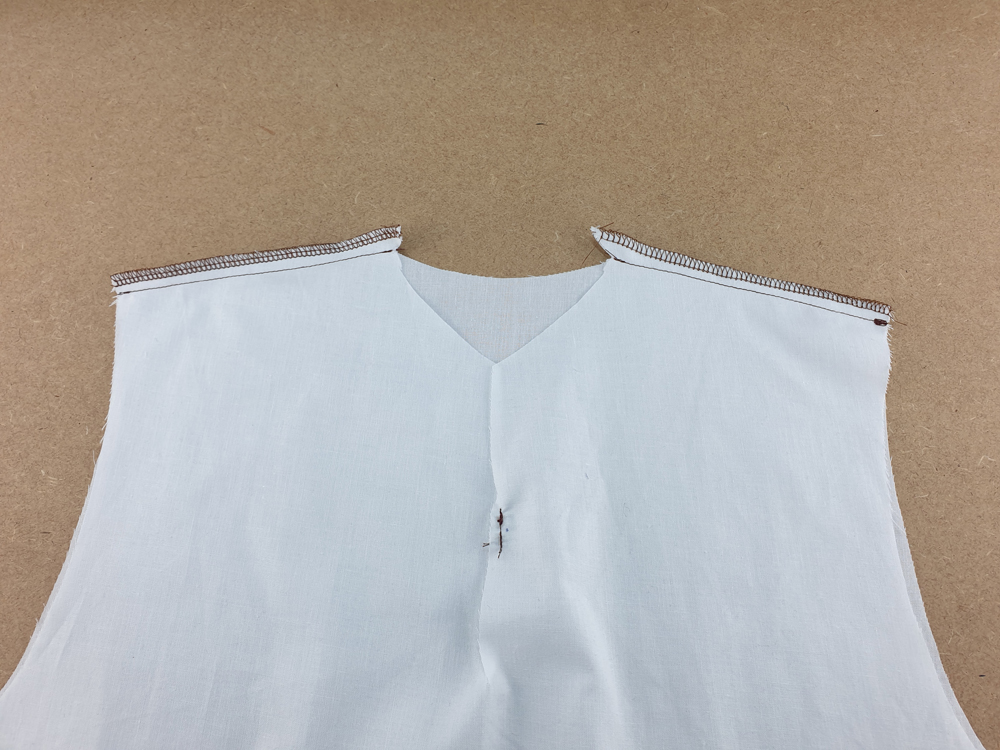
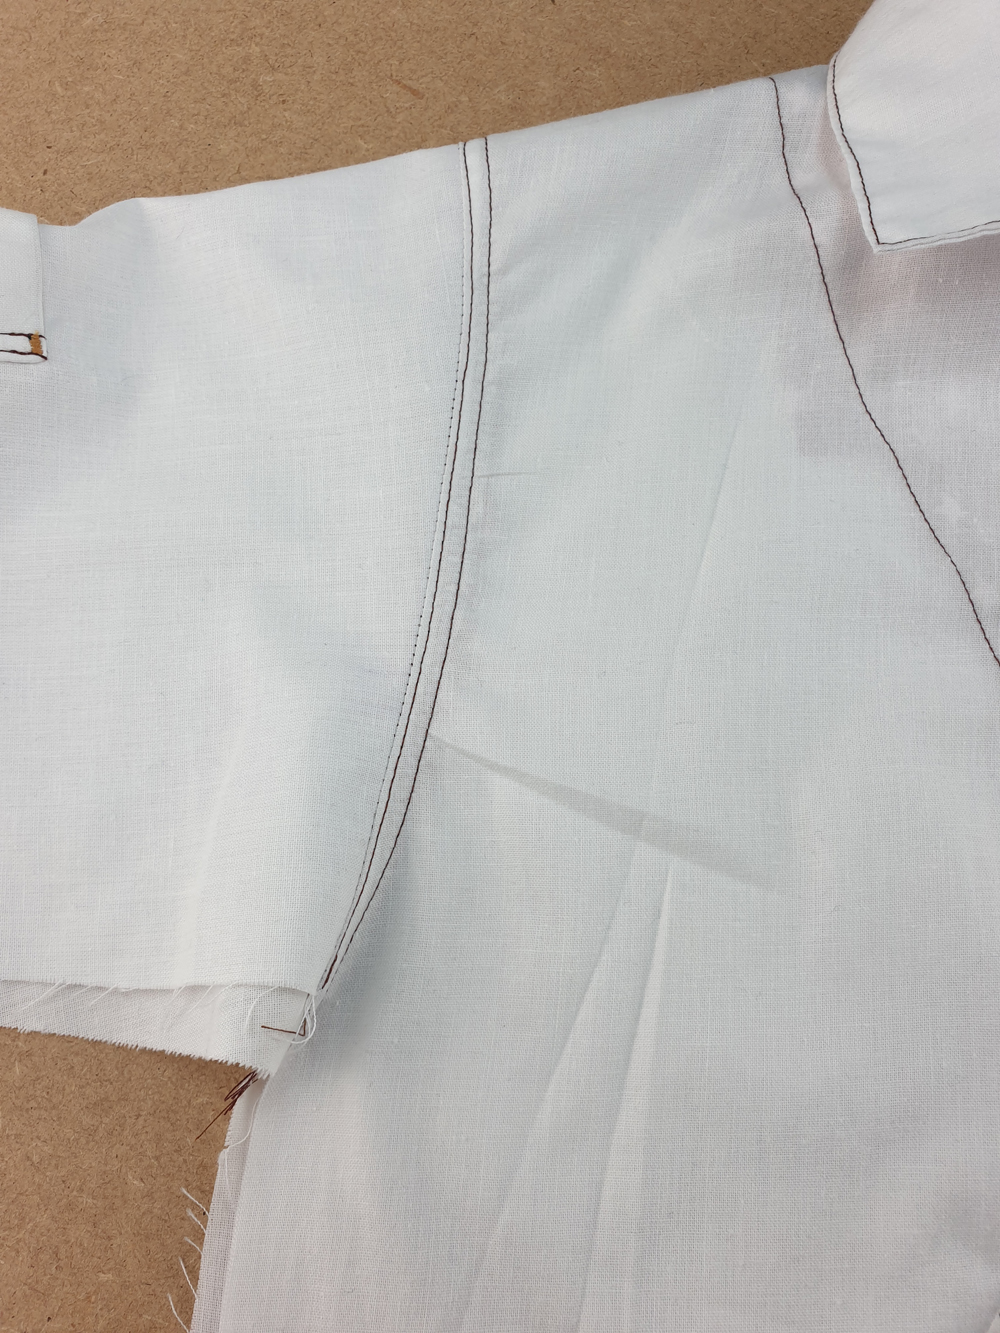
With right sides together, pin the front and back bodice pieces together at the shoulder. Sew then finish the seam allowances together. Press the seam allowances toward the back and topstitch them in place, first at 2 mm from the seam, then again at 6 mm from the seam.
Fold the collar (G) in half with the right sides together. Sew the short ends and clip the corners. Turn the collar right-side out and press. Topstitch the three sides of the collar at 2 mm from the edge (don’t topstitch the raw edges).
Wrong side of the collar to right side of the bodice, pin the raw edge of the collar to the neckline starting 4mm from the slit opening and baste in place.
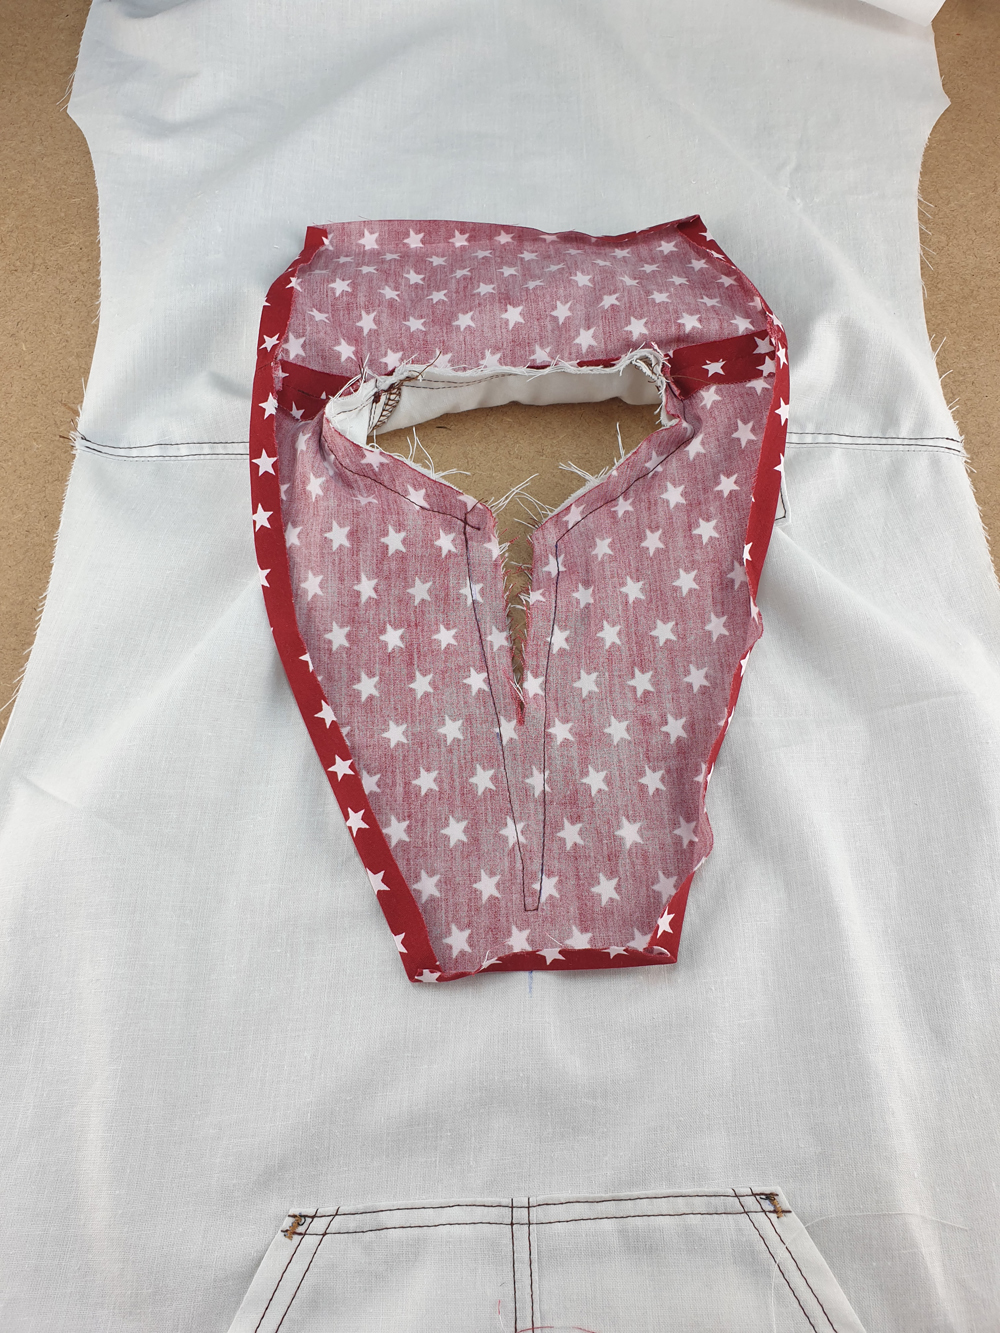
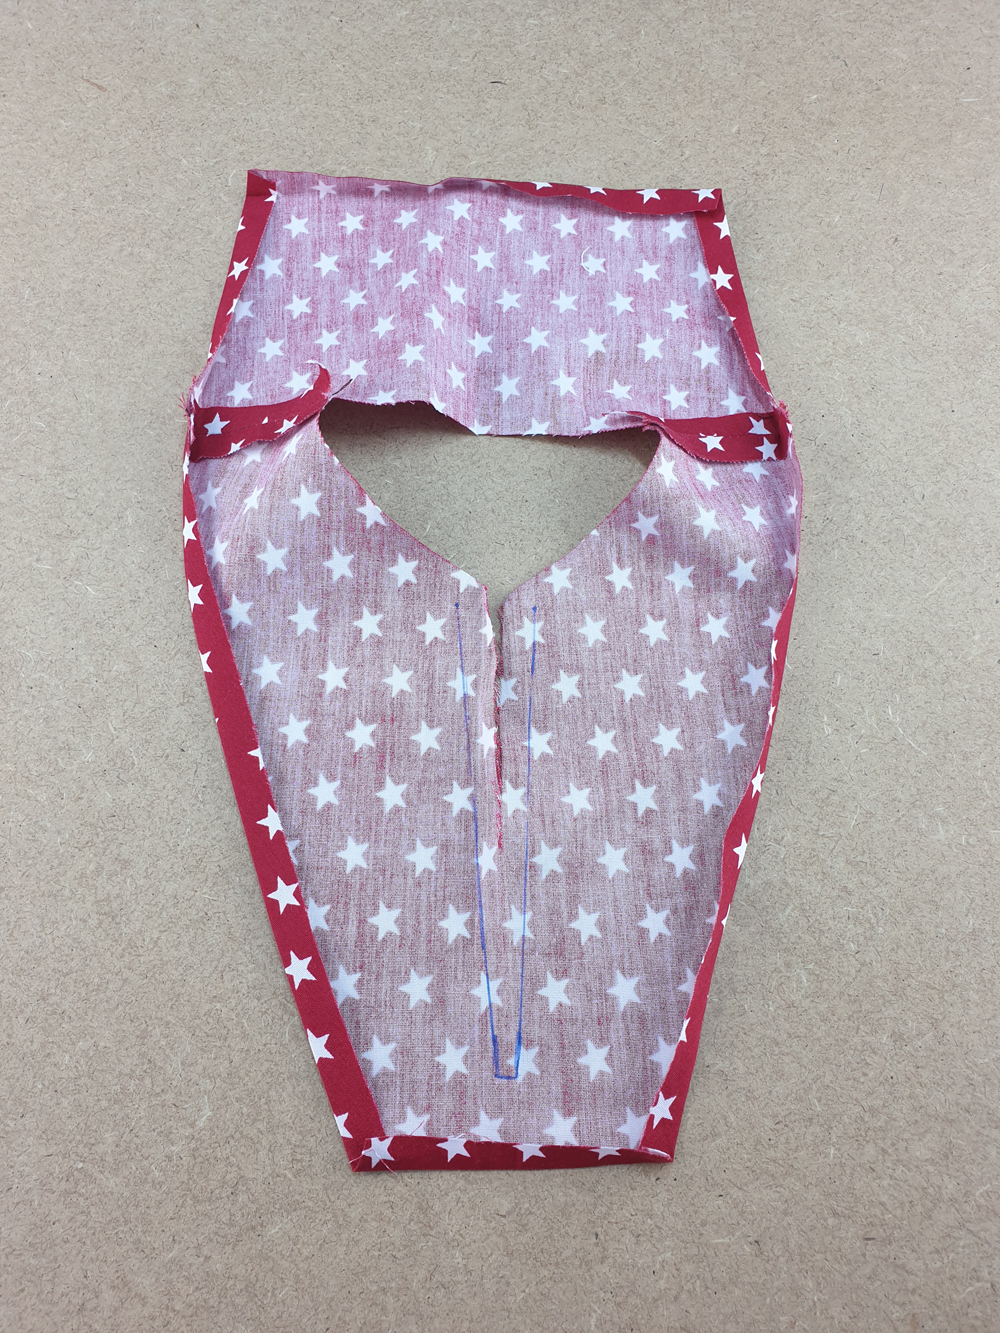
Next, with right sides together pin the facing to the bodice, with the collar and the button loop sandwiched in between the two. Sew around the collar using a 1 cm seam allowance. When you get to the v neck opening, sew according to the pattern markings.
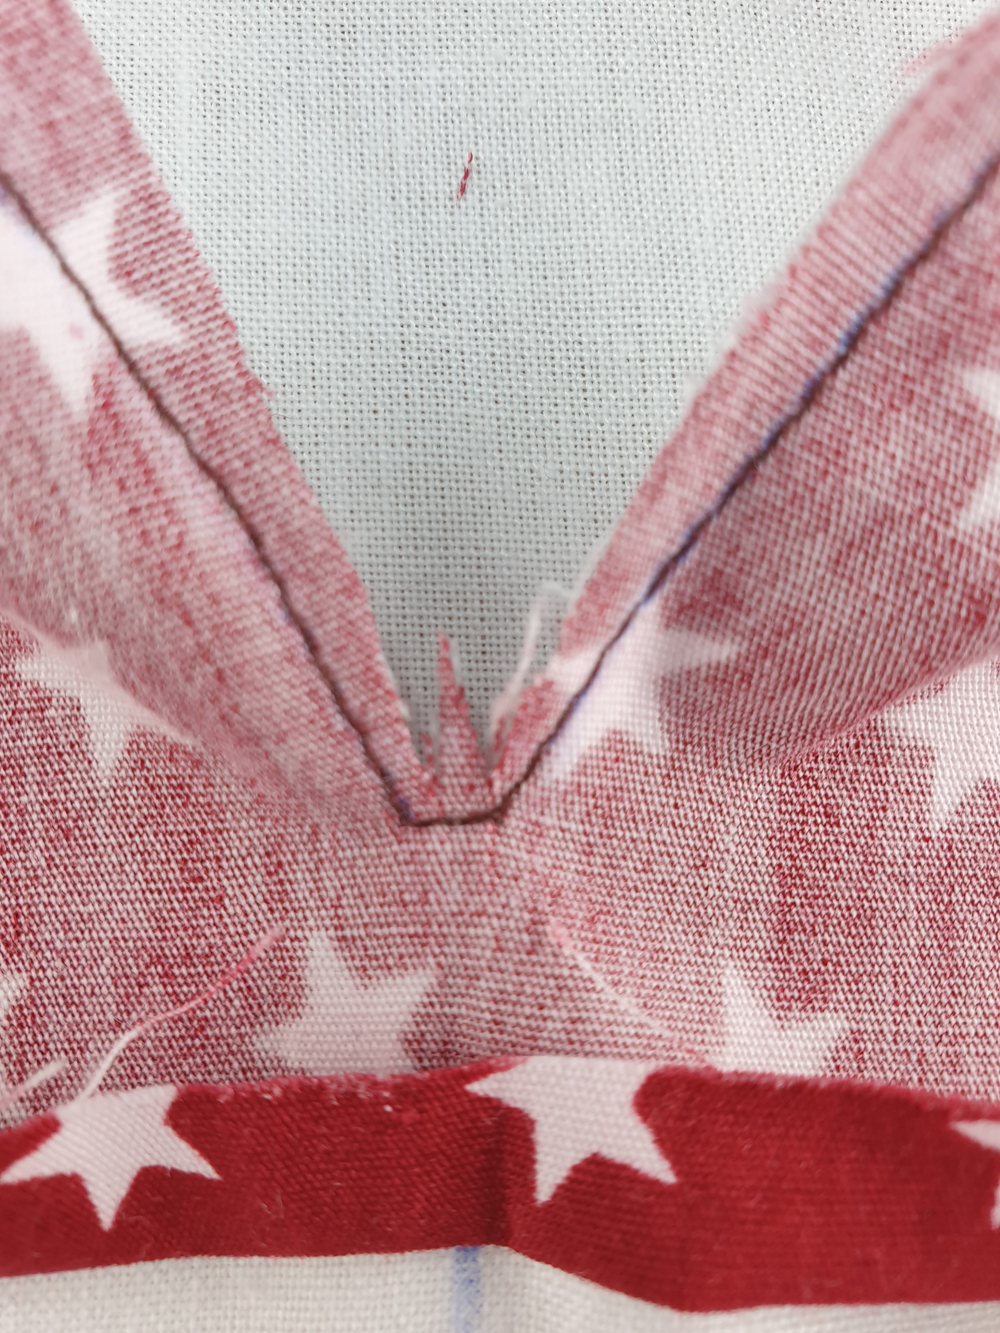
Clip to the corners at bottom of the v neck opening, being careful not to clip through the stitches.
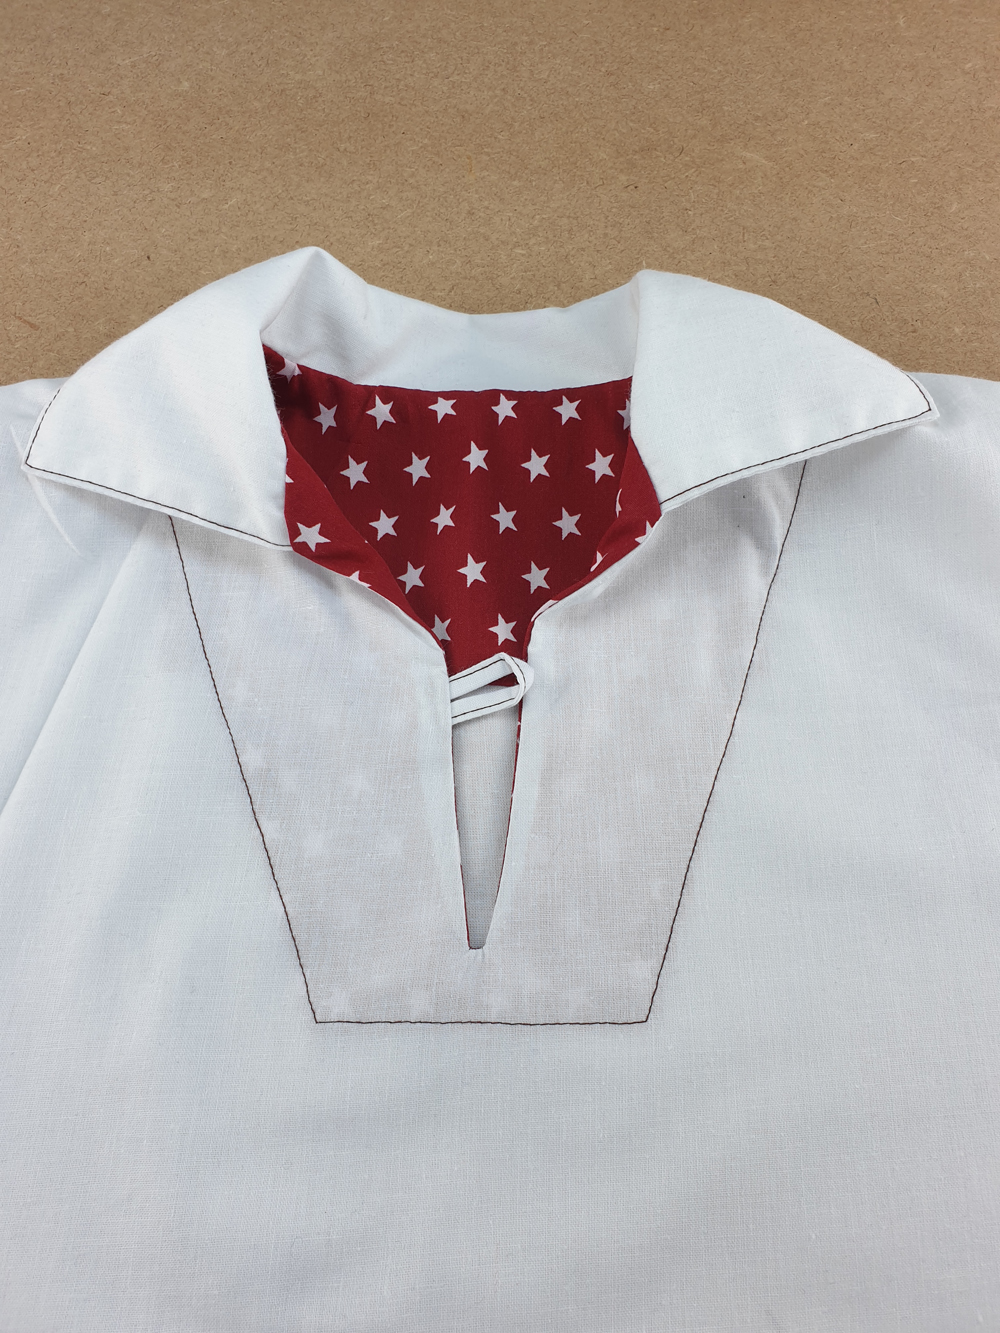

Flip the facing to the inside of the jacket and press carefully. With the bodice facing up, topstitch the facing in place 2 mm from the edge. You can baste the facing in place and draw the outline on the right side of the jacket to help you.
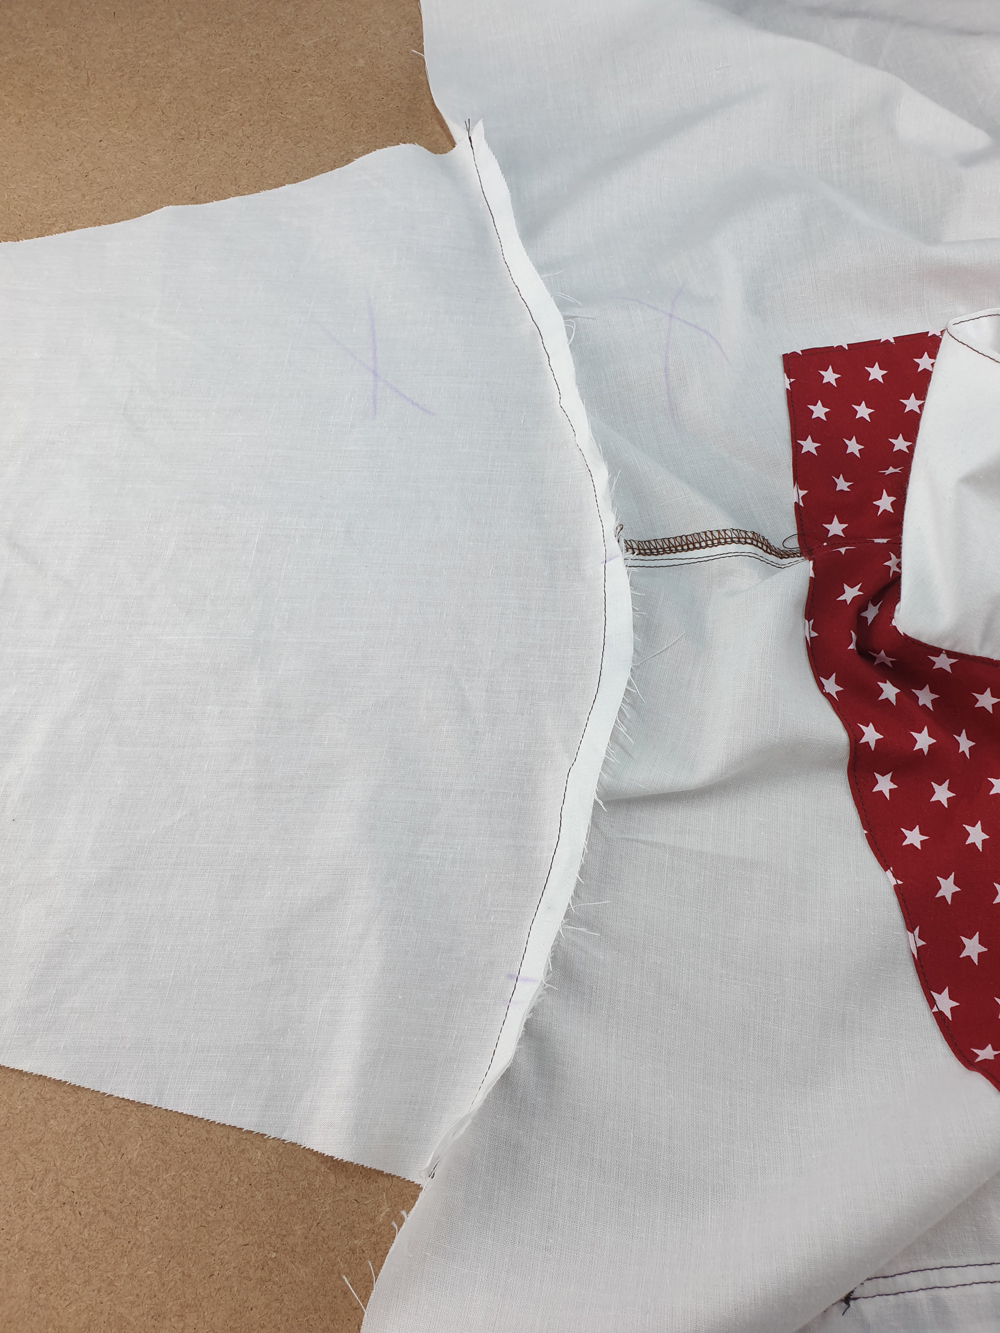
Sew the sleeves flat. With ride sides together, pin the sleeves to the bodice, making sure to line up the markings (1 notch for the back and 2 notches for the front) and sew.
Finish the seam allowances together and press them toward the jacket bodice. Topstitch the seam allowance in place, first at 2 mm from the seam, then again at 6 mm from the seam.
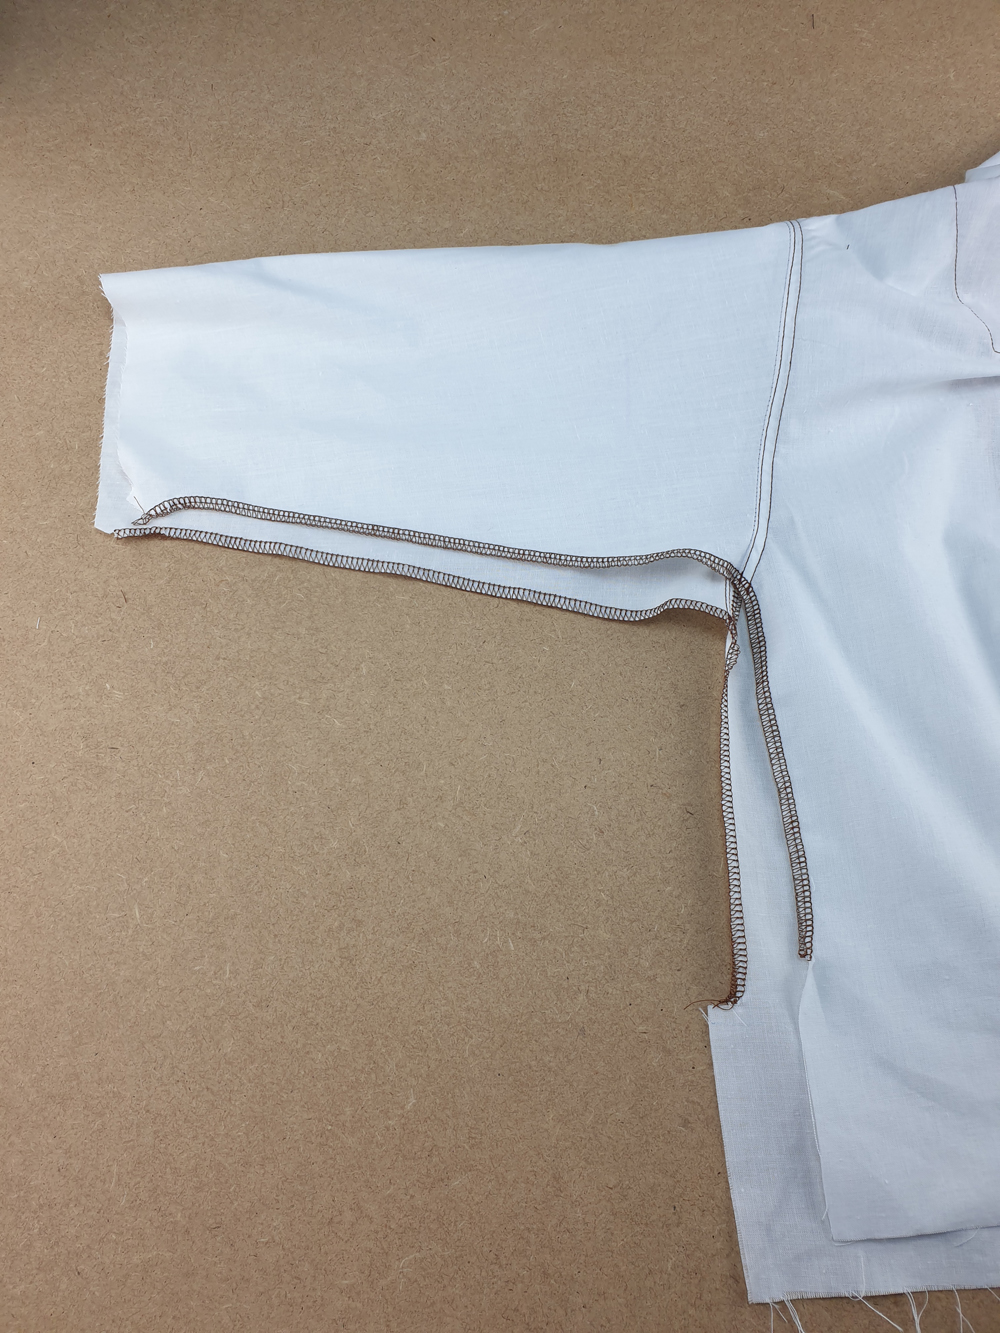
Serge the side of the sleeves and bodices, stopping where the side vent begins.
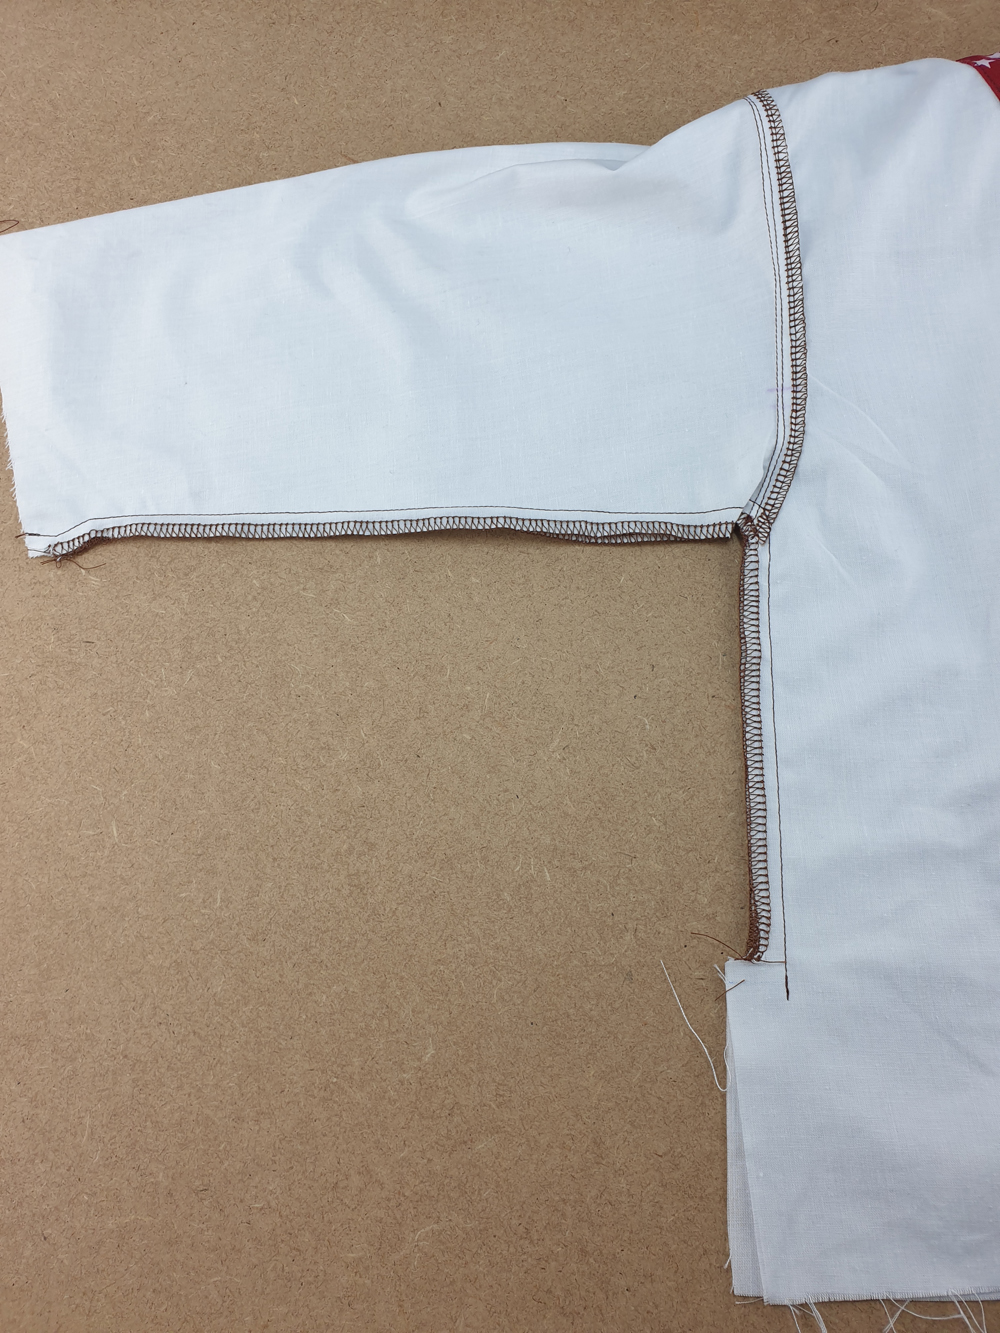
Sew the side seam of the jacket. With ride sides together, pin the sleeves and bodice, making sure to line up the underarm seam. Sew a continuous row of stitches, beginning at the sleeve and stopping 1 cm past the beginning of the side vent.
At the side vents, fold 1 cm toward the wrong side.
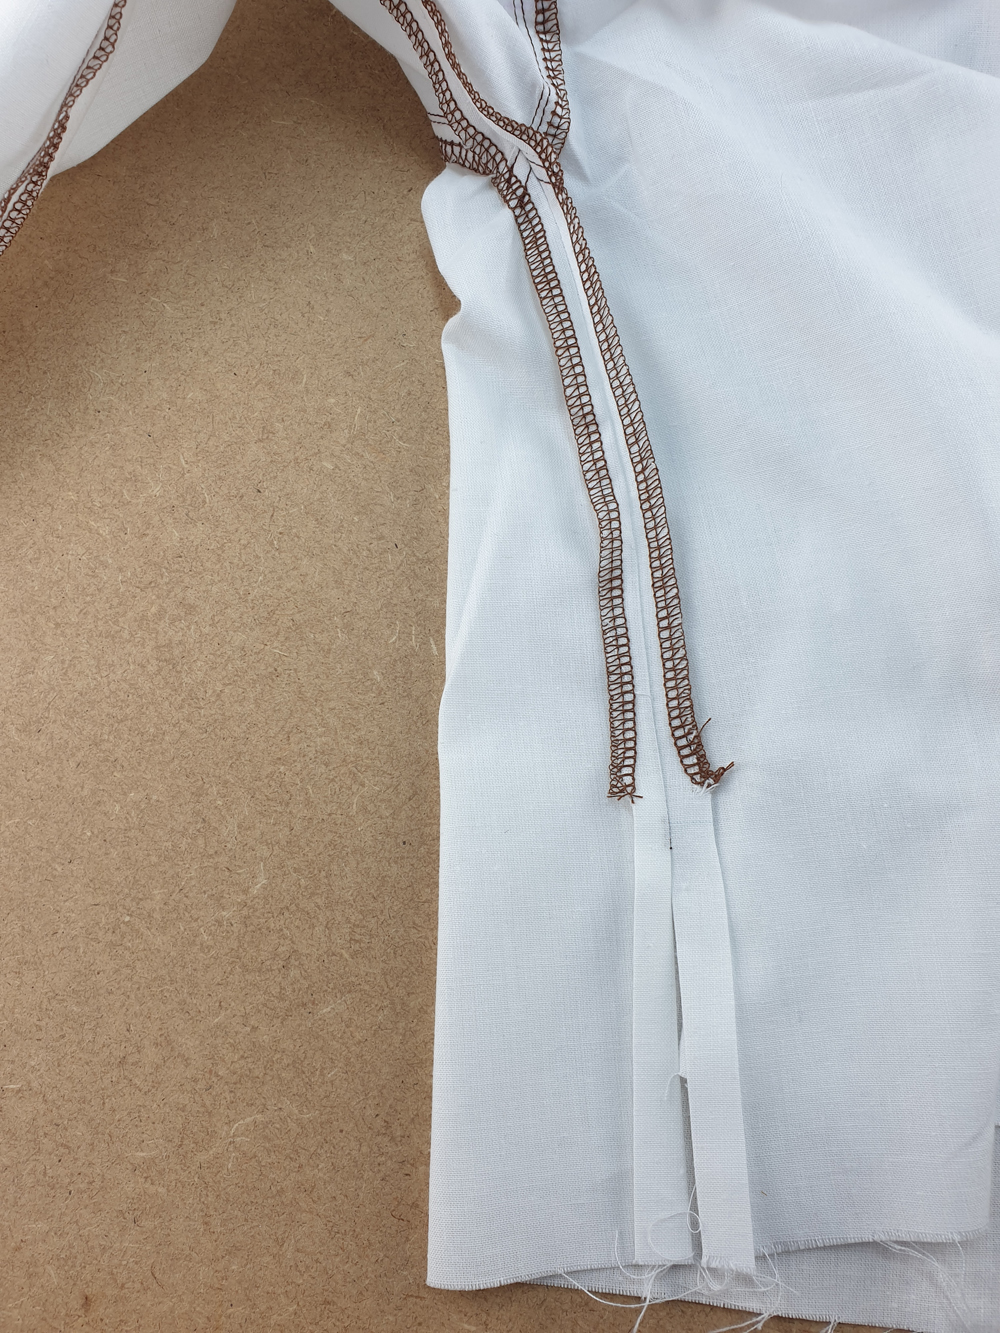
Press the seam allowances open. By doing so, you will refold the side vents, enclosing the raw edges.

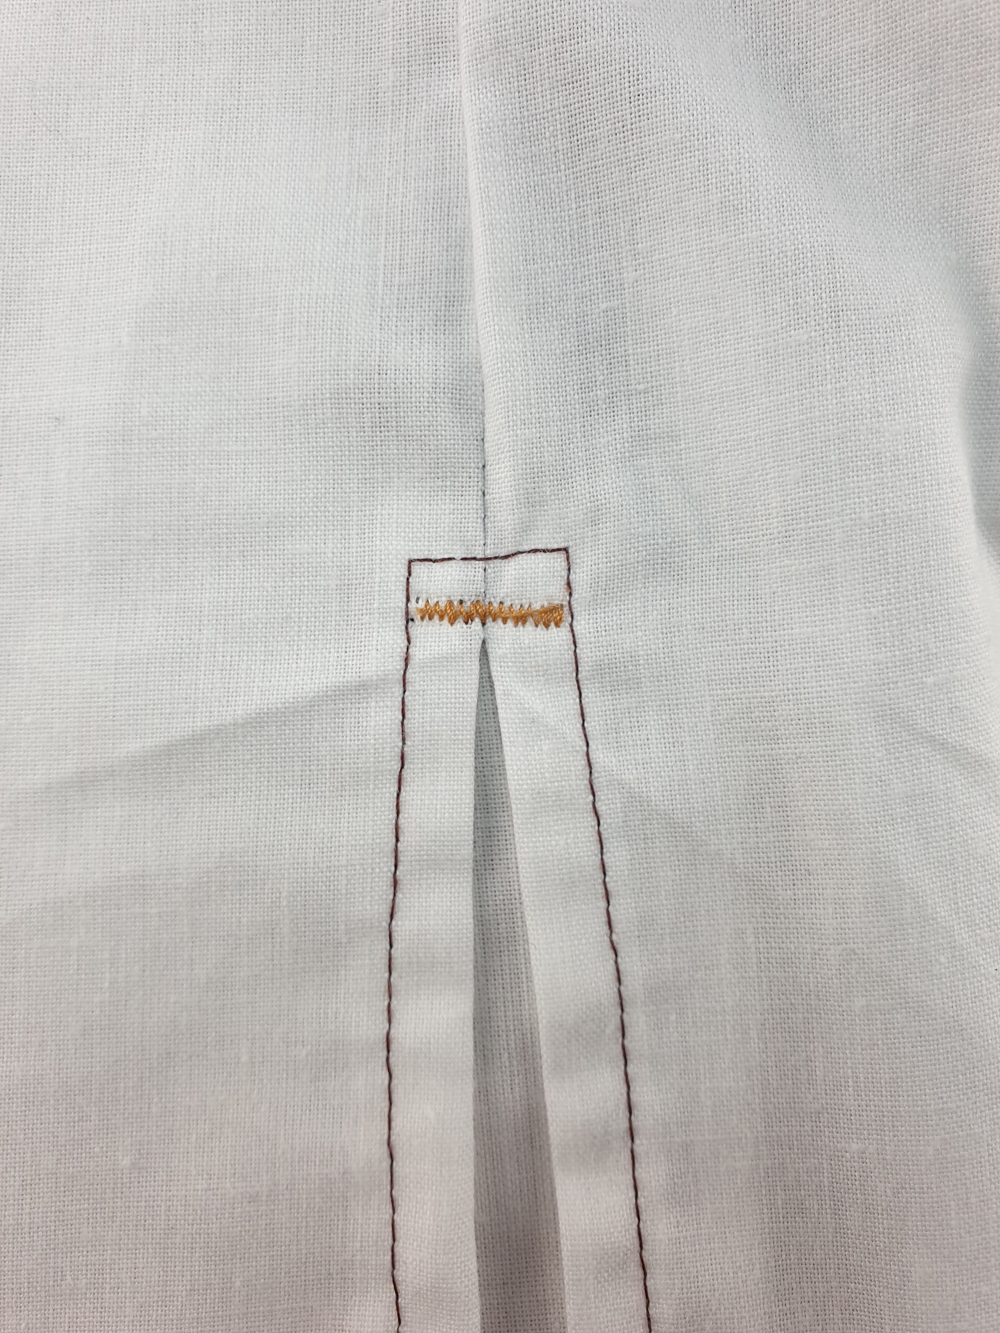
Topstitch around the side vent, 8 mm from the edge. Next, reinforce the top of the vent with a bartack.
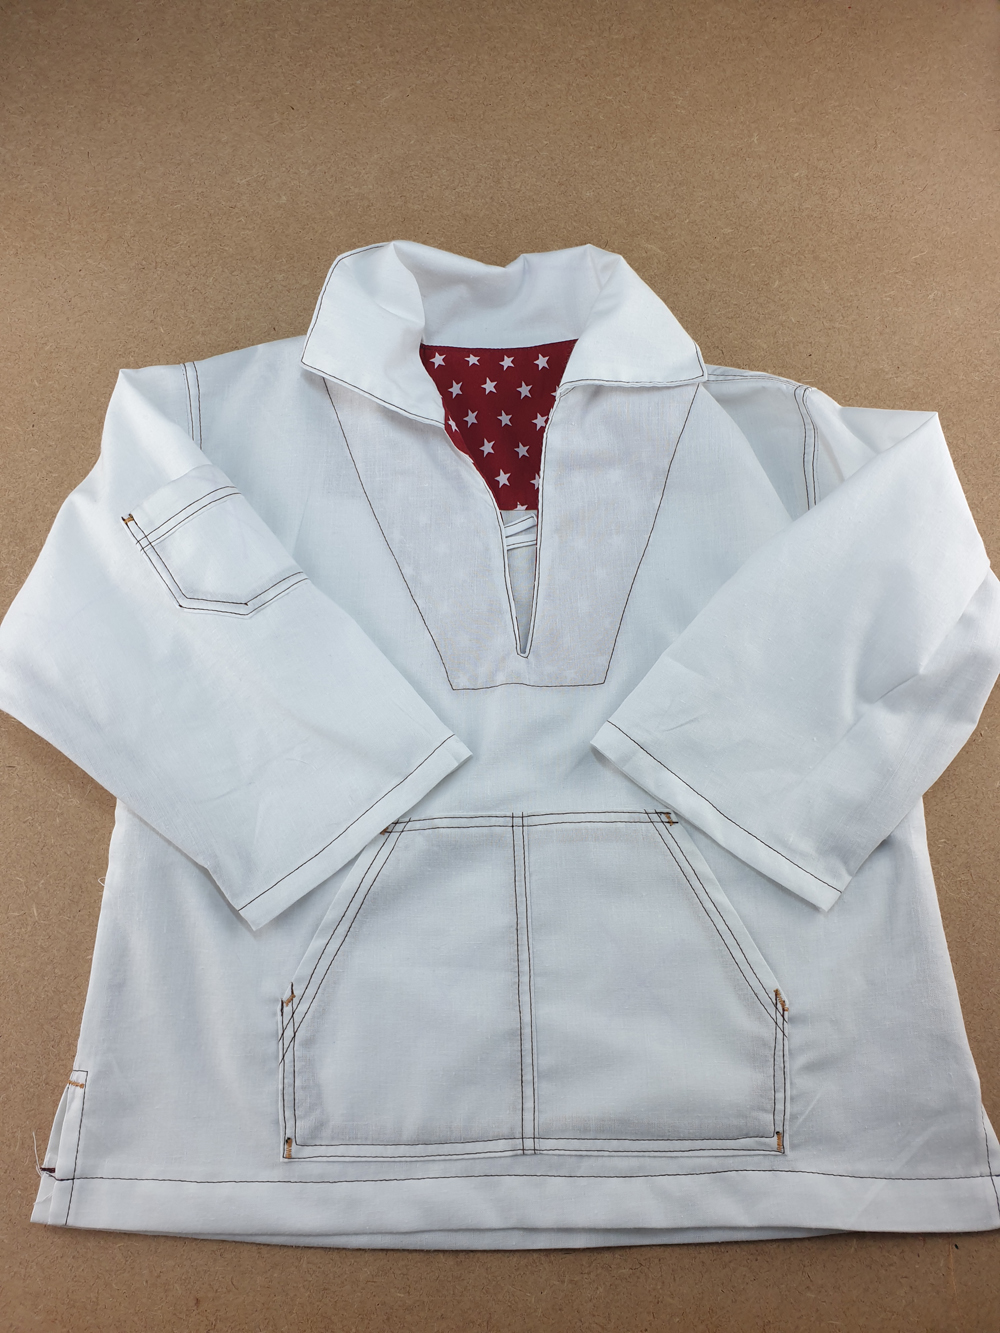
Hem the jacket sleeves by folding the fabric 1 cm toward the wrong side, then again 1.5 cm toward the wrong side. Press then topstitch in place 1.3 cm from the edge.
Hem the jacket bottom by folding the fabric 1 cm toward the wrong side, then again 2.5 cm toward the wrong side. Press then topstitch in place 2.3 cm from the edge.
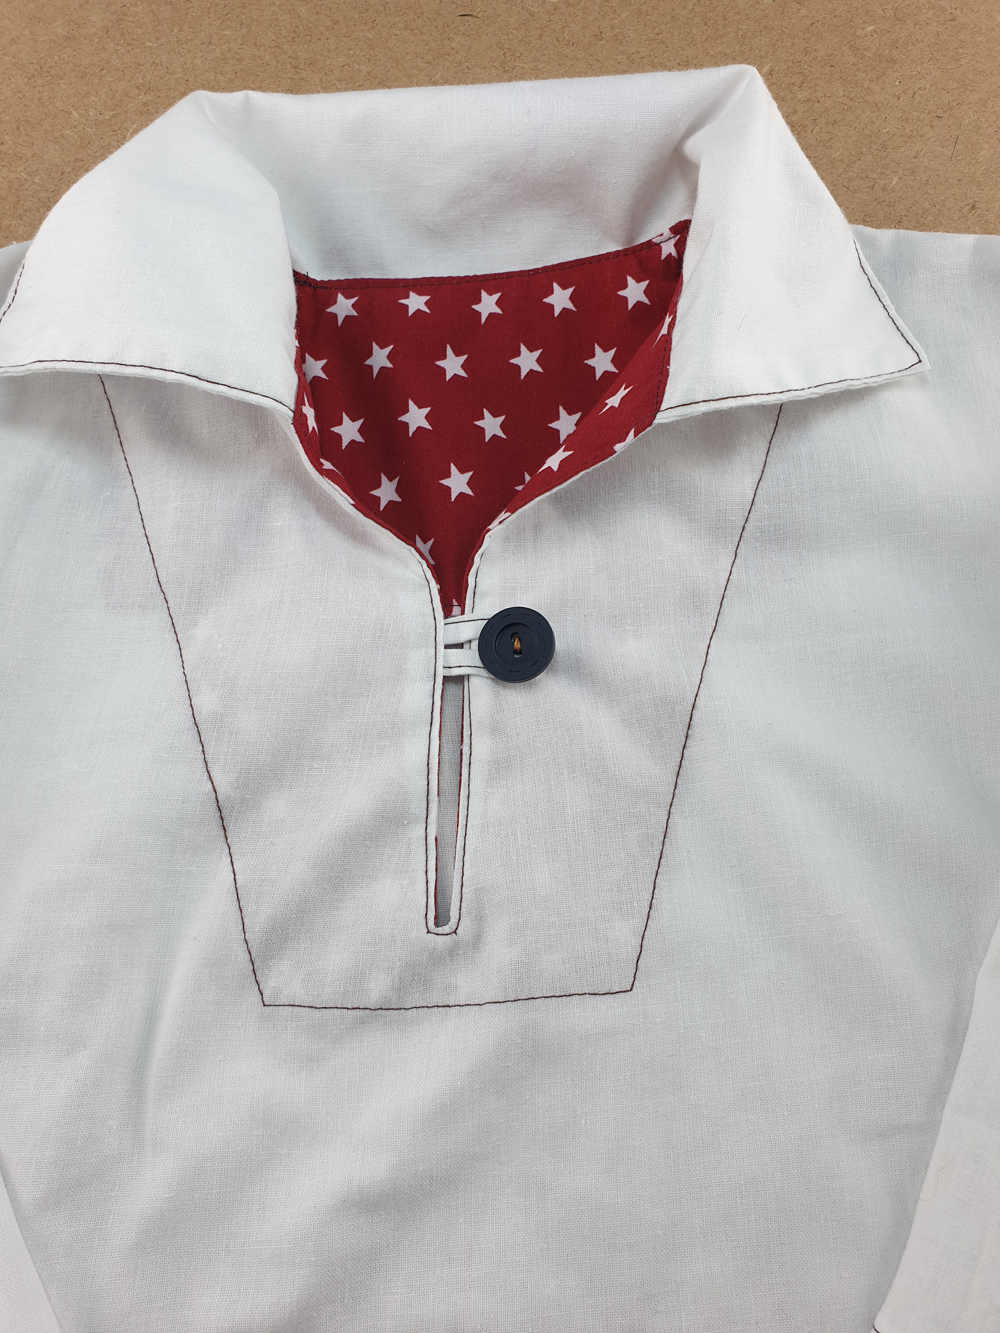
Sew the button.
Voilà, c'est terminé !
![]()
Comments
No comment at this time!
Leave your comment