How to print layers in PDF sewing patterns

To select the layers from a PDF file, you need to have Adobe acrobate reader, this software is free and you can download it here: https://get.adobe.com/fr/reader/
Start by opening your pattern in Adobe Reader. Once your file is open, on the left hand side there will be a line of icons. The bottom one represents Layers, so click on it.
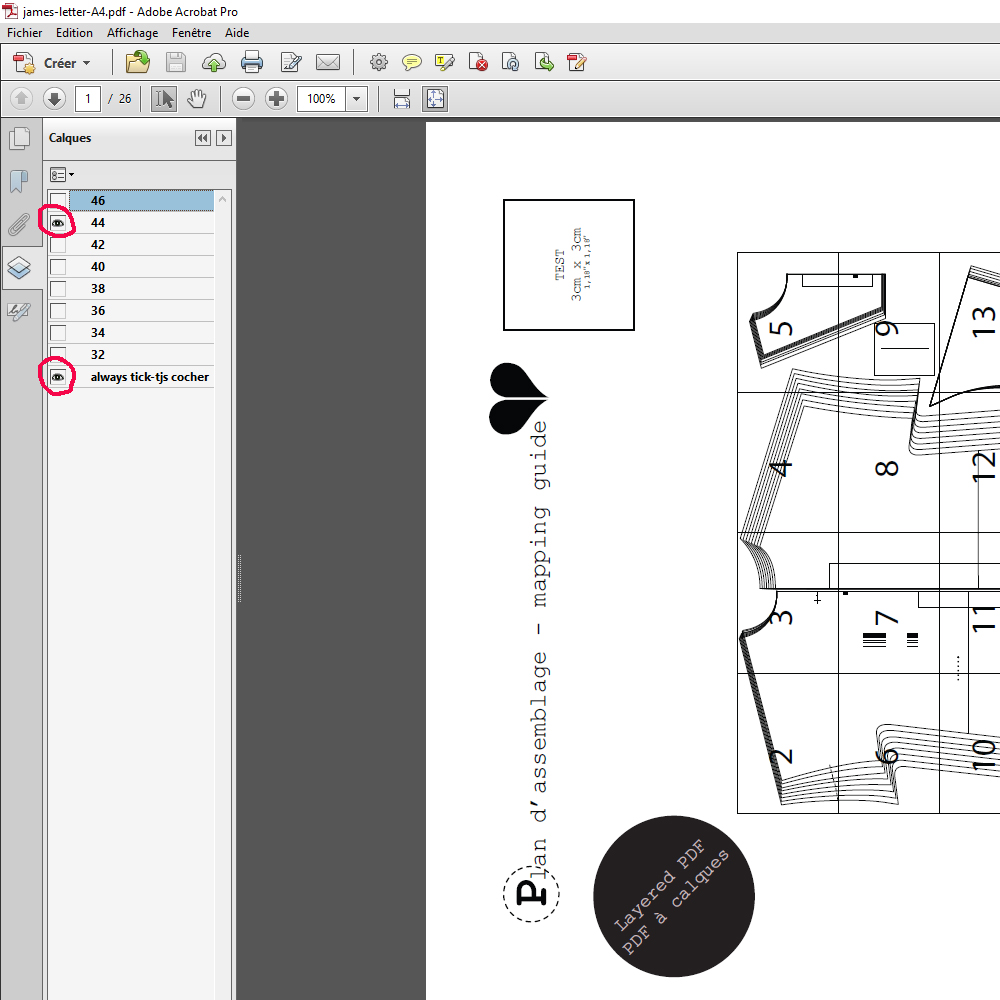 For Ready to sew patterns, each size is on its own layer and there are one extra layer – “always tick - tjs cocher”. You can select which layers you want to be visible by clicking on the eye icon next to the name of each layer. Make sure that you keep “Always tick - tjs cocher” selected no matter which sizes you decide to print.
 Once you have selected your layers, it’s time to print!
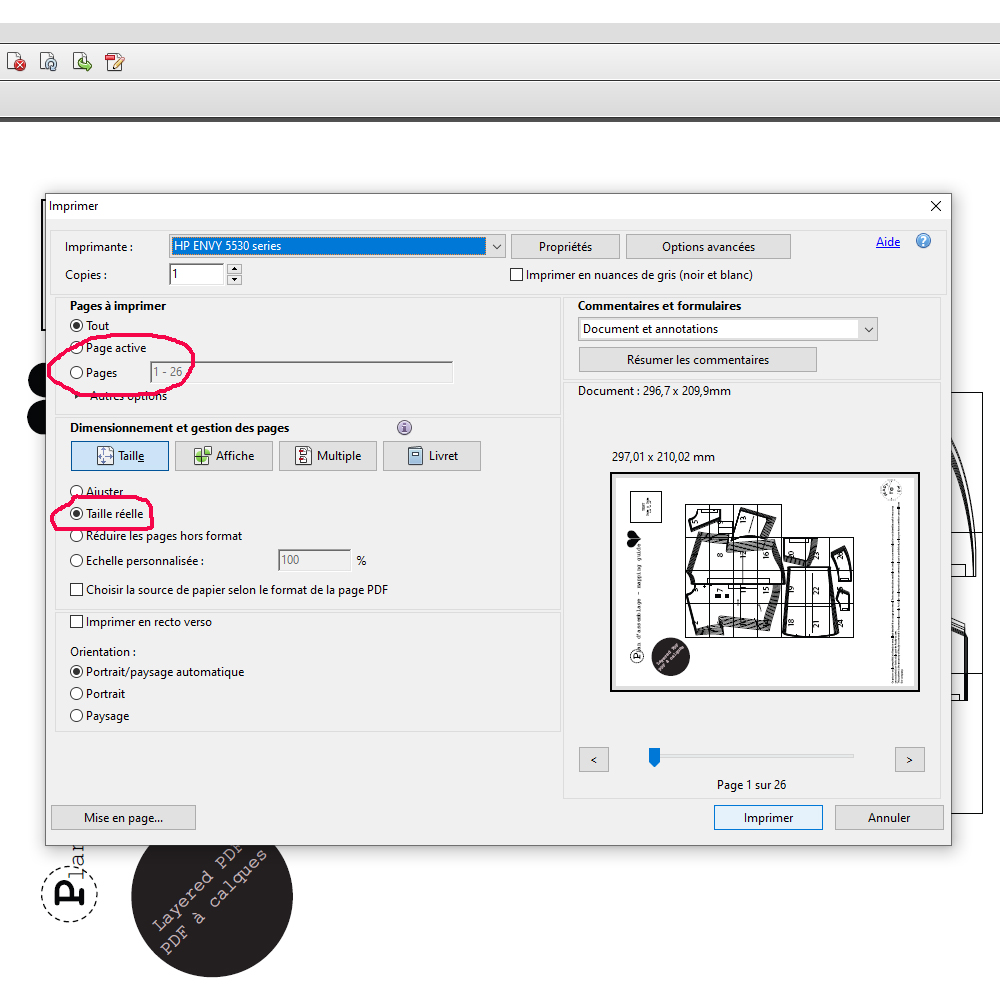 The important thing with printing is to make sure that your pattern is printing at the right scale. Select “Actual Size” or manually set the scale to 100% (your print program may look slightly different or have slightly different wording but it will definitely have these options). Do NOT select “Fit” or “Fit to page” as this will stretch the pattern larger.
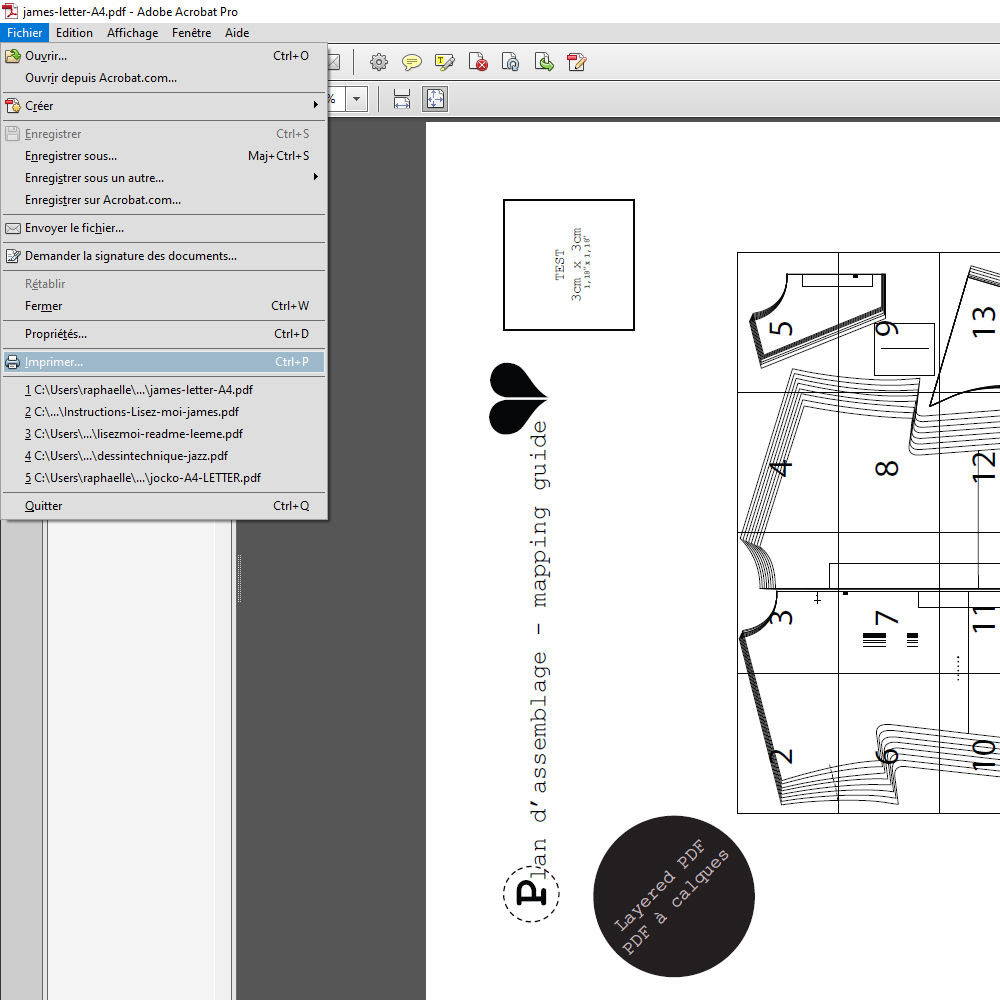
Ready to sew patterns always tell you exactly what pages you will need to print for your sewing options to help you minimize the number of pages you need to print. Of course you always can just print all the pages of the pattern for simplicity’s sake, but if you want to print only the necessary pages, you can enter the range into the “Pages” box.
All Ready to sew patterns have a test square on them that tells you what size it should be after printing. Usually this is on the first page of the pattern. Test to make sure that your pattern is printing at the right size by printing just the first page, measuring the test square, and then printing the rest of the pattern.
Je vous conseille de vous renseigner sur internet ou de faire appel à un professionnel.
Raphaëlle de Ready to sew
Avez-vous connaissance d'un logiciel permettant de gérer les calques sous Linux ? Je n'en ai pas trouvé...
Merci d'avance.