Sew along, the Papao pants

Sew along with us as we walk you through making the Papao pants! You will notice that the sew along can differ from the sewing instructions included with the pattern. First you’re going to need to gather the supplies you’ll need to sew a perfect Papao! The Pépite collection was designed specifically for motivated beginners and seamstresses who love simple and quick projects. As I created this collection, I considered the following three requirements:
1 - The design must not require any notions apart from the fabric, thread and pattern (no zippers, no buttons, no snaps)
2 - All designs must be appropriate for advanced beginner to intermediate level sewers.
3 - The search for simplicity and ease in sewing should not be to the detriment of style and form.
Supplies:
- Fabric (for the fabric head back to the instructions to know what kind of fabric you need and the yardage)
- 1 bobbin of regular thread matching the fabric color

Let's start
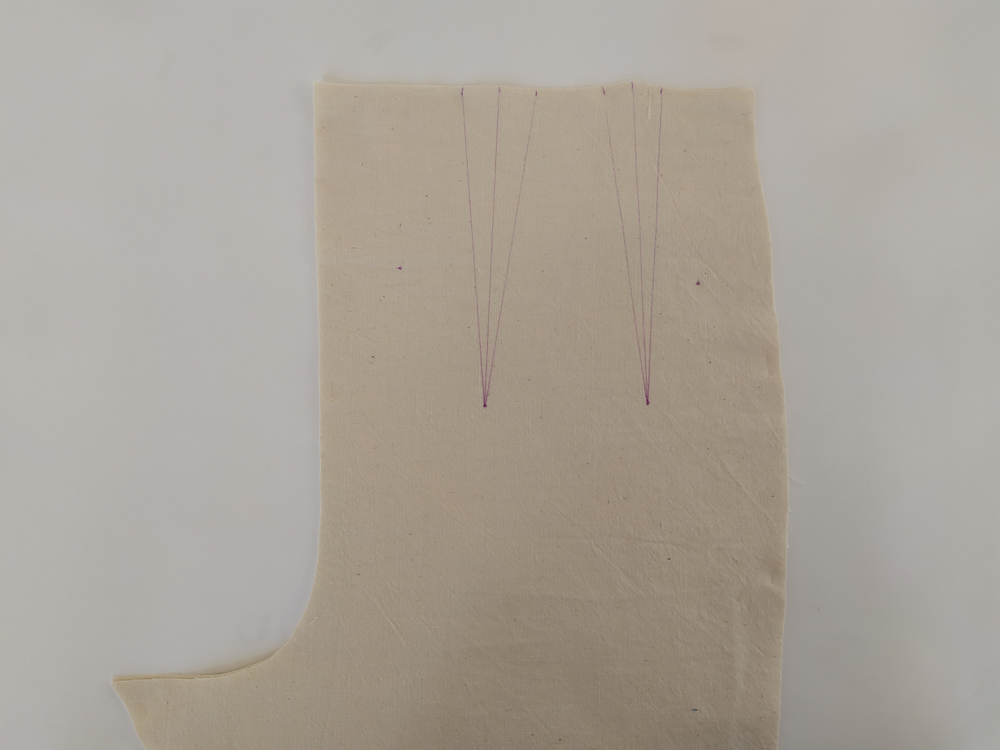
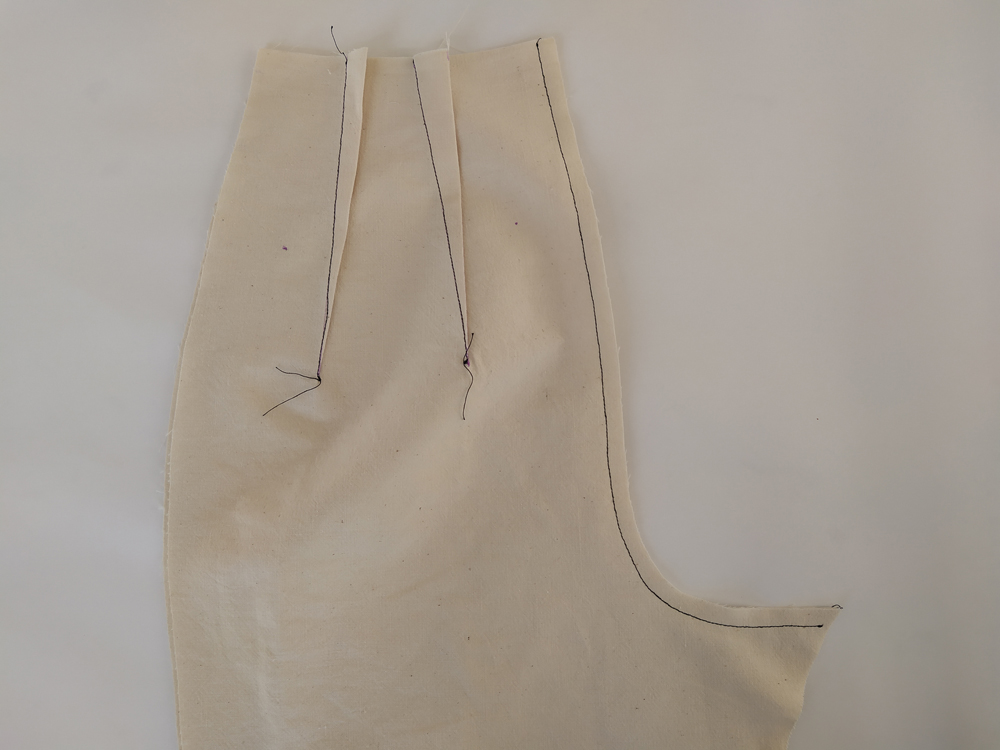
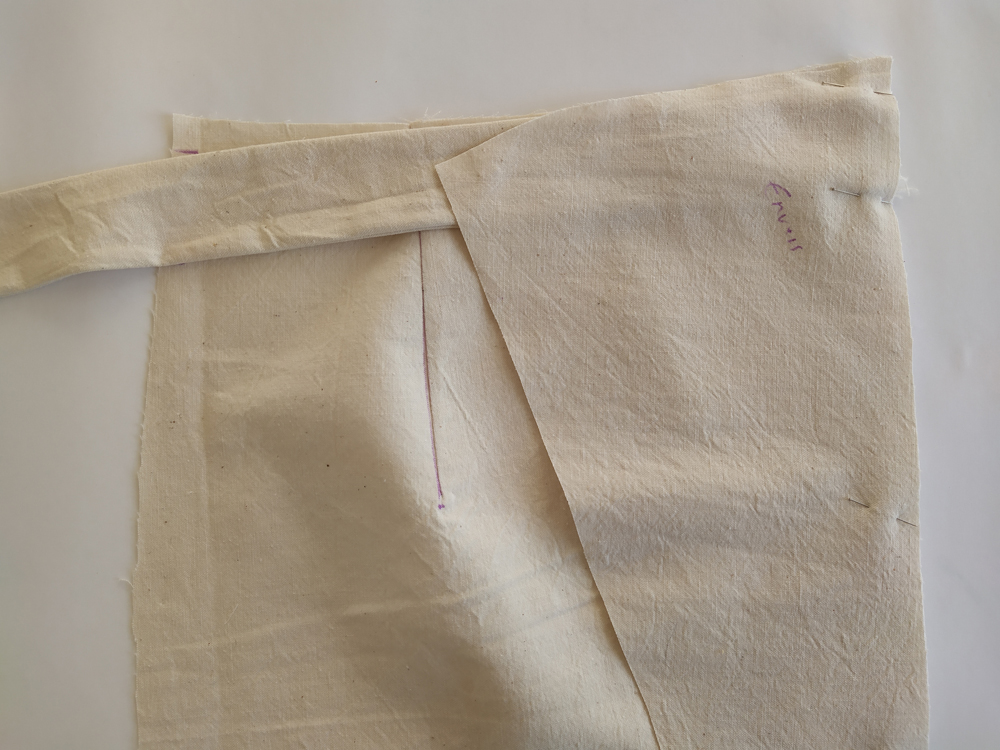
1 : Mark the dart placement on the wrong side of the fabric with tailor’s chalk or a disappearing ink marking pen on back leg pieces (F) front leg pieces (G & E) and pocket bag (K) for view 2.
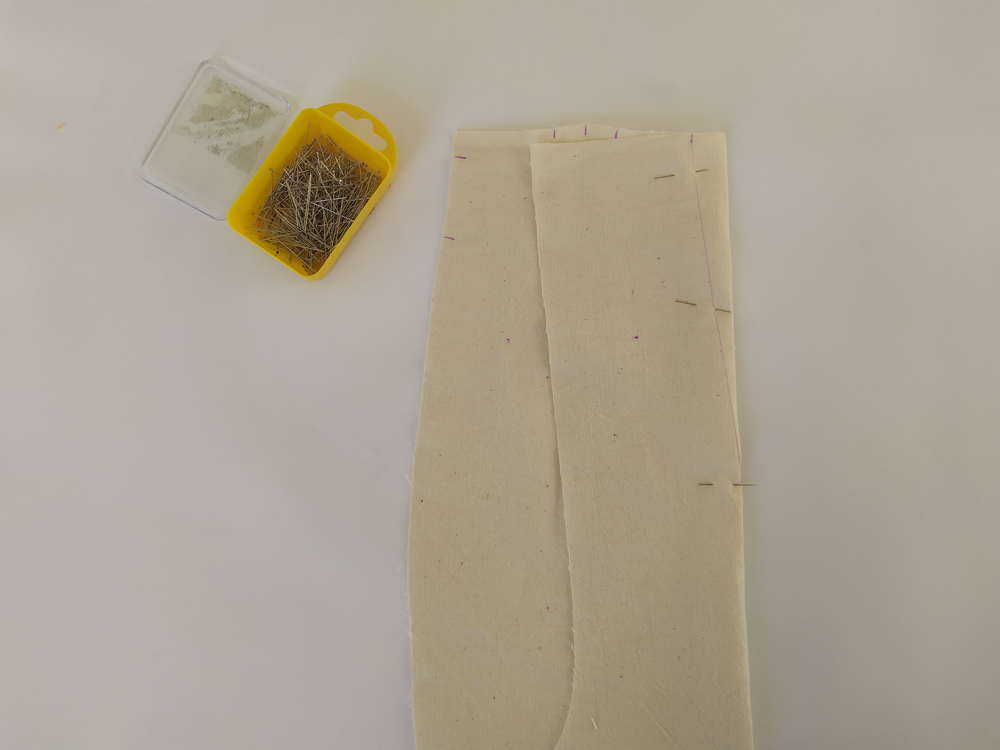
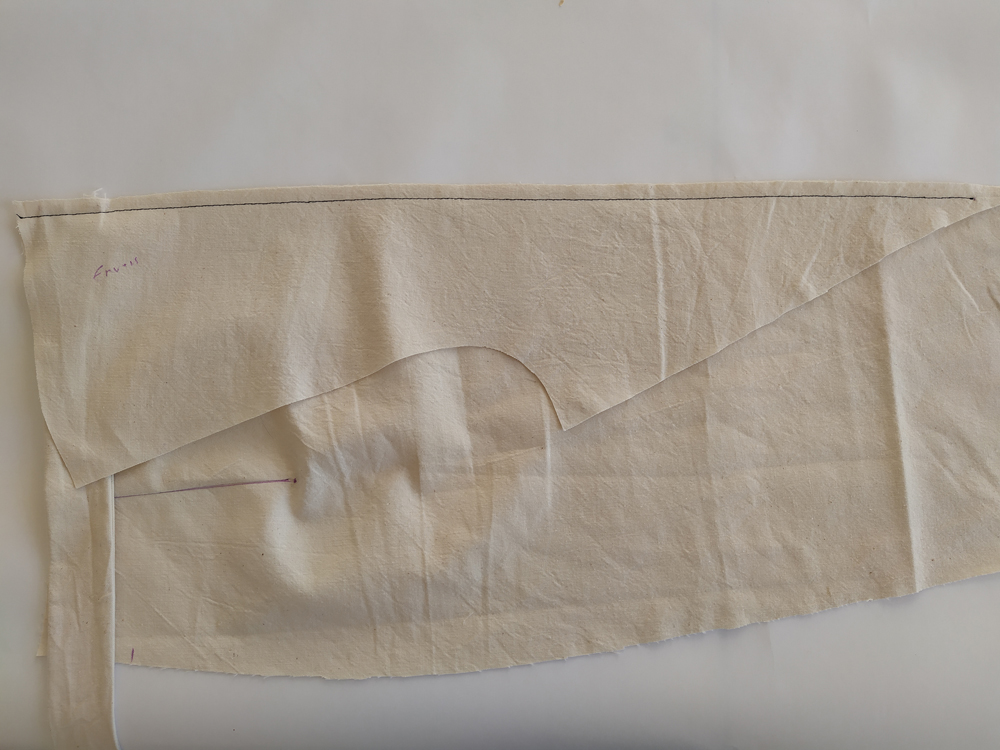
2 : With right sides together, fold along the centerline, matching dart legs. Pin in place.
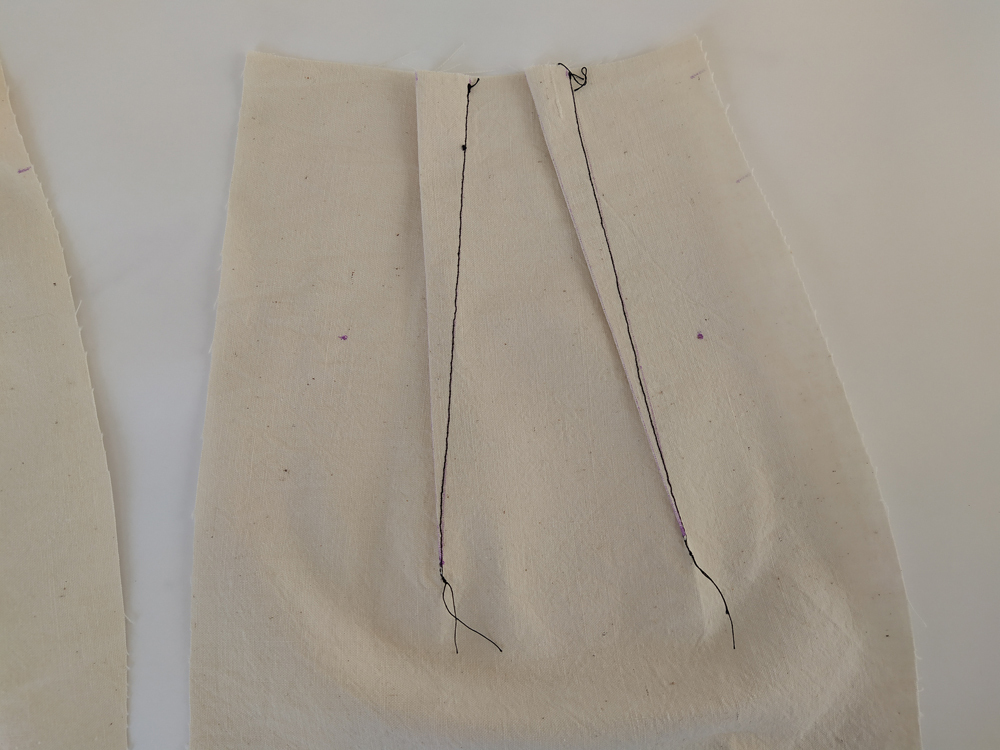
 3 : Stitch dart, beginning at the sides and sewing to the dart dart point. Continue sewing past the dart point for a few stitches, without backstitching. Raise your needle, leave a thread chain of at least 30 mm. Tie the chain at the dart point and cut the threads, leaving about 10 mm after the knot. Press darts towards the center.
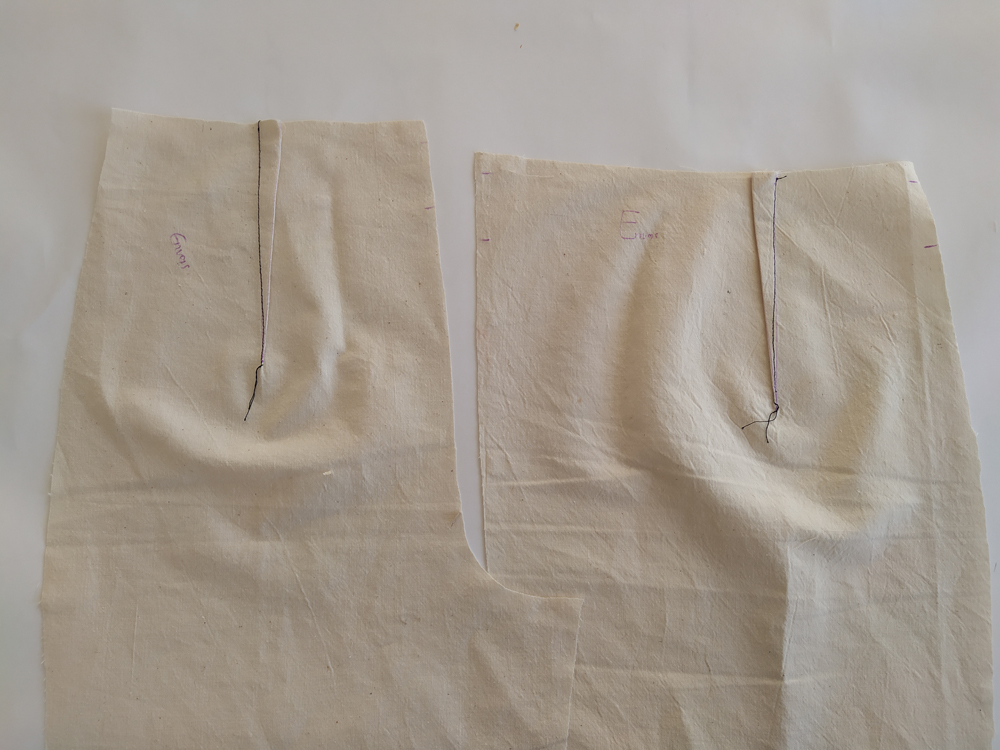
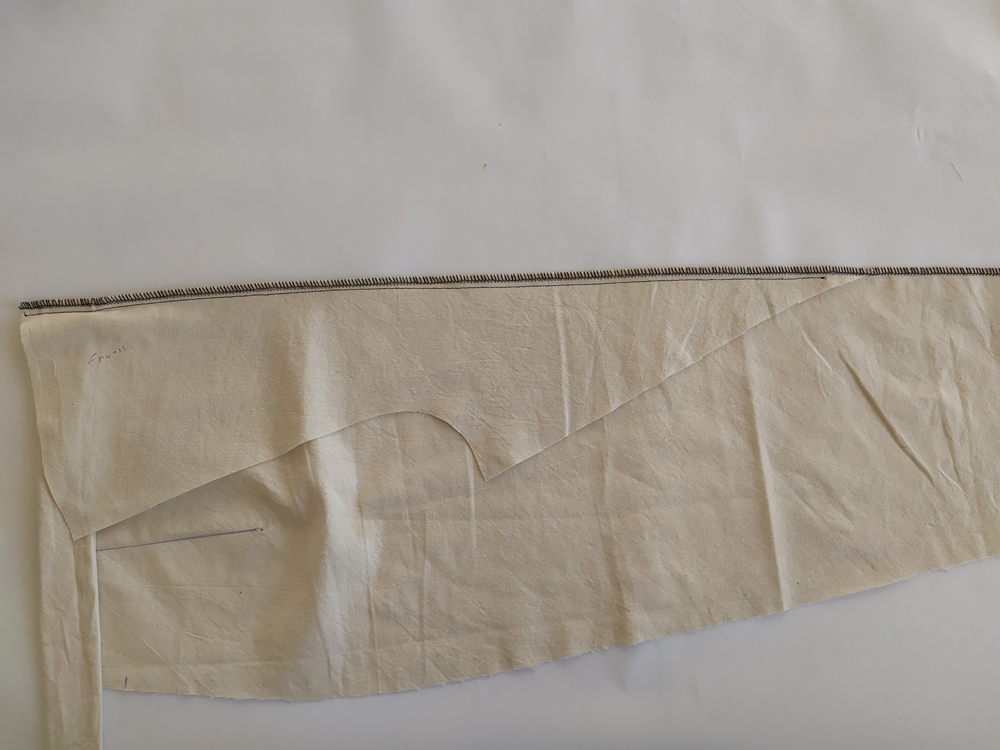
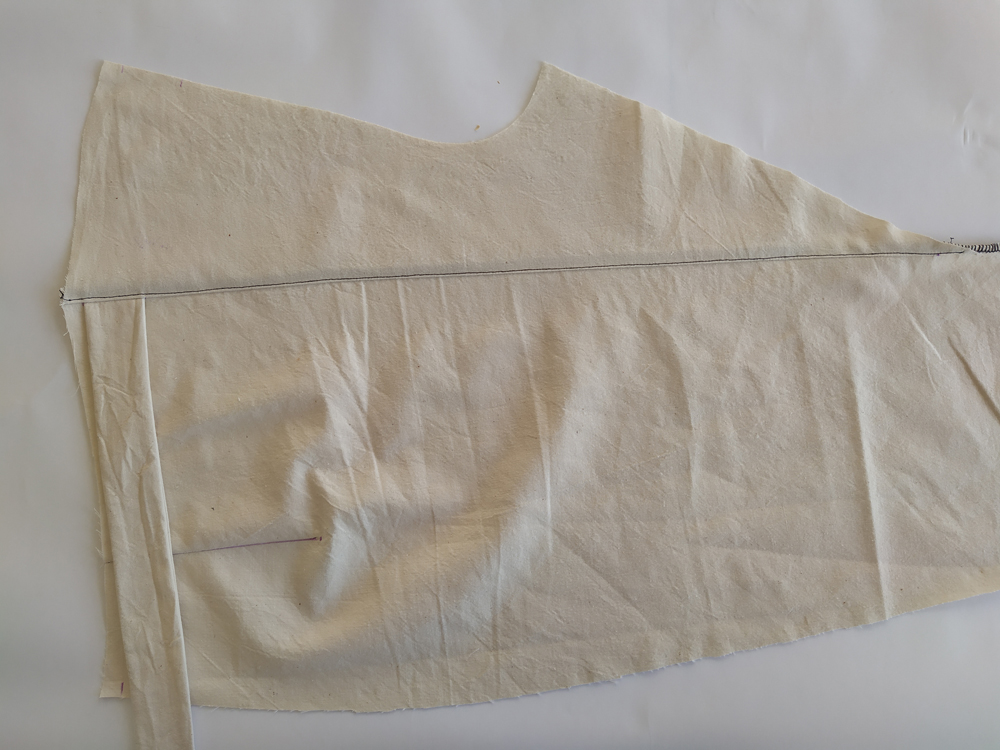
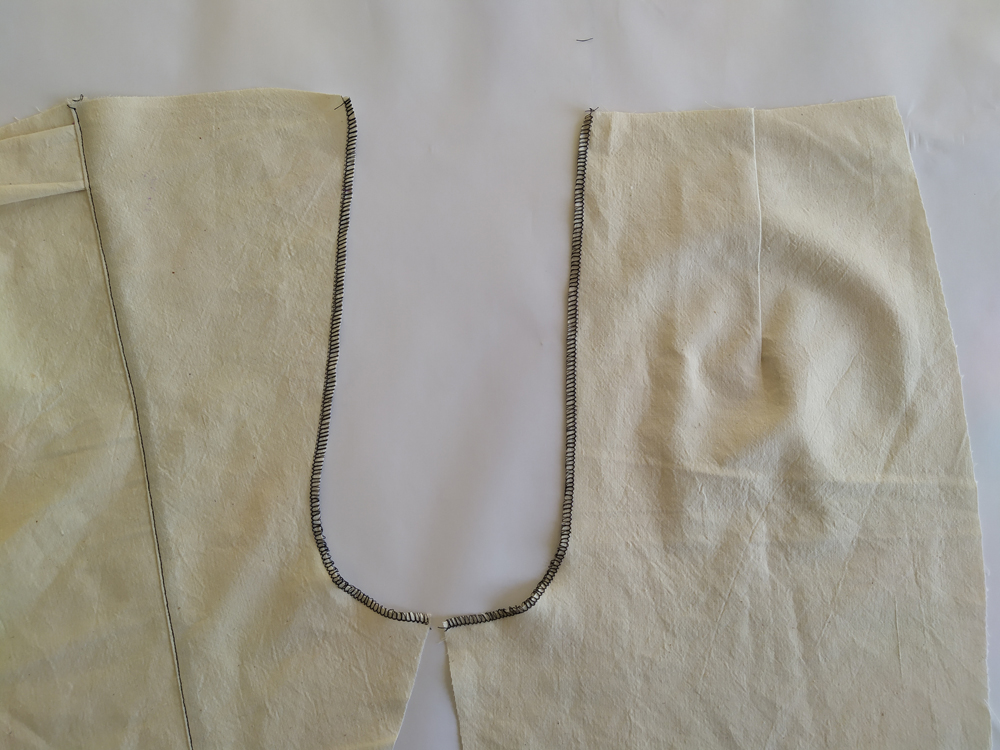
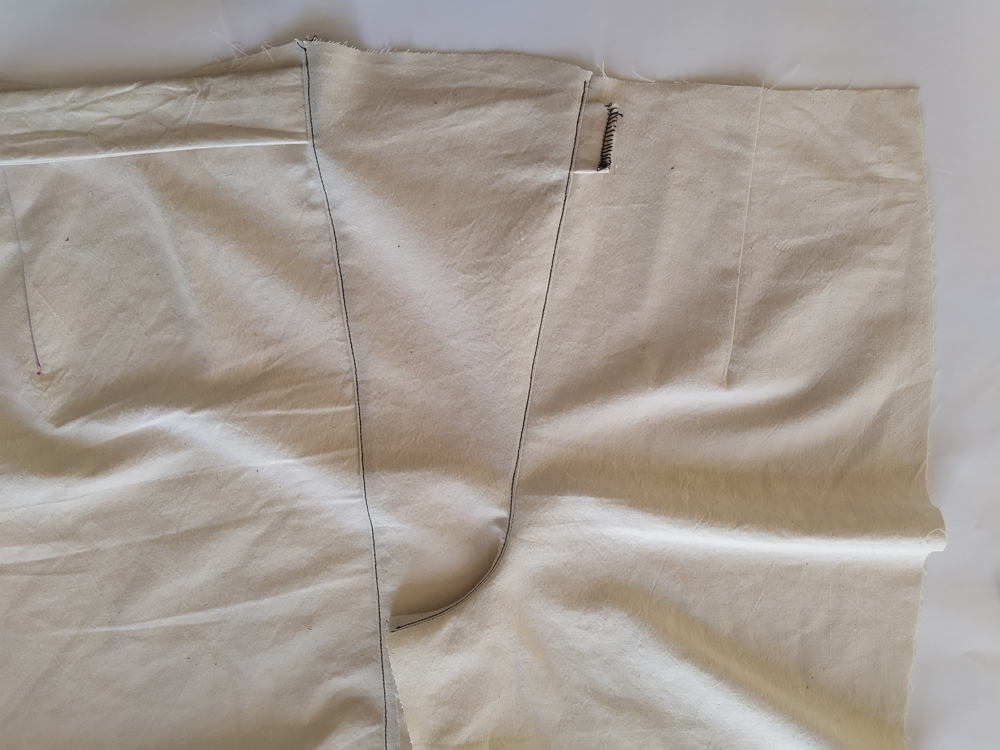
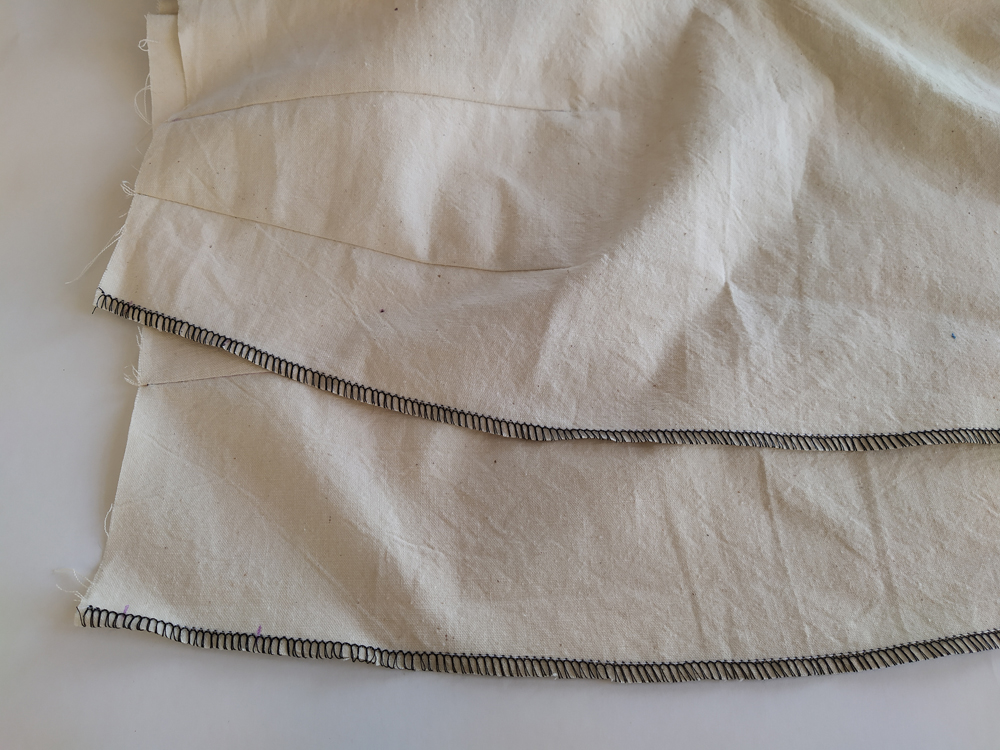
4 : With right sides together, sew the front and the back leg pieces (F) at the back rise. Begin sewing at the waist and continue to sew until the end of the crotch curve. 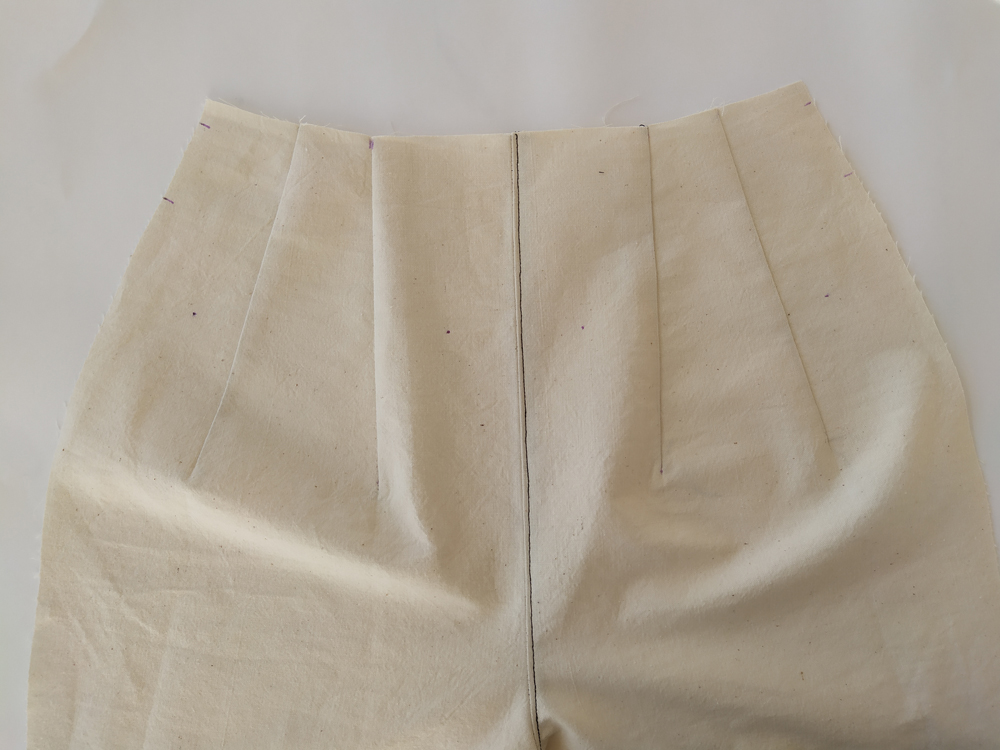 5 : Finish the seams together and press them toward the right. Topstitch the seam towards the right side of the pants.
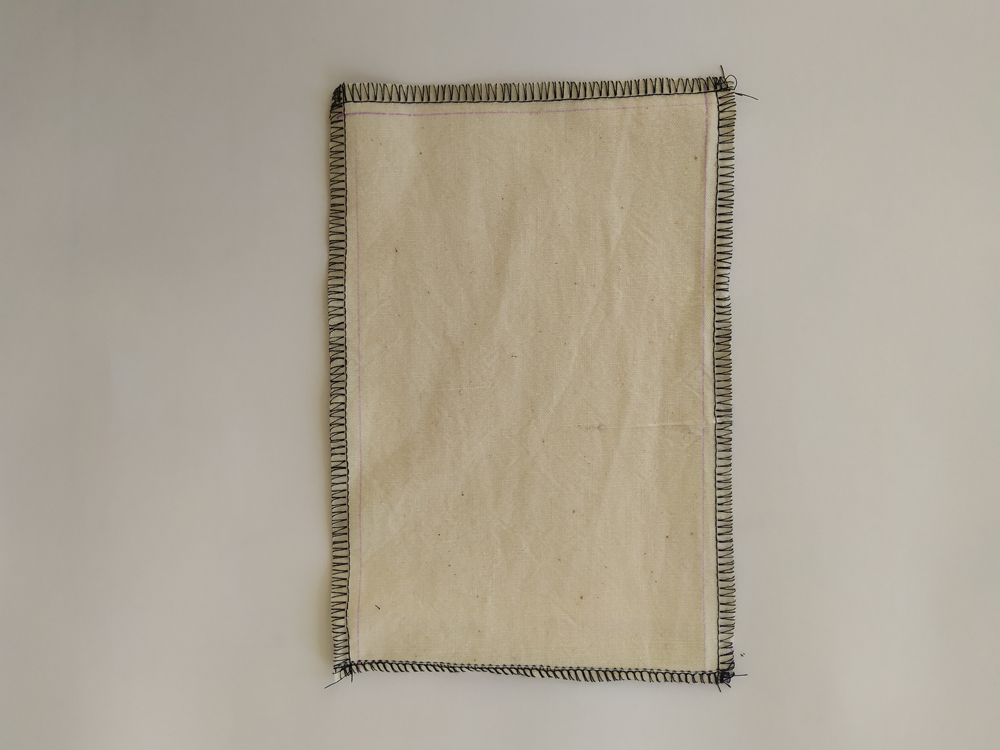 6 :Finish the four edges of the patch pocket (I).
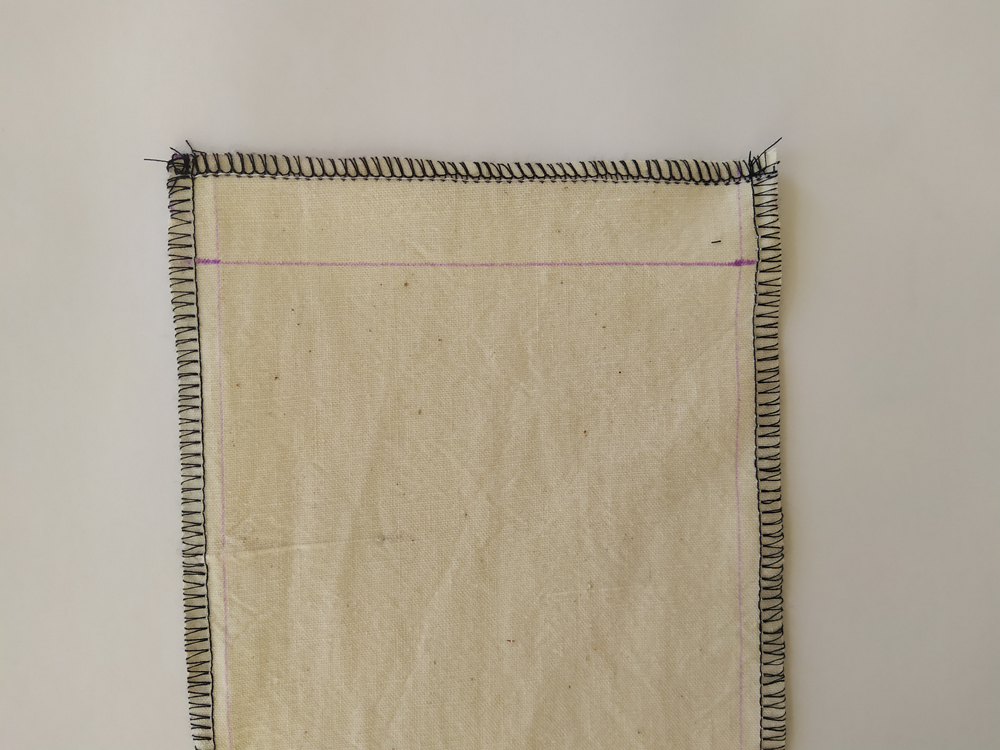
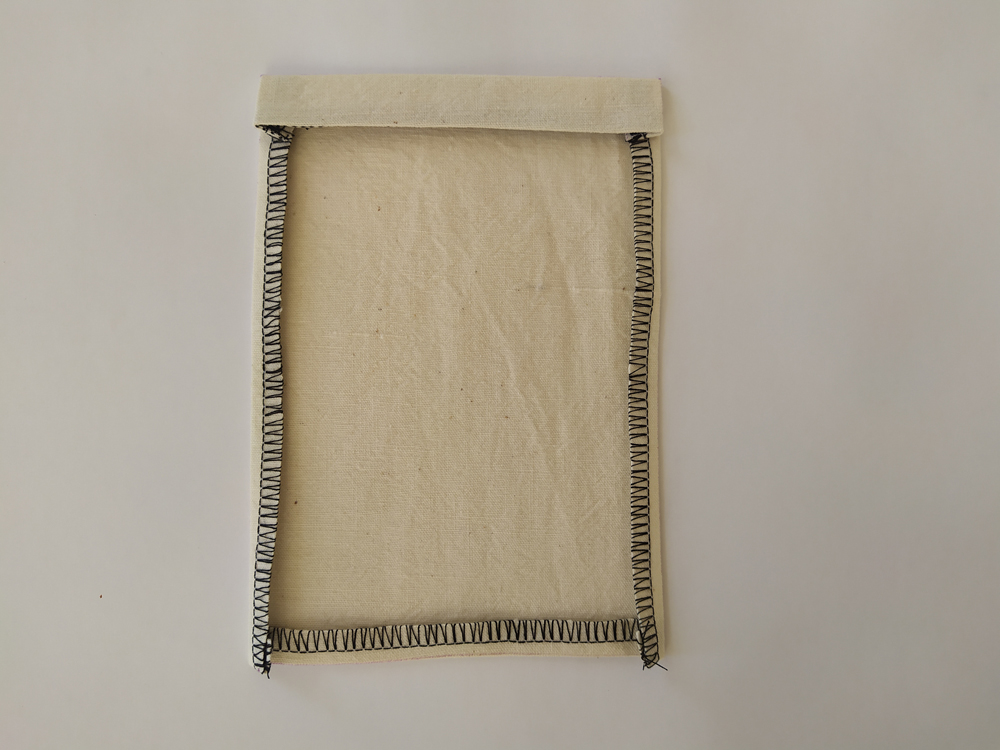
7 :On the front side of the pocket, trace a line 15mm from the top. With wrong sides together, fold along the line. Press.
8 : On the front of the pocket, draw a line 10mm around the other sides.
9 : Fold the bottom edge once along the traced line, press and then fold the other two sides toward the center. Press the pocket.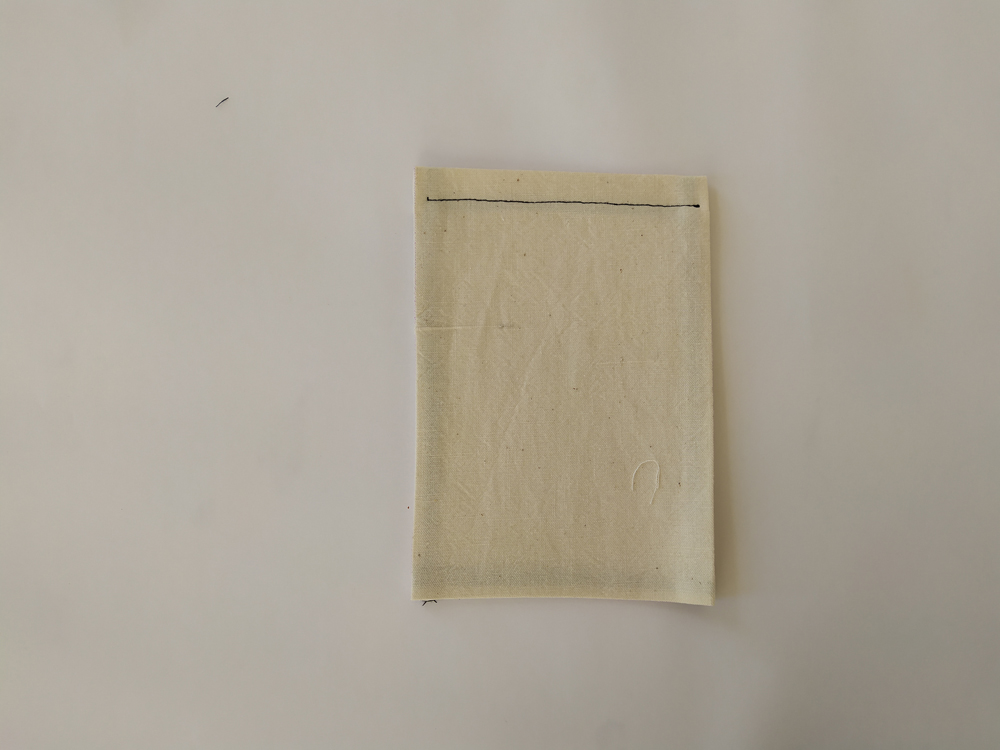 10 : Sew the top of the pocket 12 mm from the edge to keep it in place.
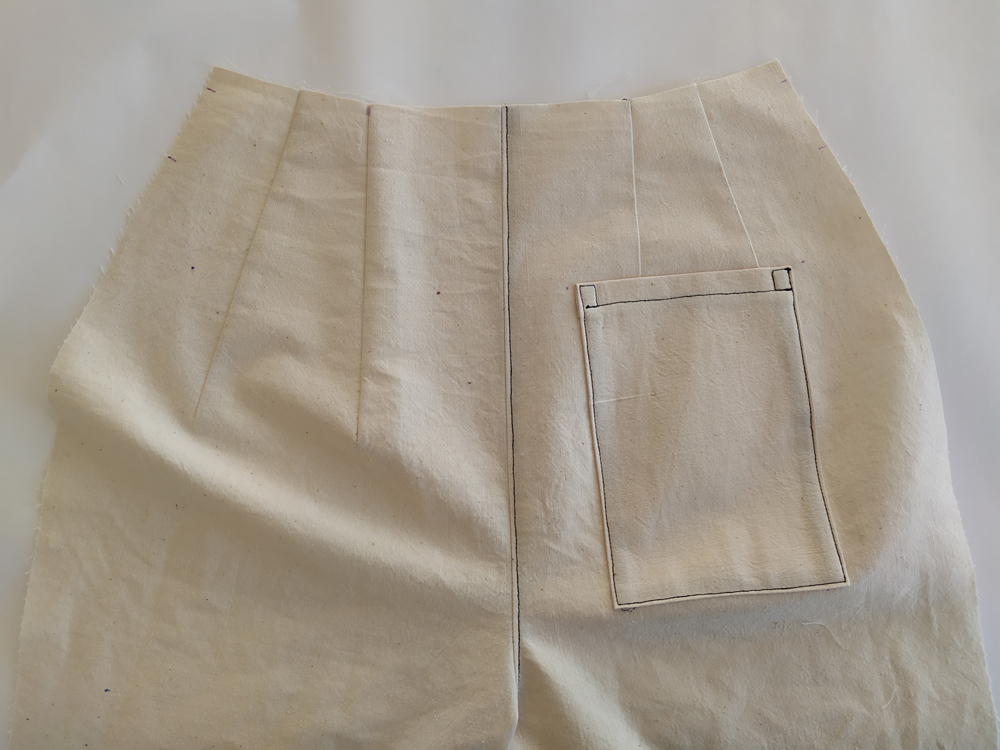 11 : Pin the pocket (I) on the right buttock(F), matching the corners to the pocket placement marks.
12 : Topstitch pocket in place 2 mm from the edges.
13 : Finish the edges of the pocket by sewing small squares to reinforce the top of the pocket.
Go to step 14 for view 1
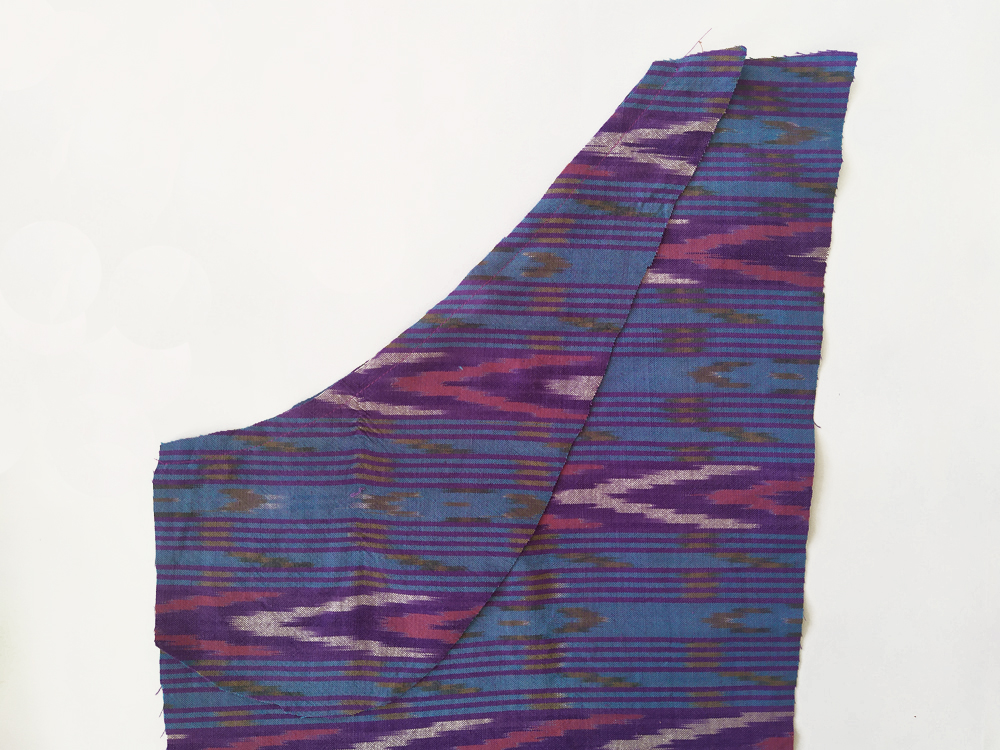
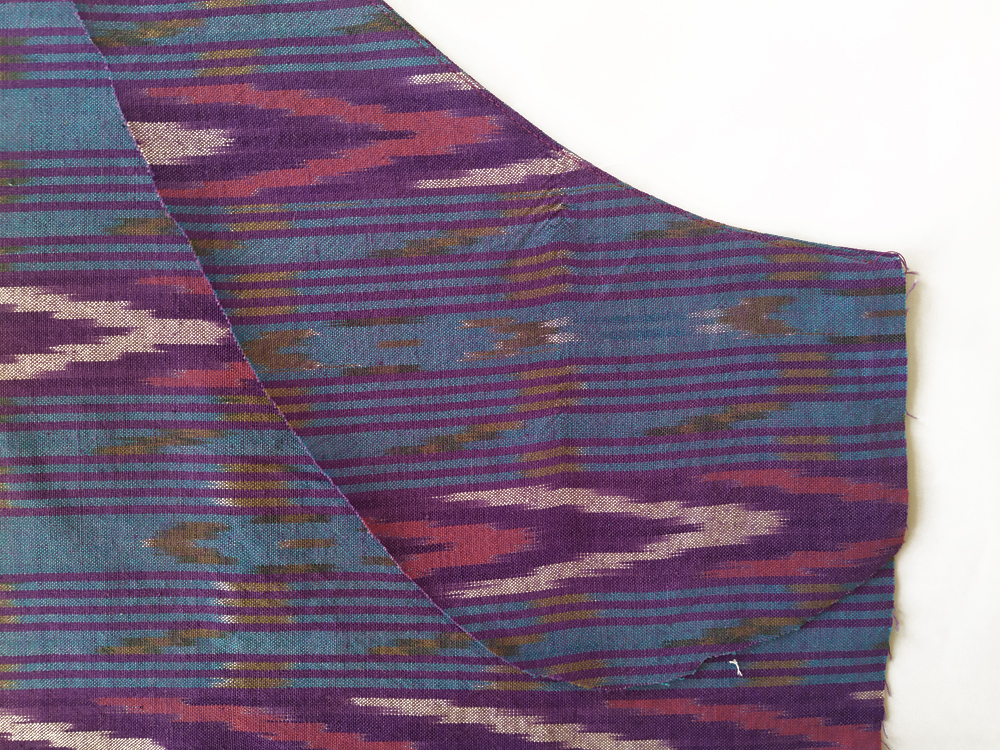
With right sides together, pin and sew the pocket lining (J) to the right front leg (G’). Press the seam towards the lining and understitch 2 mm from the initial row of stitches.
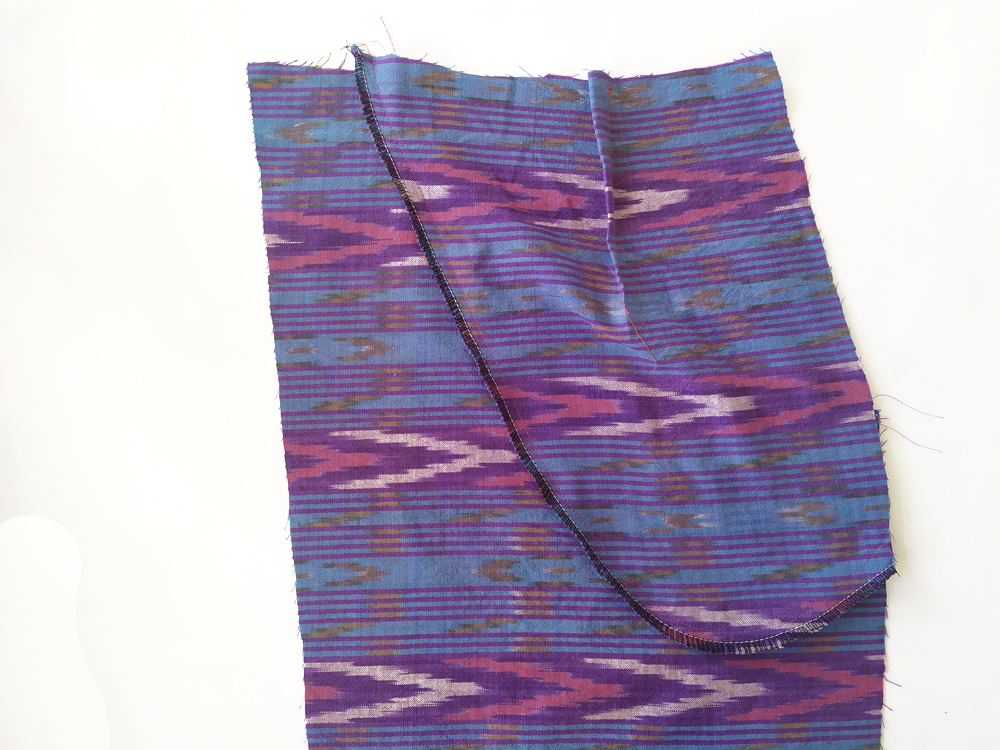
Flip the pocket lining (J) to the wrong side of the leg (G’). With right sides together, pin and stitch the pocket pouch to the pocket lining along the curve edge. Finish the seam.
Baste pocket edges to pants along the side seam. Topstitch the first 50 mm of the pocket opening.
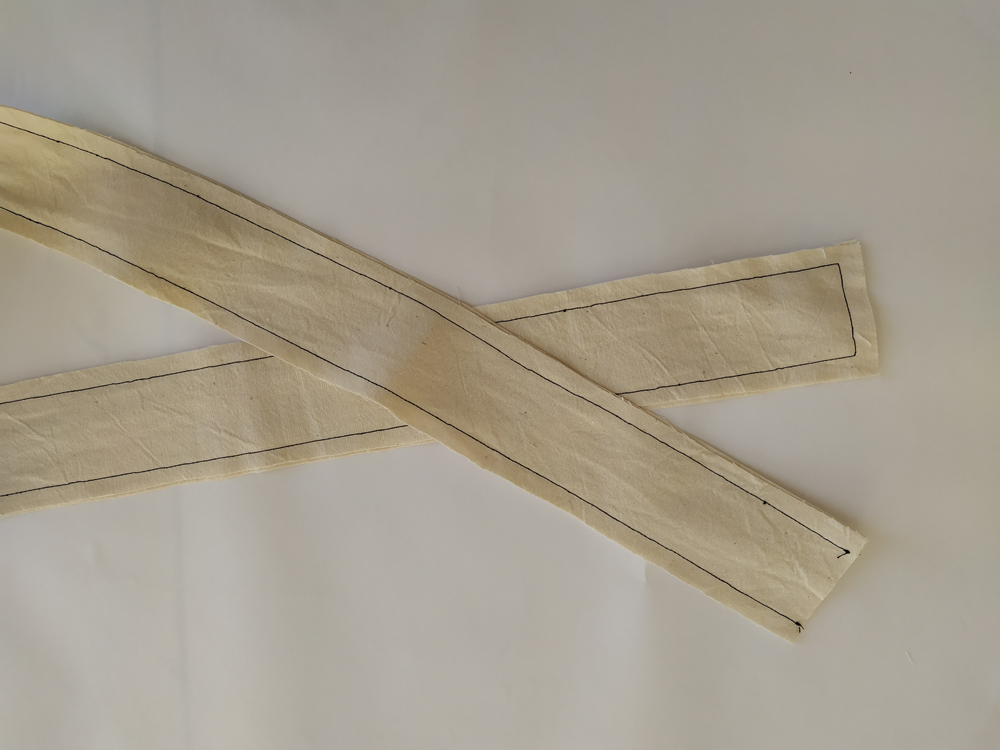 14 : With right sides together, pin and sew the long waist tie (M). Sew only three sides, leaving one of the short ends open.
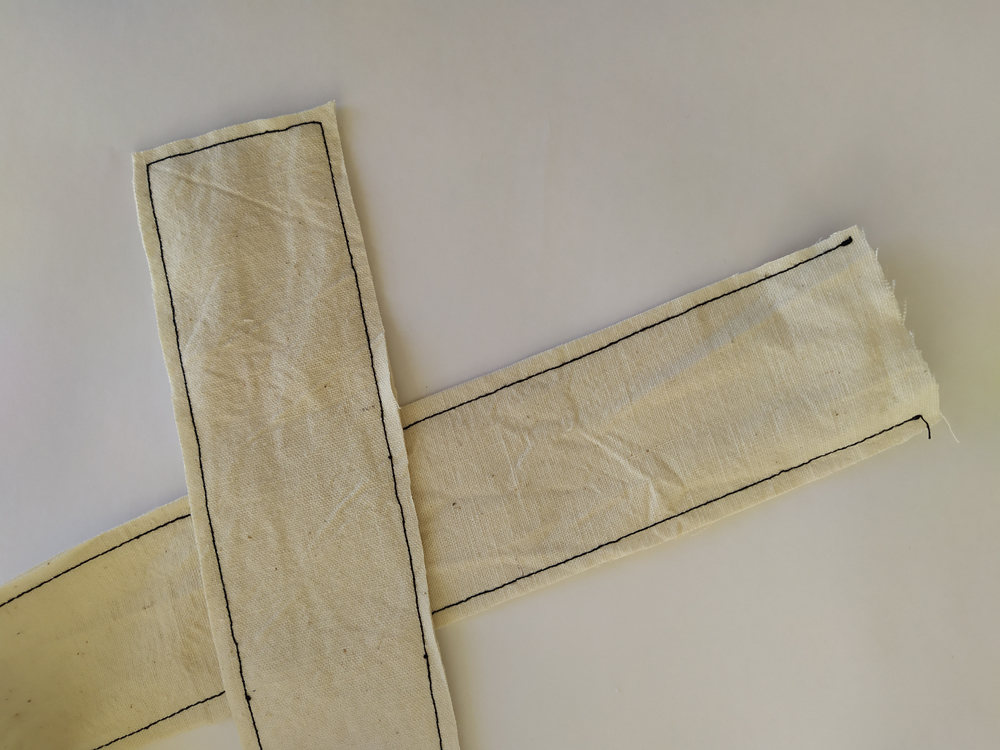 15 : Trim the seam allowance to 5 mm and clip the corners.
 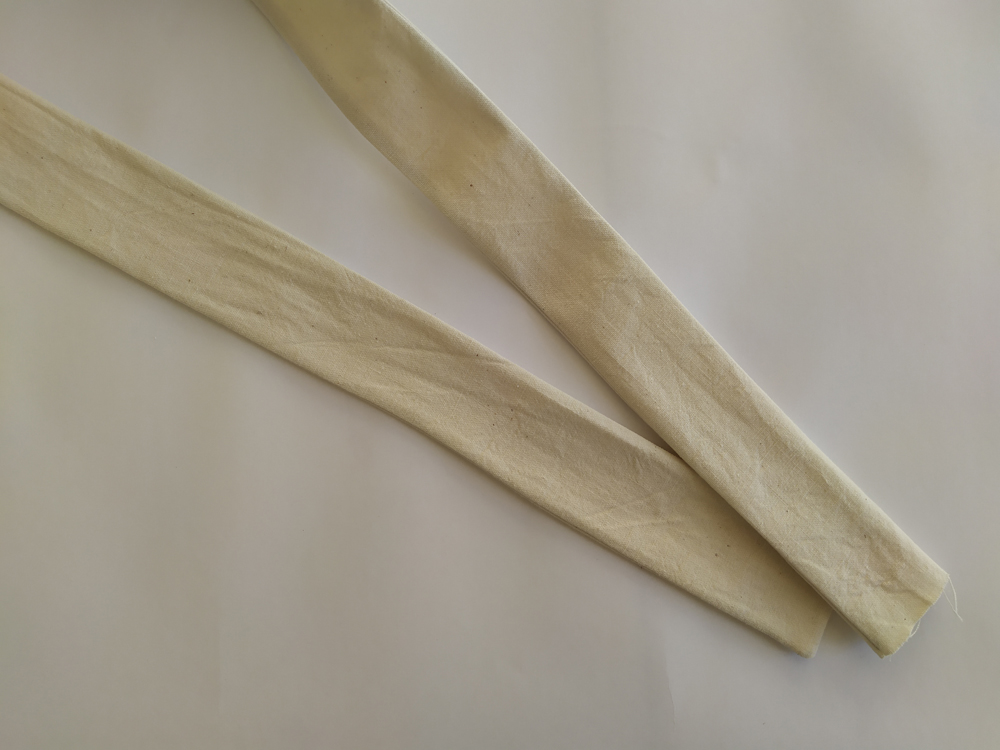 16 :Turn the waist tie to the right side and press.
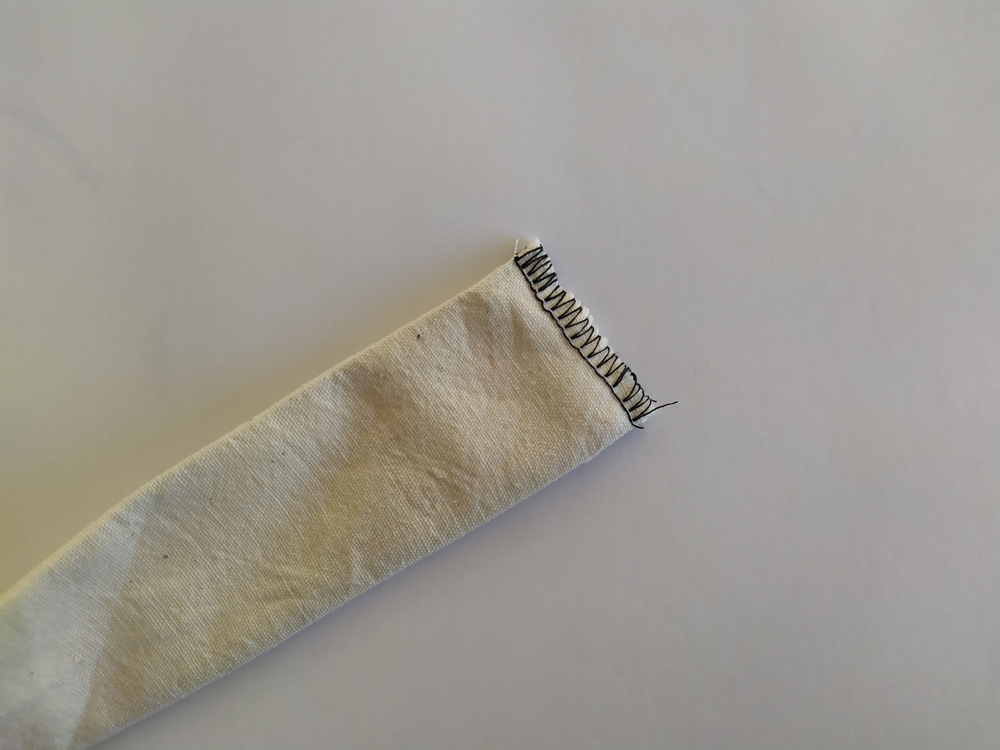 17 : Repeat steps for the short bands (N) and serge the short end that was left open.
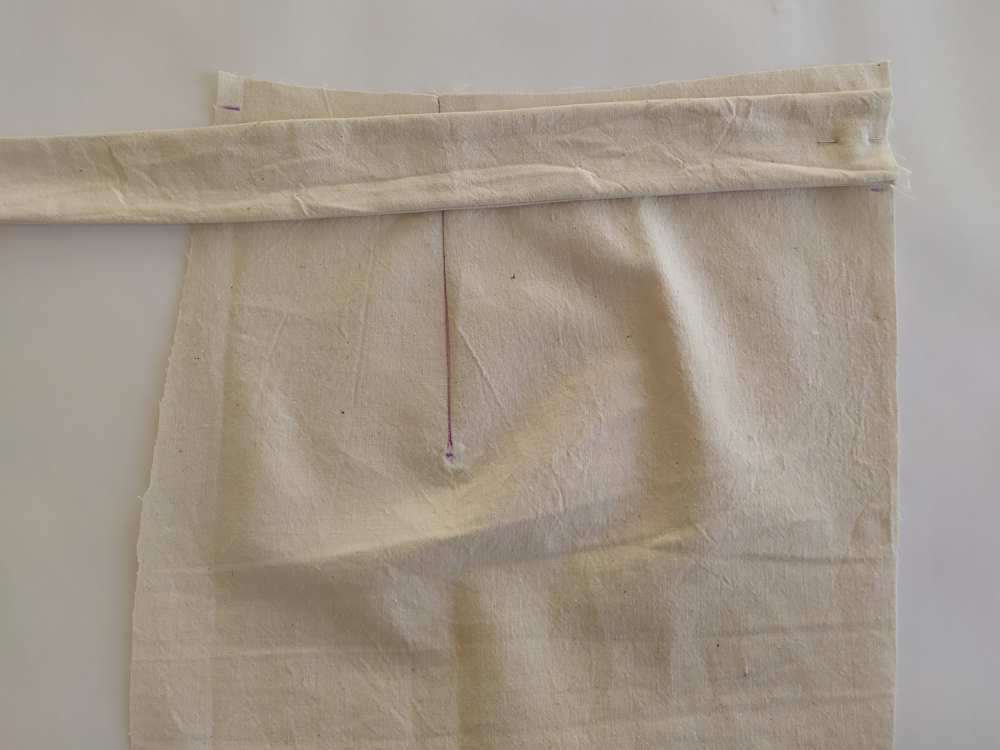 18 : With right sides together, pin the open end of the long waist tie (M) to right front leg (G or G’), matching notches.
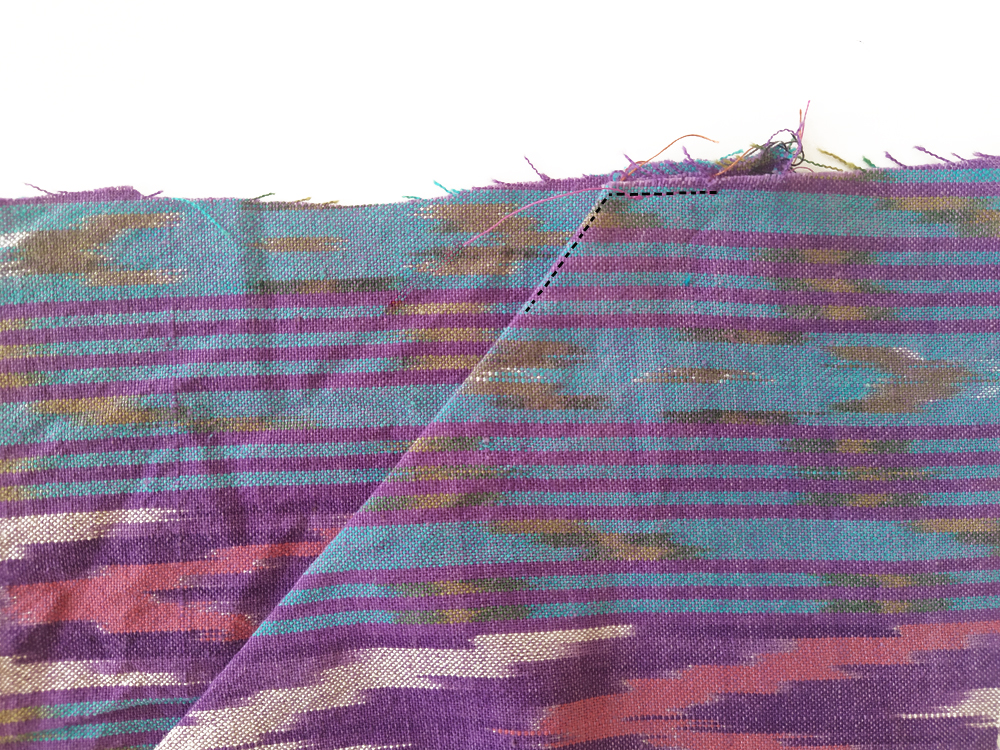
 19 : Sew the front center right piece (H) to the right front leg (G or G’). Stop sewing at the dot marking.
The long waist tie (M) should be sandwiched between the two pieces. Finish the edges and press the seam allowance towards the front center piece (H).
 20 : Finish the edges of the rise of front center right piece (G or G’) and front left piece (E).
 21 : With right sides together, pin the serge short tie end (N) to the front center right piece (H), using placement marks. The tie should protrude about 20 mm on (H).
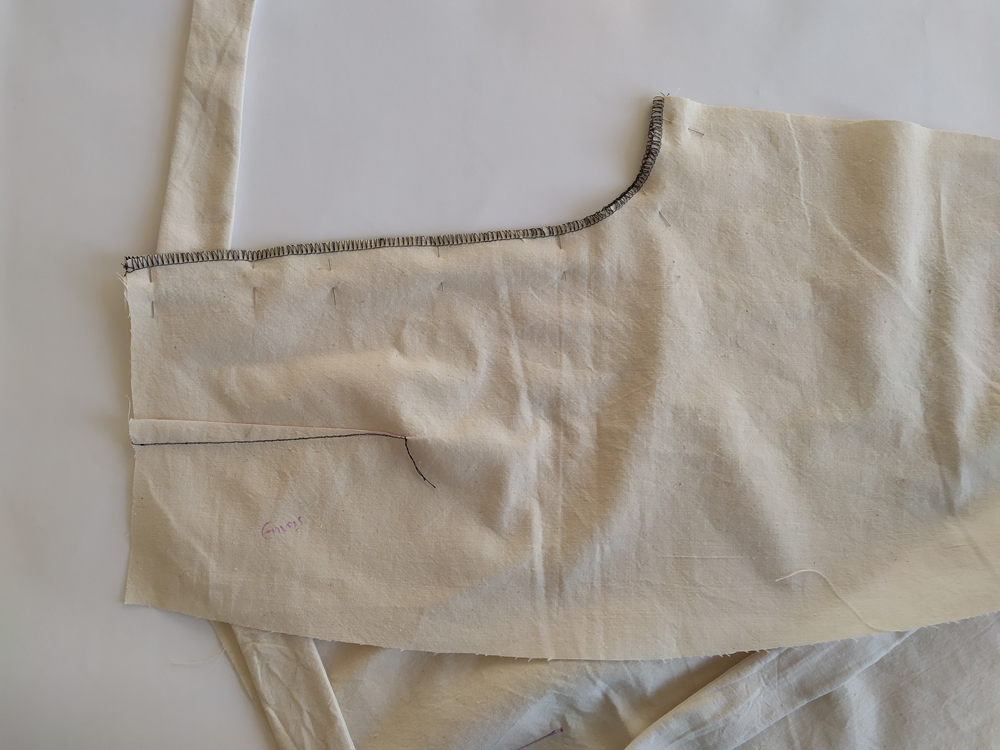
22 : With right sides together, sew the front left piece (E) to the front center right piece (G or G’) at the rise. The end of the tie will be sandwiched in the seam. Press seams towards (H) and topstitch.
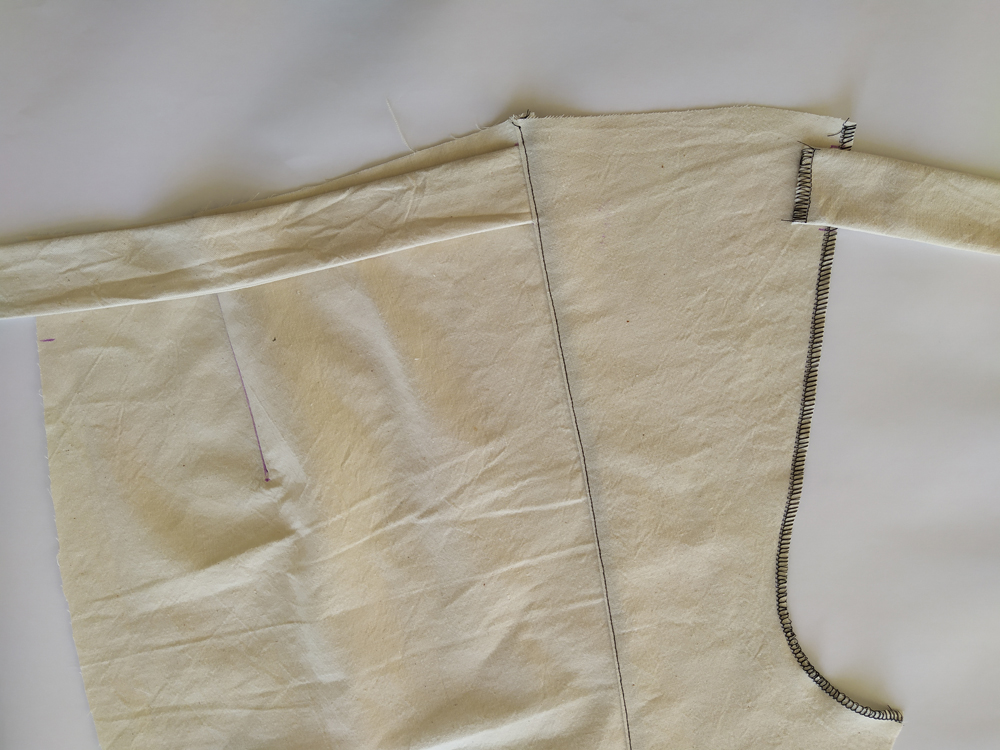
 23 : Finish the sides of the front and back.
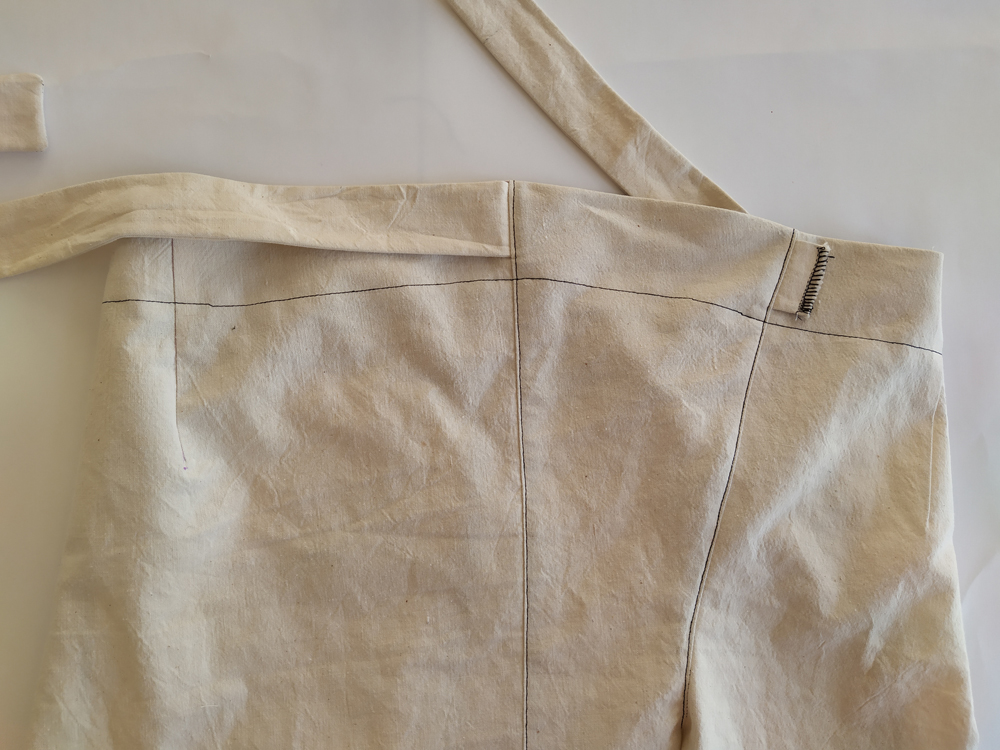
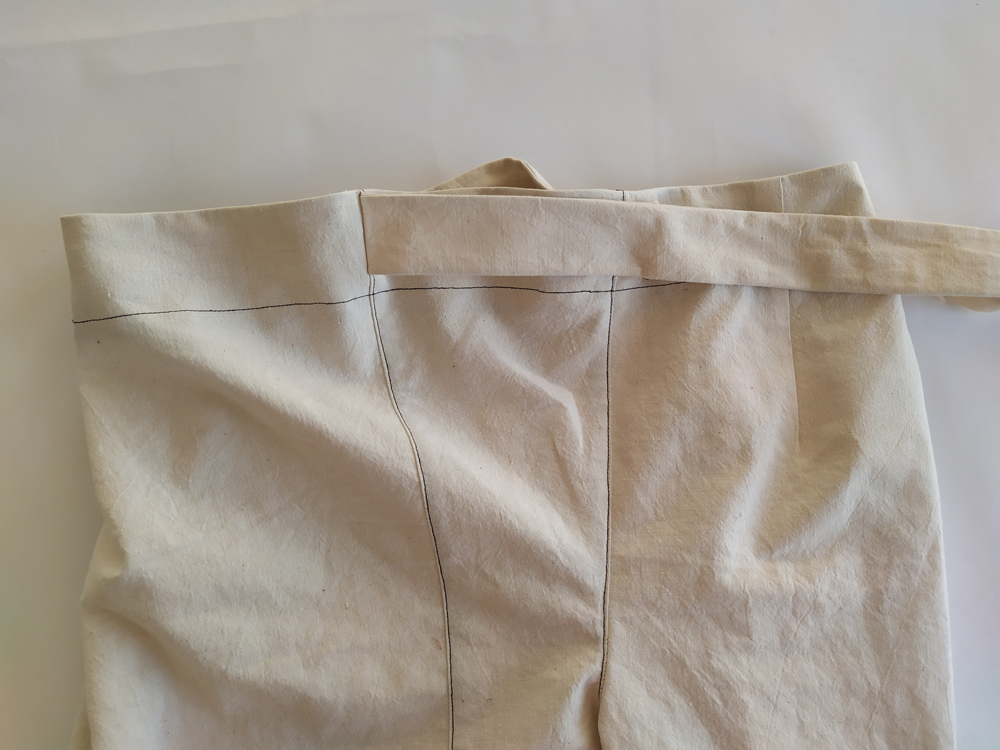
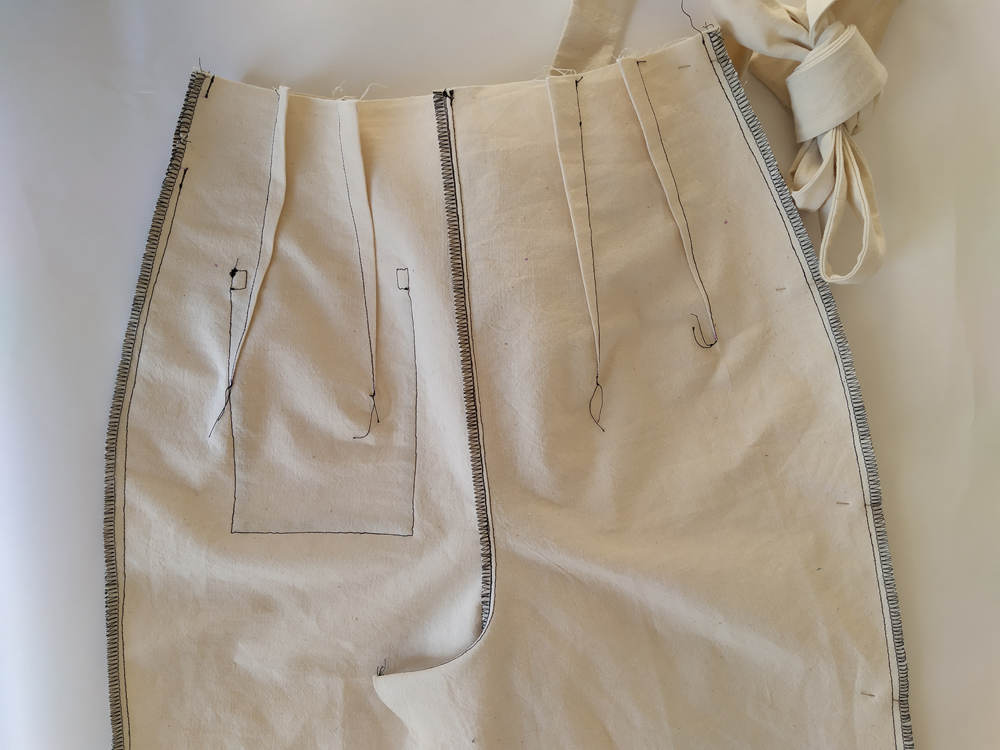 24 : With right sides together, sew the front to the back at the side seams. On the right leg only leave an opening by stopping and backstitching at the notches. The part in between the two notches must remain open in order to insert the waist tie later. Press the seams open.
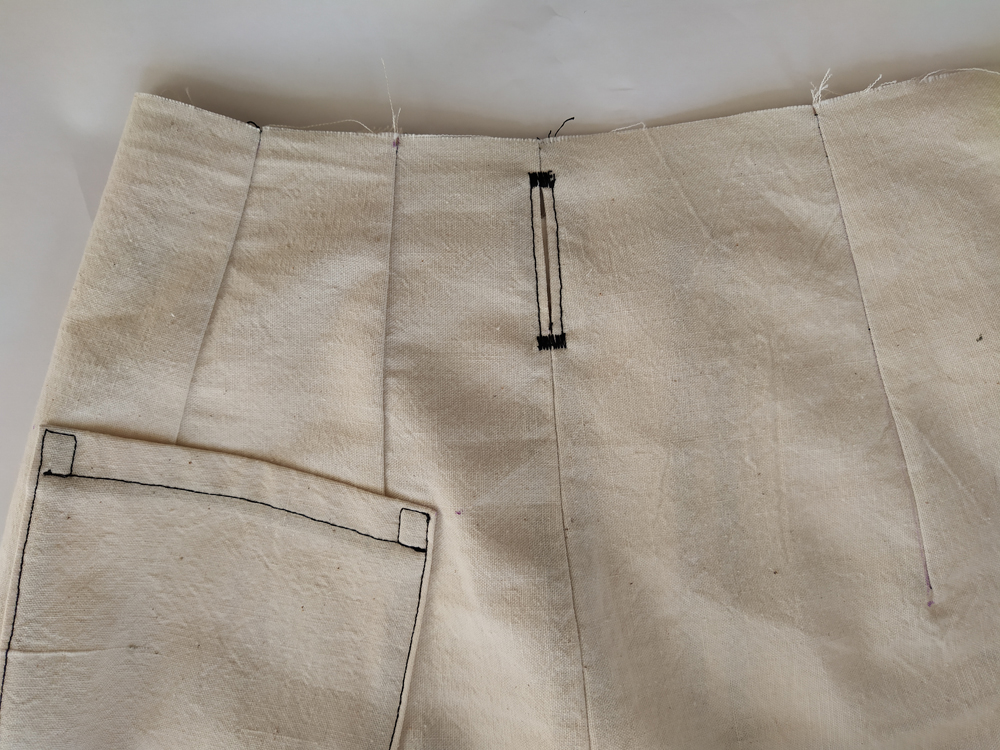 25 : Reinforce the tie opening on the front side of the pants. Sew a row of stitches 5 mm from all four edges. On the top and bottom of the opening sew a bar-tack, using a small, tight zigzag stitch.
 26 : Pin and sew the front to the back at the crotch. Finish the seam and press towards the back.
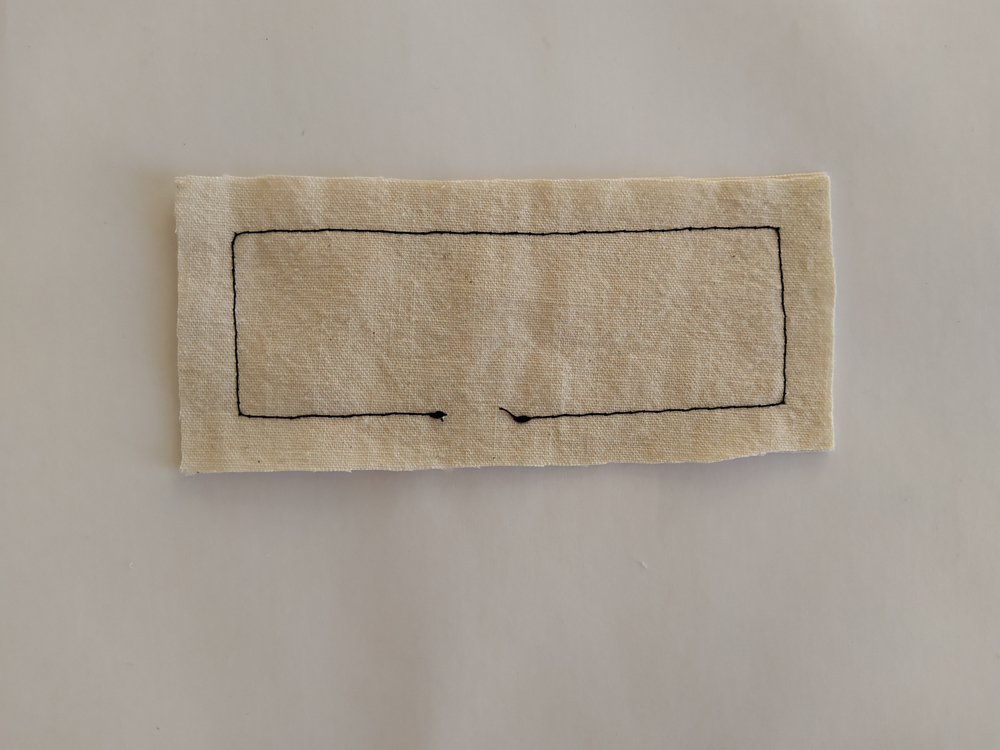
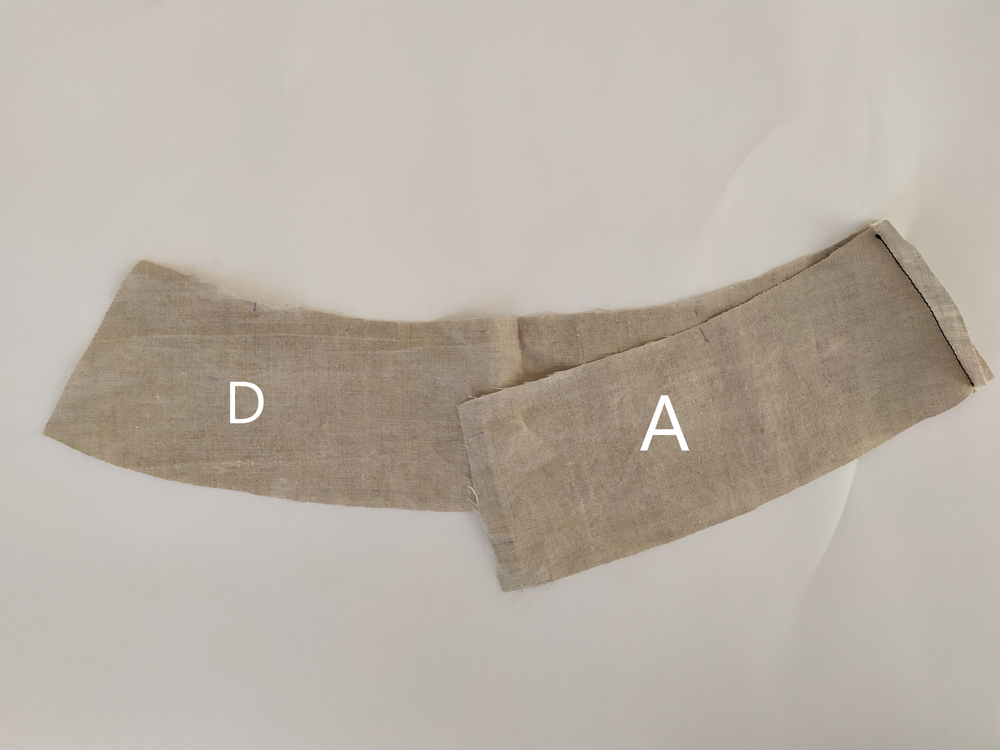 27 : Mark the facings with tailor’s chalk or a disappearing ink marking pen:
A = front left
B = middle front right
C = front right
D = back
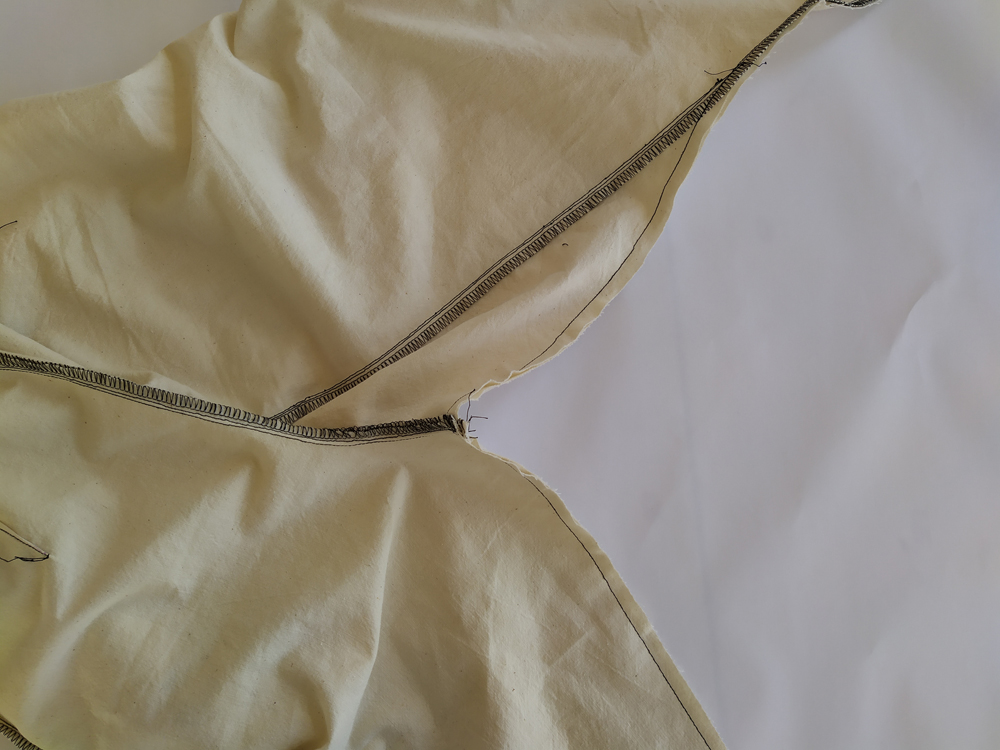
With right sides together, sew the back facing (D) to the front left facing (A) at the short end. Press seam open.
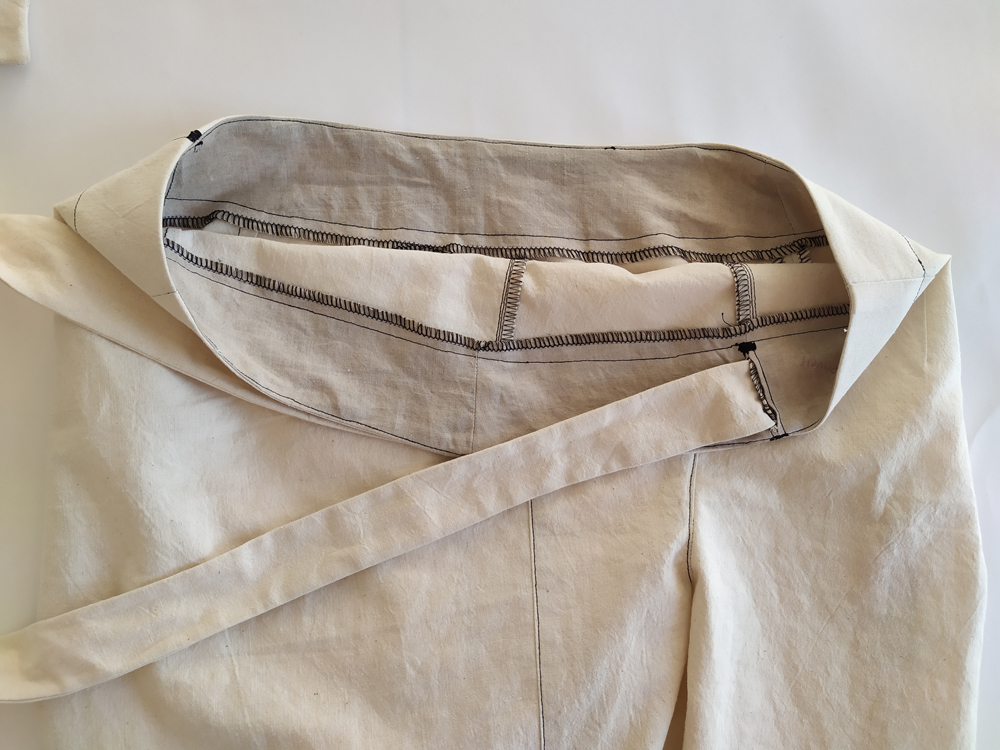
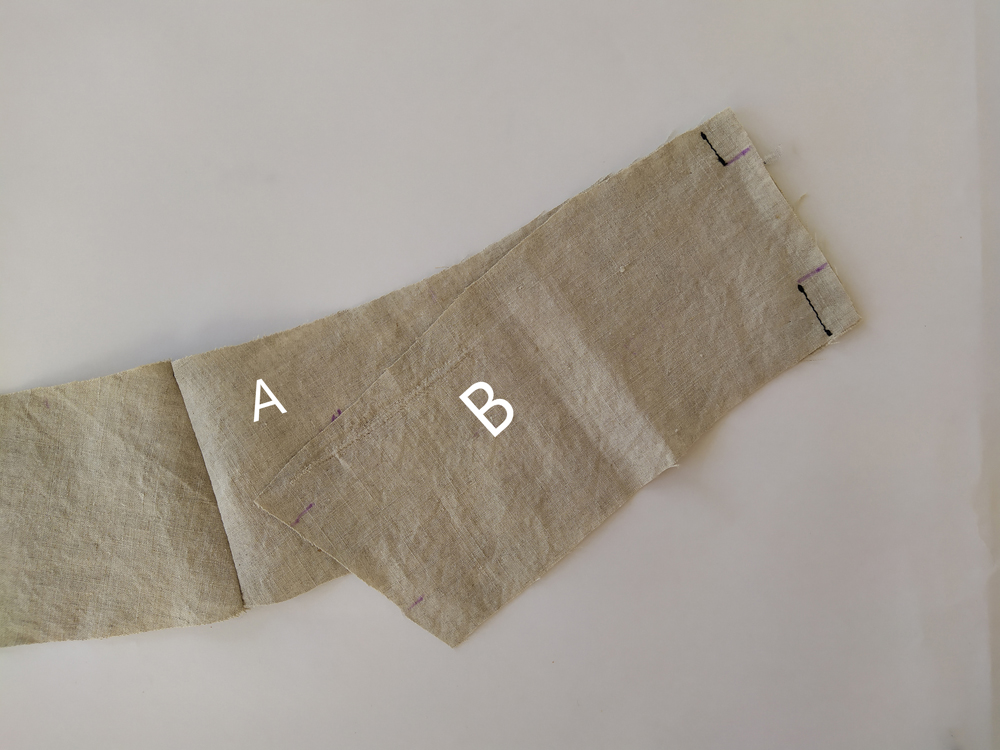 28 : With right sides together and matching notches, sew the front left facing (A) to the middle front right facing (B). Leave an opening by stopping and backstitching at the notches.
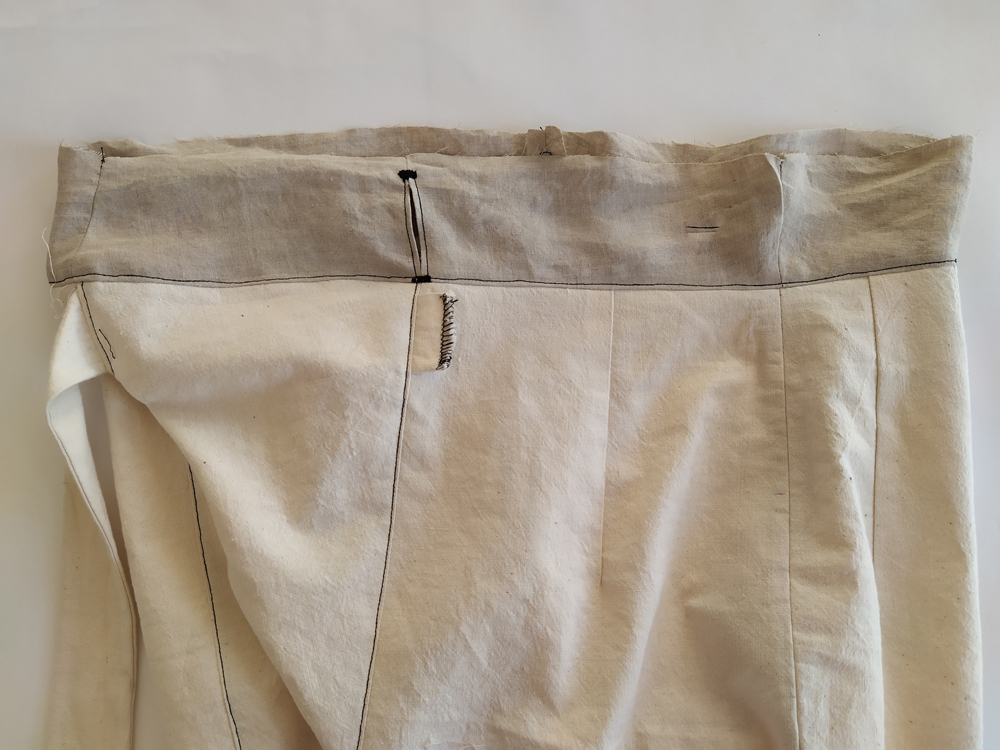
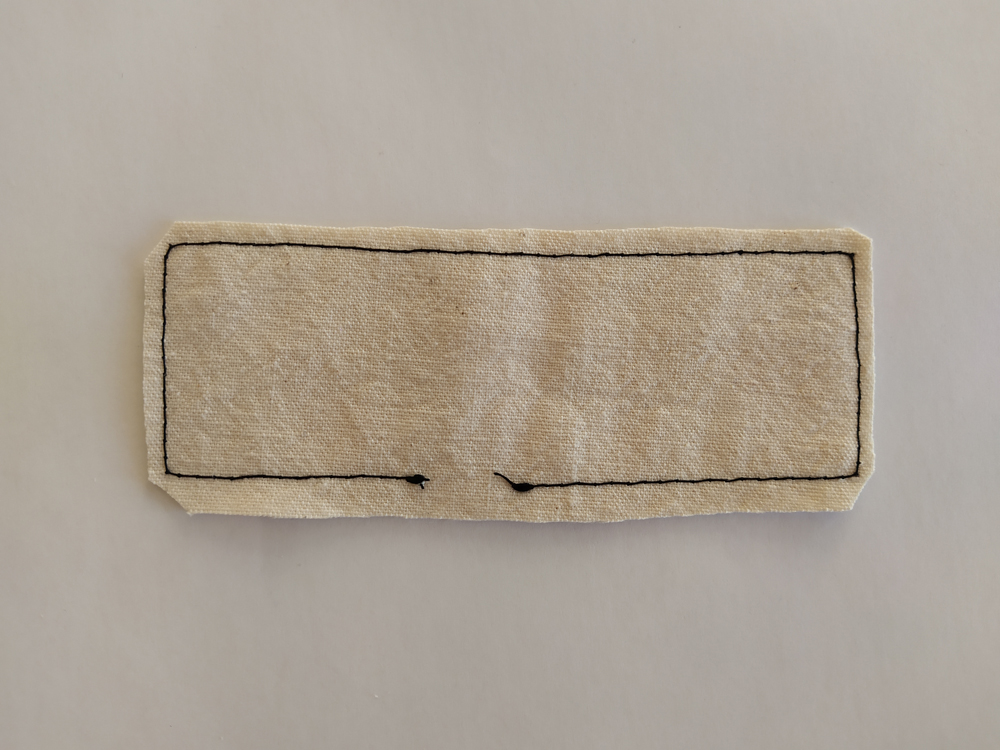
 29 : Reinforce the tie opening on the front side of the facing. Sew a row of stitches 3 mm from all four edges. On the top and bottom of the opening sew a bar-tack, using a small, tight zigzag stitch.
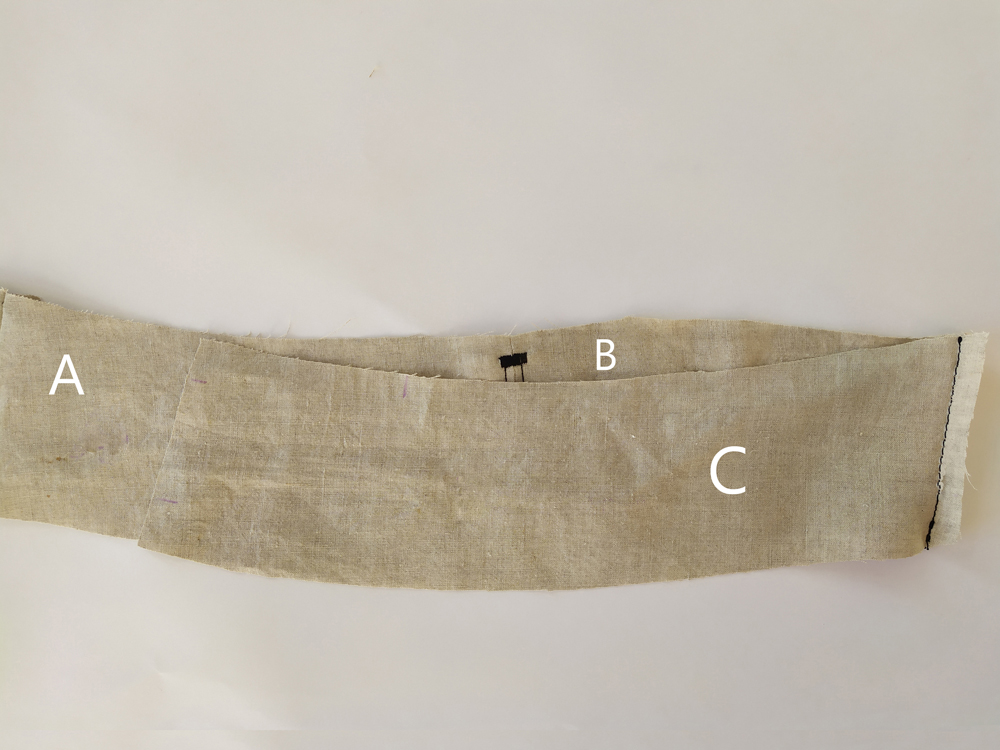 30 : With right sides together, sew the middle front right facing (B) to the front right facing (C) at the short end. Press seam open.
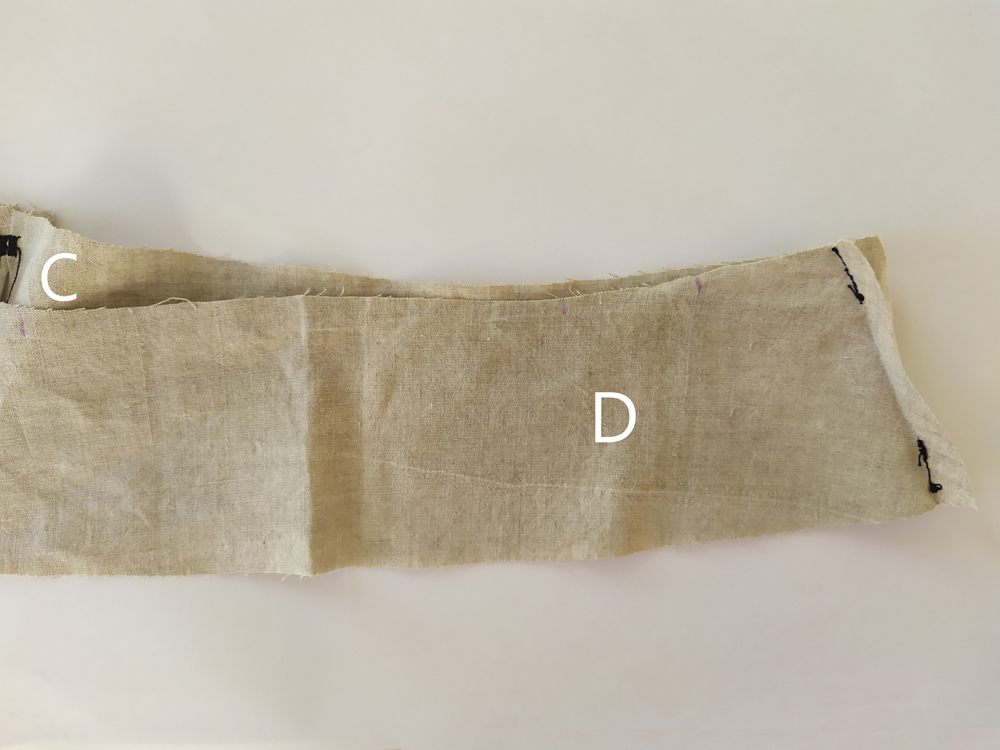 31 : With right sides together, sew the front right facing (C) to the back facing (D). Close the facing, leaving an opening at the notches. Reinforce the tie opening on the front side of the facing. Sew a row of stitches 3 mm from all four edges. On the top and bottom of the opening sew a bar-tack, using a small, tight zigzag stitch.
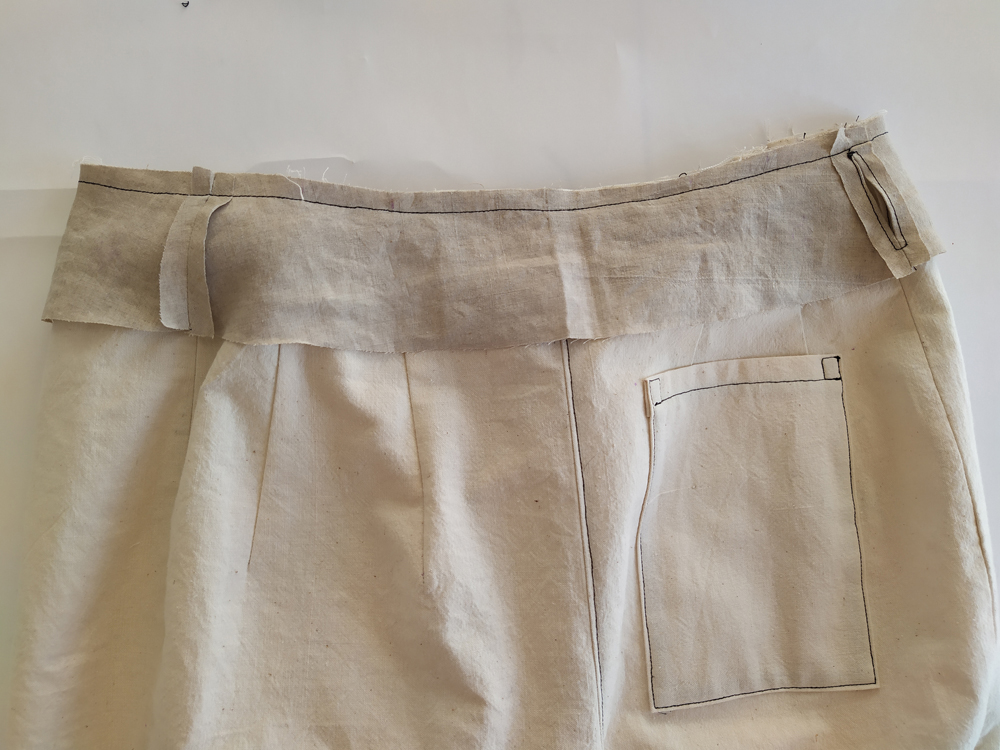 32 : With right sides together, pin and sew the facing to the pants, lining up all seams.
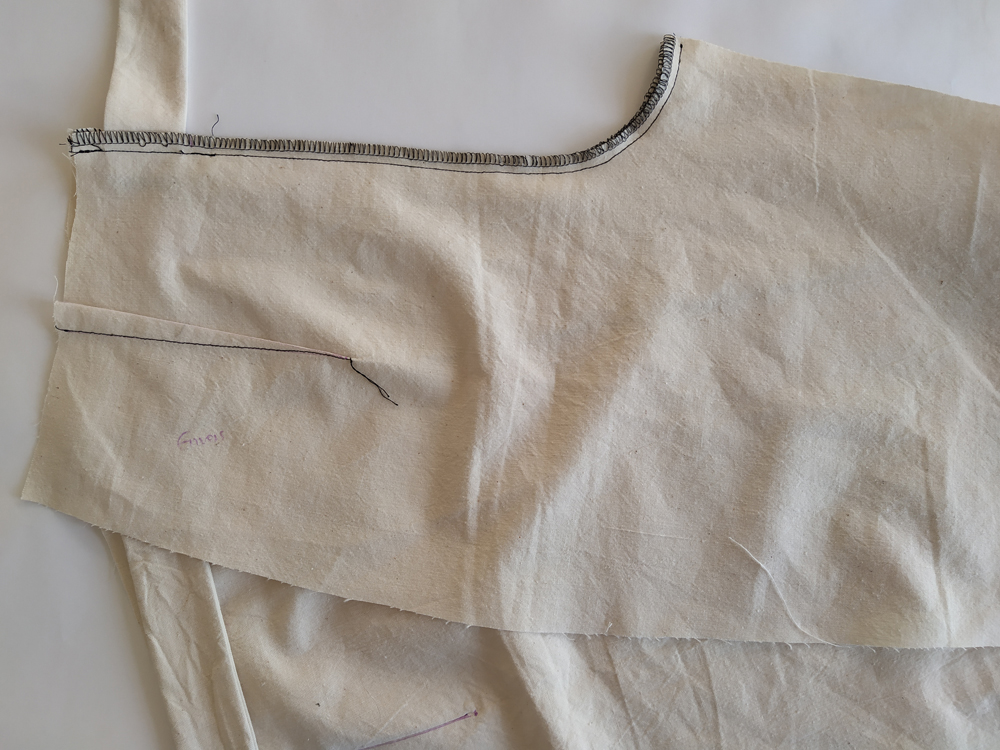
 33 : Press the seams towards the facing. Understitch 2 mm from the original row of stitches.
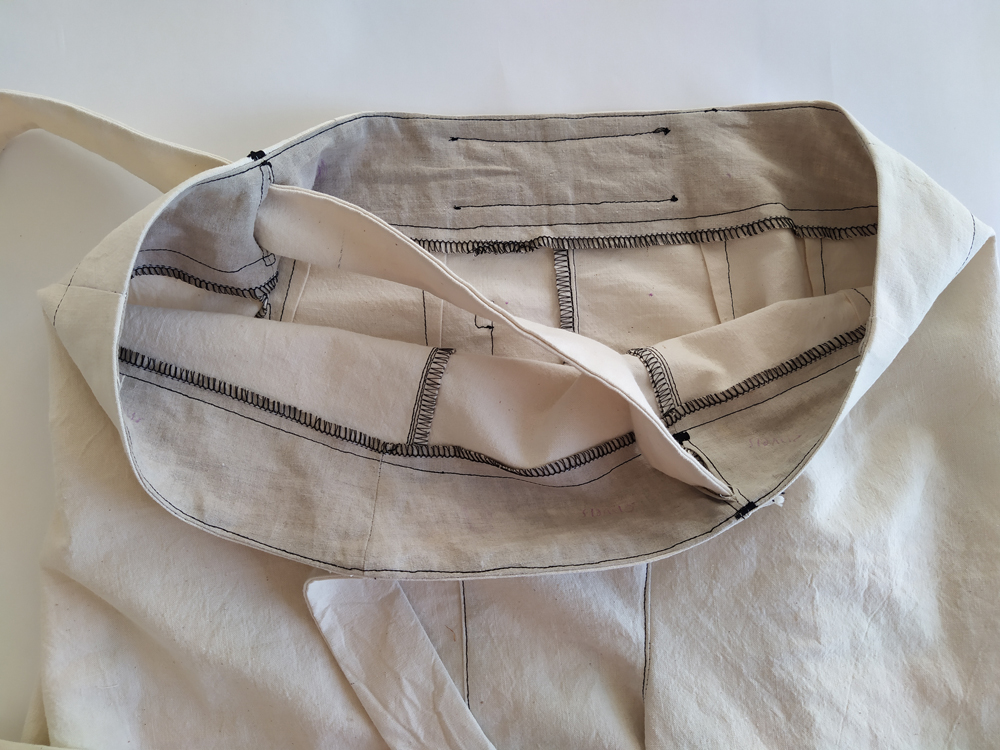
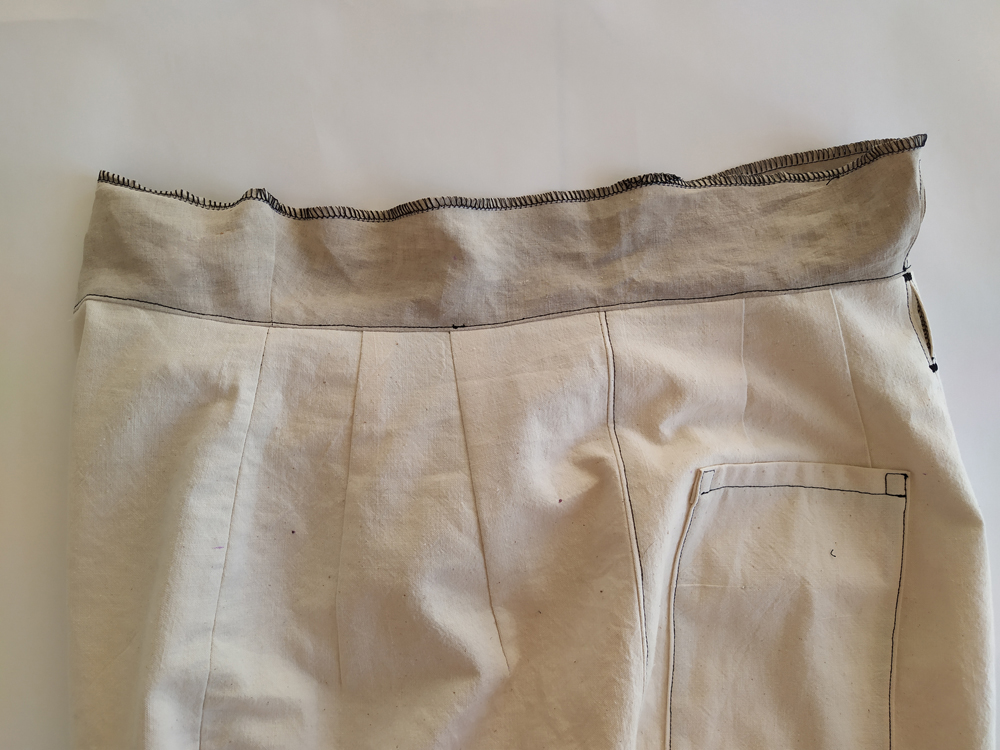 34 : Finish the bottom edge of the facing.
35 : Turn the facing towards the inside of the pants and thread the short waist tie (N) through the opening. Press then stitch the lining into place, 55 mm from the waist edge, being careful not to catch the waist ties.
36 : With right sides together, pin and sew the two belt loops (L) together. Leave an opening of about 20 mm.
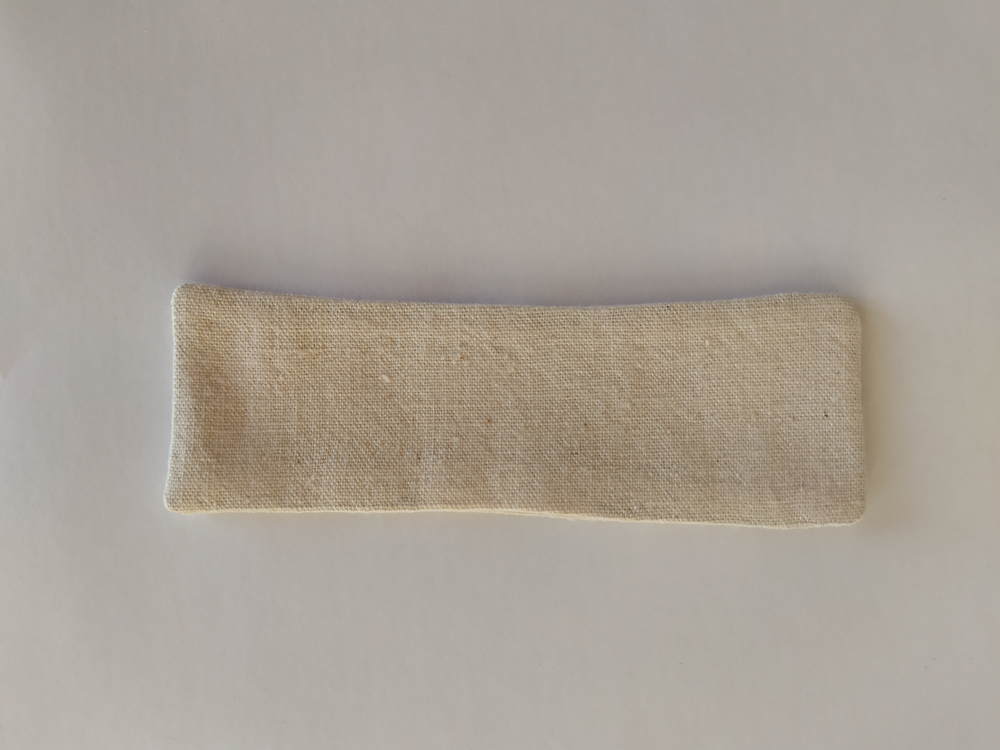 37 : Trim the seam allowance to 5mm and clip the corners. Turn the belt loop to the right side using the opening you created in step 36. Press.
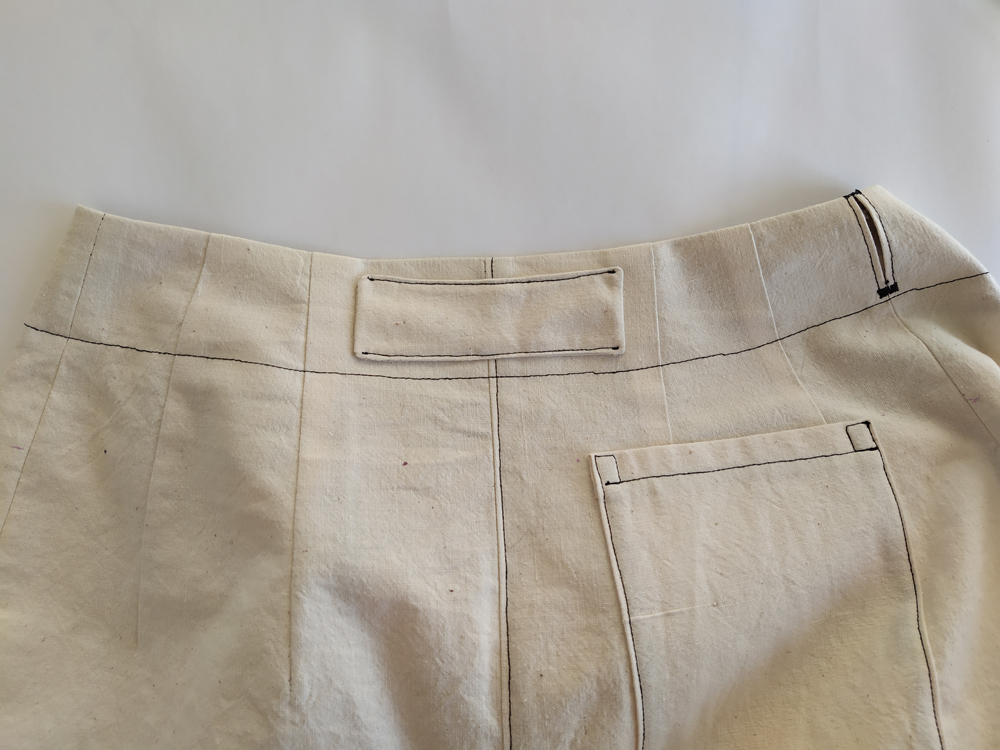
38 : On the right side of the pants, center the belt loop in the waistband along the center back seam. Pin and topstitch into place along the long edges.
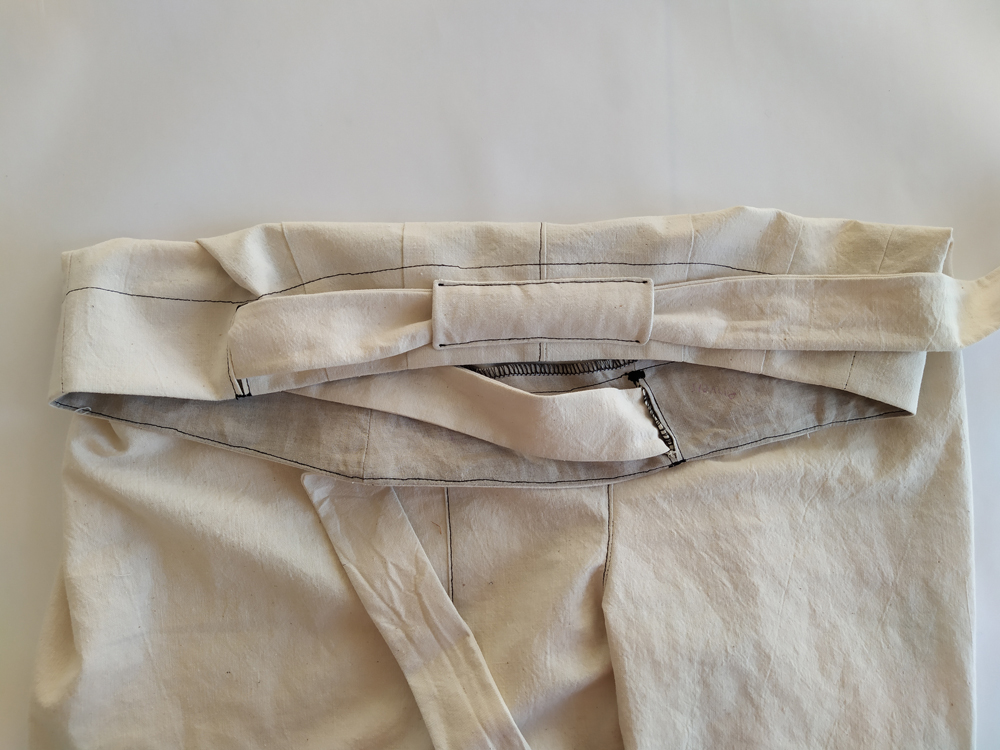
39 : Thread the short waist tie through the opening on the right side of the pants. Next, thread it through the back belt loop. It may help to use something like a pen to pull the tie through the loop.
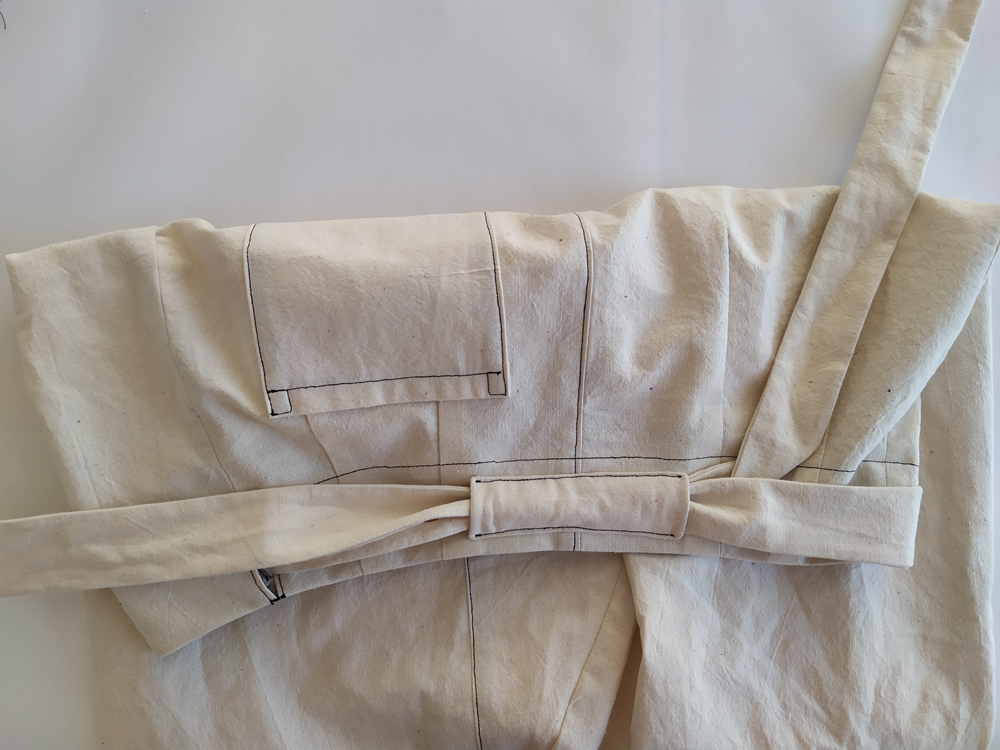 40: Thread the long waist tie through the back belt loop.
Try on the pants to ensure proper fit. The hem allowance is 40 mm, and the garment is drafted to fall above the ankle. If needed, adjust the length of the inseam. You can hem you pant or roll-up the bottom of the leg according to your preference.
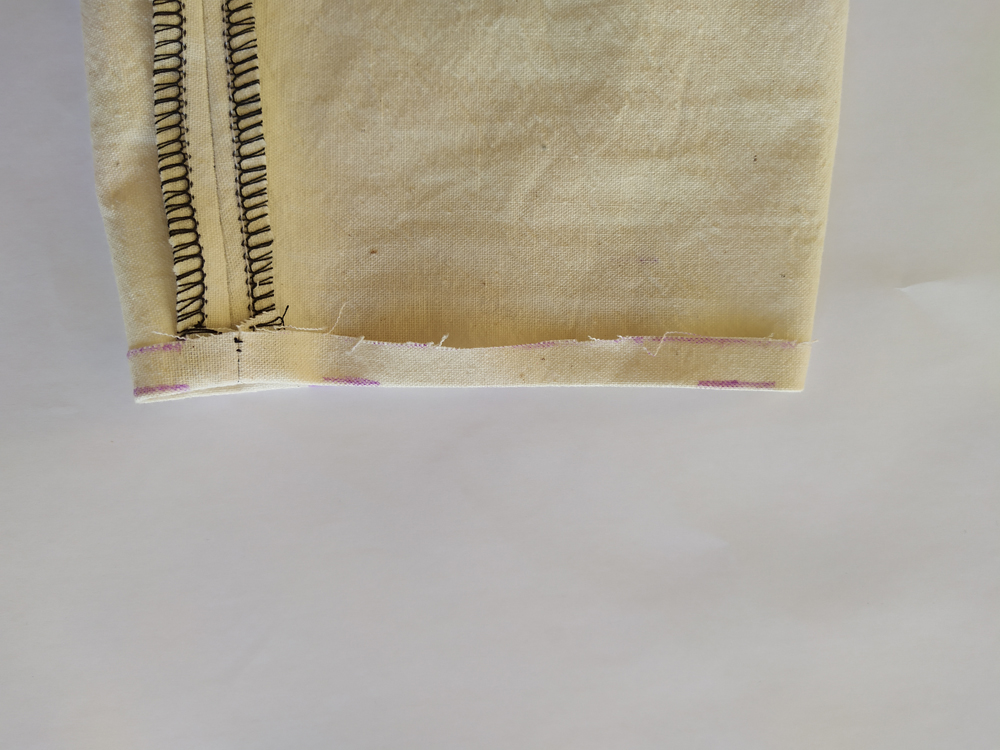
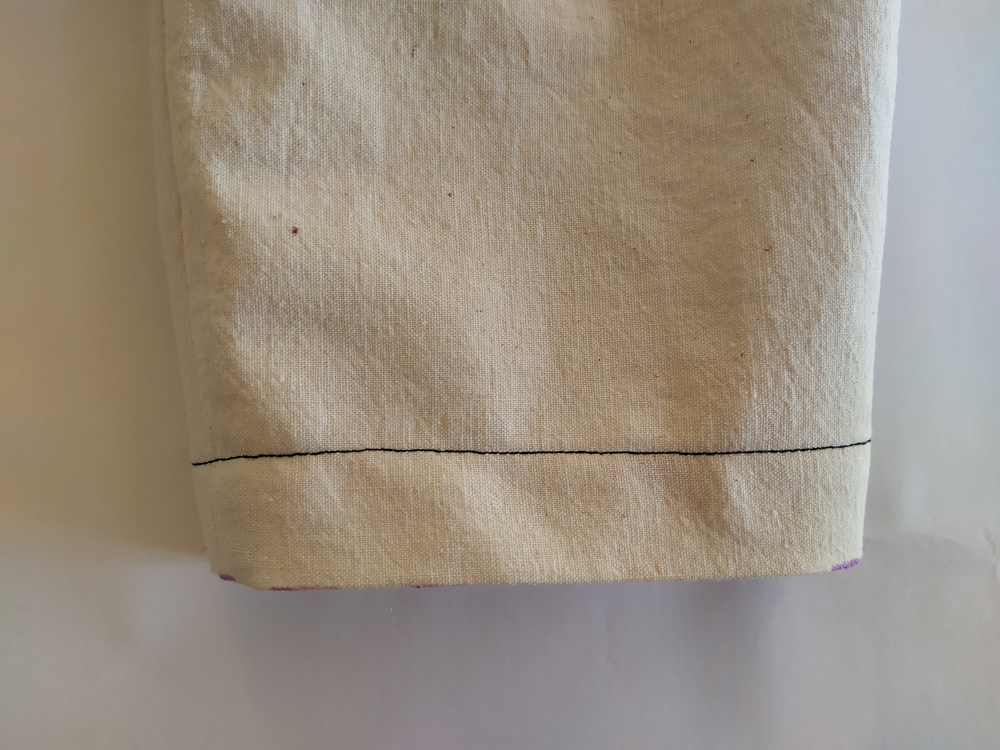 41 : Press bottom edge of the fabric 10mm to the wrong side. Turn the pressed edge under 30mm, press again and edgestich in place.
Learn how to tie the Papao pants by watching the vidéo below
Linda R
Merci de m'indiquer le numéro de l'étape que vous ne comprennez pas.
Bonne journée,
Raphaëlle
je ne comprends pas ce qu'il faut faire avec le bord droit de la pièce H (celui du côté de l'enfourchure ). Faut-il un repli?
merci