La salopette Partner - guest blogger

Je suis ravie de partager avec vous une nouvelle assez excitante. Je commence dès aujourd'hui à inviter des bloggeuses qui seront rémunérées pour écrire un article sur le journal de Readytosew.
Mon intention a toujours été de montrer mes modèles sur des silhouettes différentes et dans une variété de tissus. Malheureusement, gérant toute seule cette entreprise, je ne peux pas me permettre de coudre une multitude de prototypes et de payer / gérer plus de deux modèles par shooting. C’est pourquoi j’ai décidé de commencer le projet d’inviter des bloggeuses à coudre mon dernier modèle et écrire un article détaillant leur expérience pour le blog de Readytosew.
Aujourd'hui, nous accueillons Tino (@sewstartino) sur le journal. Elle a cousu la salopette Partner et vous détaille cette expérience ci-dessous. L'article est en anglais uniquement mais sera traduit d'ici quelques semaines en français quand ma traductrice sera de-nouveau disponible.
![]()
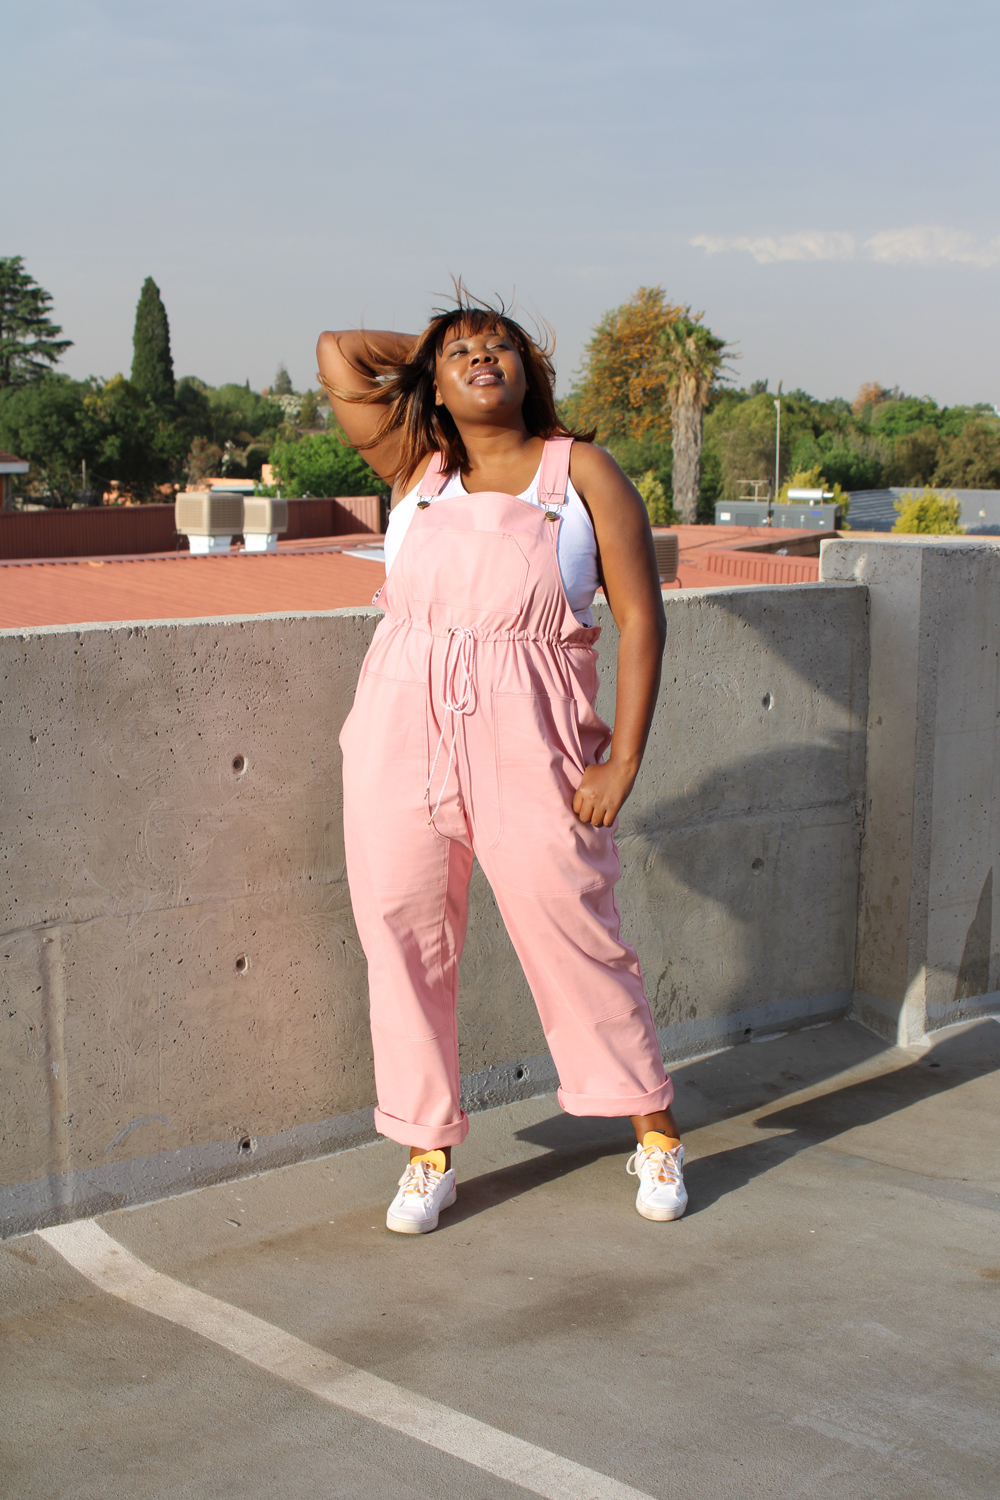
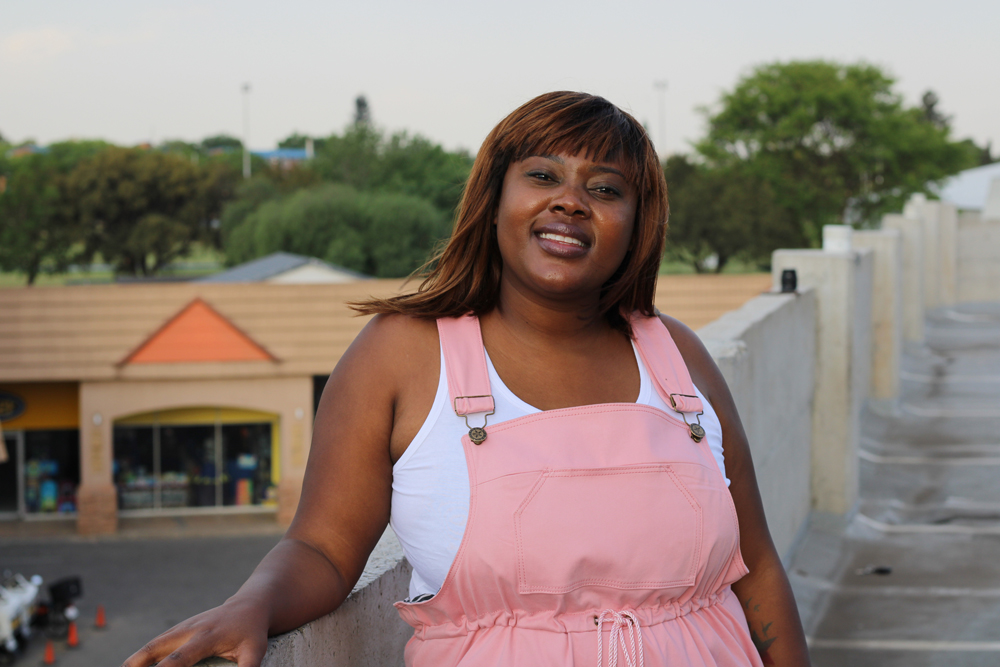
Hello sewing friends, I'm Tino from sunny Johannesburg, South Africa. I am so excited to write about my experience with the Partner Dungarees, something about dungarees that I have such fond memories of wearing as a child. I guess these are an oud to my childhood, even better they are in my favourite colour – pink. Sewing dungarees was a first for me, sewing something close to a pair of jeans was a first for me but I do like a little sewing challenge now and then. I started sewing the Partner overalls after sewing a couple of knit projects, as you can imagine, knits are quick and easy in general. So, I can say I was ready for something a little challenging or a more involved project. This was my experience, my wins, hardships and do I even like these pink dungarees?
![]()
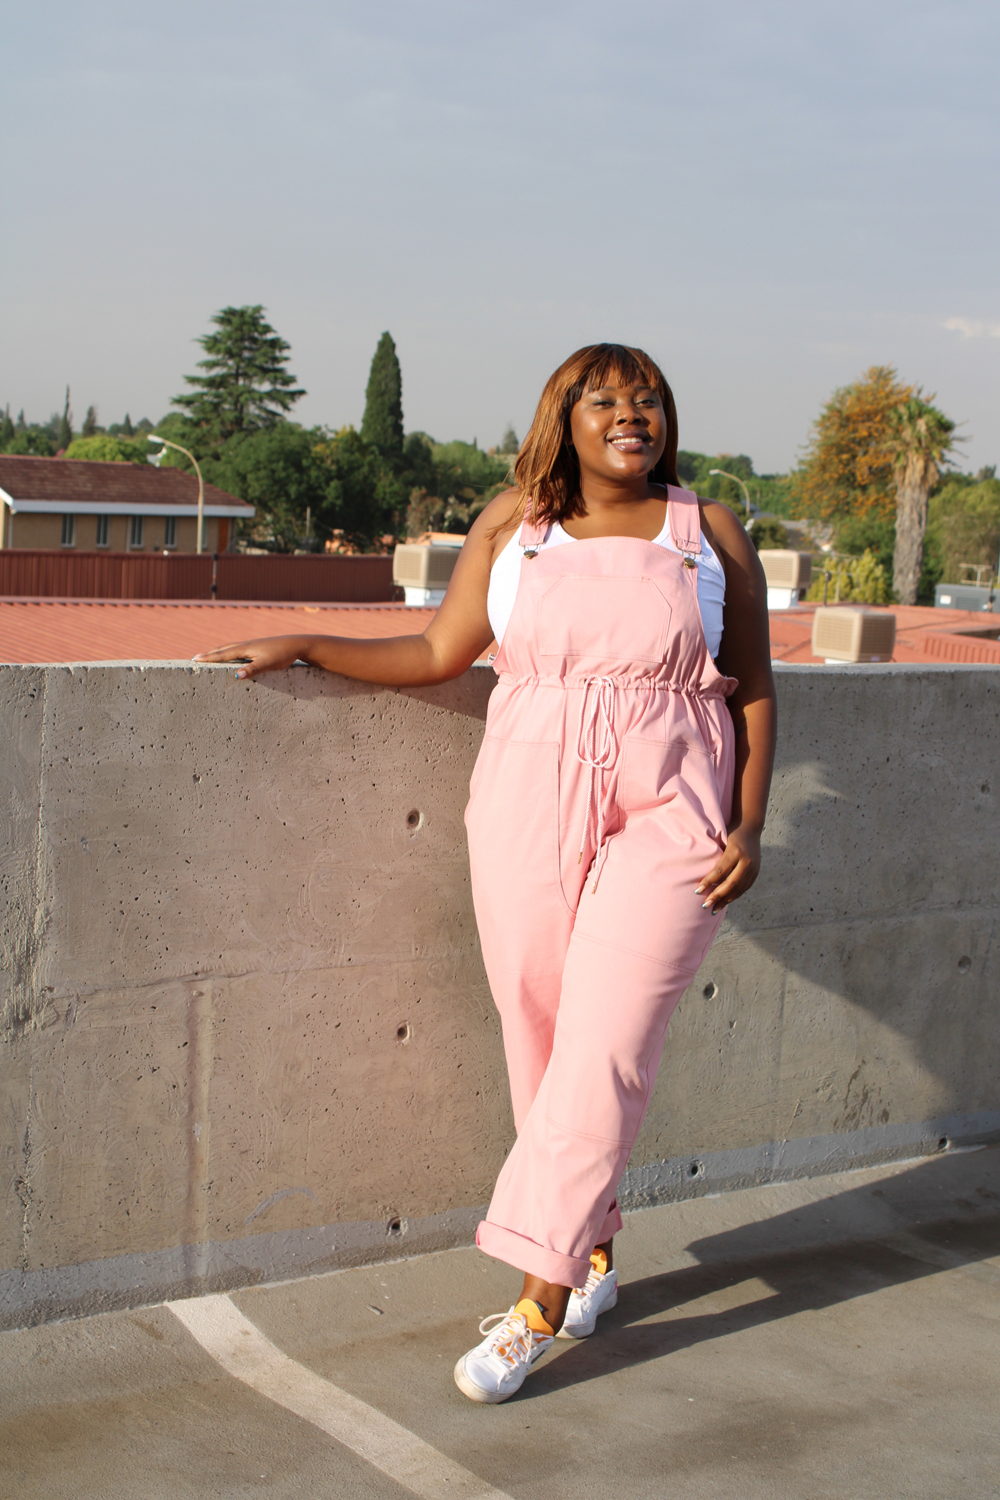
Pattern and Sizing
It is so nice making a pattern that the measurements are true to size, based on the size chart given, I knew I had to grade between sizes. I will mention that this is a well-drafted pattern and pieces aligned so well. My measurements are:
- Bust – 107 cm
- Waist - 92 cm
- Hip – 124 cm
Based on these measurements I fall within the Range 2 sizing and would have to grade between sizes 46, 47 and 49. Because the waist is significantly oversized and cinched by the cord, I cut a size 46 in the bust and grade it to a 49 at the waist and hip. There are numerous pattern pieces, so grading between 2 sizes made it easier to keep track of the adjustments that I was making.
![]()
 Fabric and Notions
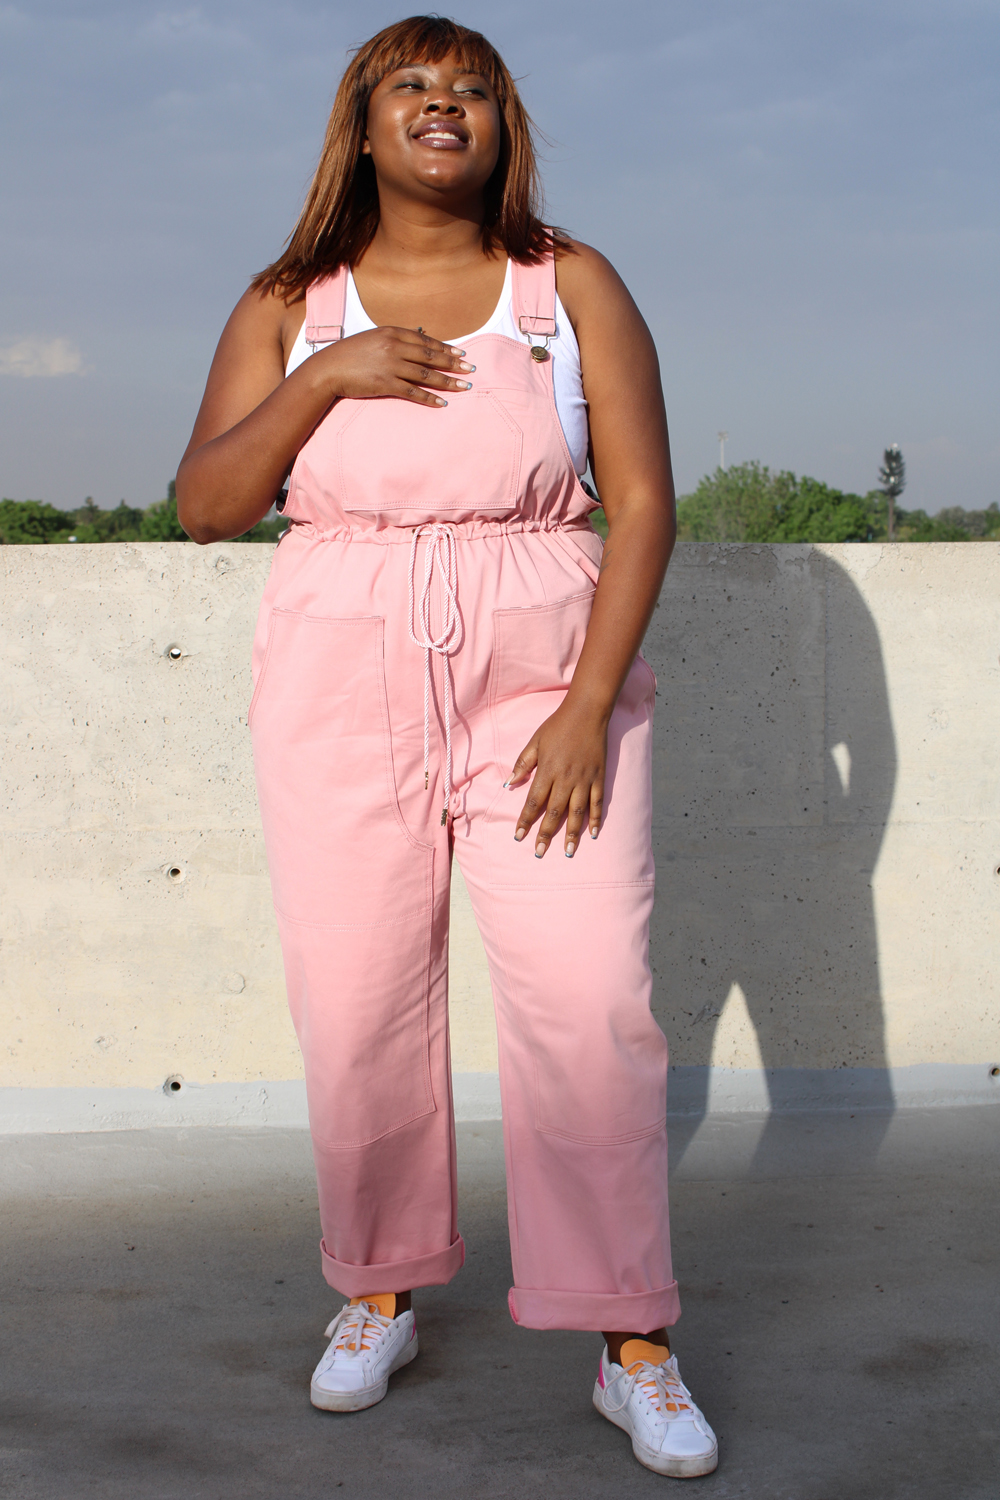
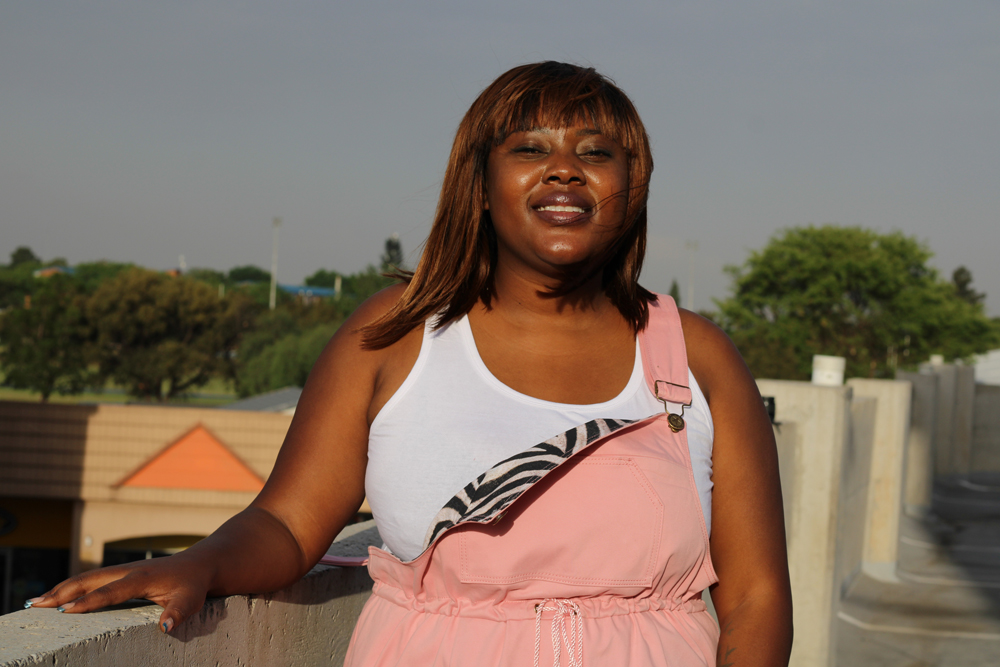
I will admit, after going through the notions list, I got a little worried. I knew I was entering new territory here, but I was also excited because I would be learning lots of new things. In general, finding the overall hardware was easy, I struggled to get the adjustable sliders and when I did finally find them, they were silver, and I had already bought bronze buckles, buttons and grommets. A sew sister came to my rescue and suggested I spray paint them bronze, such a brilliant but simple idea. I did exactly that, I had leftover spray paint from when I spray painted my pegboard frame in my sewing room. I think they look great and turned out well. I would recommend sourcing the hardware all from one place and getting everything before starting the project. For a person that loves shopping for fabric like me, I was surprised that I'd never shopped for Denim before and that was an experience, there's just so much of it. I found mostly very dark denim fabric and it just wasn't inspiring to me. The person helping me showed me other bottom-weight fabrics and when we got to the cotton satin spandex, it just fell in love with the weight but how soft it also felt. It got me excited to start the project. The fabric has a 5% stretch and it was perfect, this is recommended for the range 2 sizing. I used a zebra print quilting cotton from my stash as a fun detail for all the facing and it's a great contrast to the pink.
![]()
 Sewing and Instructions
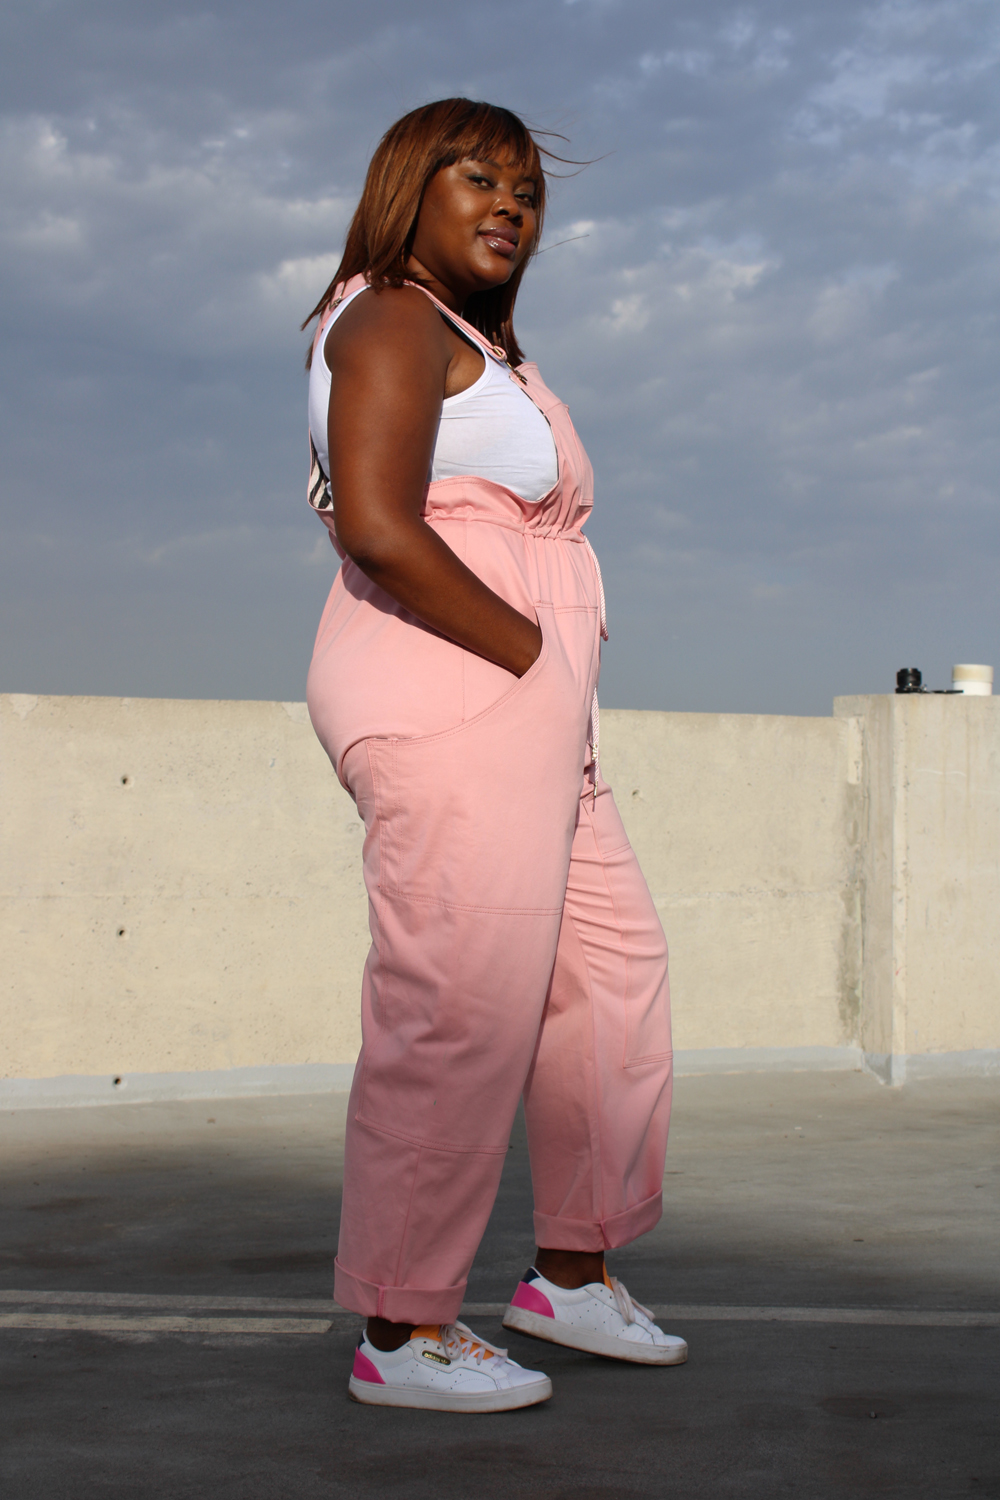
I was so happy and appreciative that Ready to Sew a sew-along with pictures on their blog and I found it easy to follow along to the sew-along versus the instructions. The sew-along comes in 2 parts and I understand why it's like that. So, I will admit that when I put together the pockets and did my first rows of topstitching, I was super impressed with myself but by the time I completed the overalls, I was over the whole topstitching thing, it almost took me out. It was a lot! But it was all worth it because the topstitching detail it's one of my favourite thing about the overalls. I was happy that I have 2 sewing machines, one for the topstitching and the other sewing, I don't think I would have coped with having to constantly remove and change the thread from the machine. The other new experience for me was installing the hardware on the overalls, I enjoyed using a hammer, I felt powerful and like a real boss lady! ![]()
 Overall Thoughts
After hours and hours of working on these overalls, I was exhausted but as soon as I put them on, I immediately forgot all the hard work that I put in and just fell in love with them. These made my week, they filled me with joy, and I did not want to take them off. My sister and I both agree this is the best thing I've ever made! All the many details and pockets come together so well, they are both simple and intricate. I see myself wearing these all the time all through summer and winter, they are so comfortable and stylish but with a twist of fun. I was looking to sew something more challenging; I got that challenge from this project, and I am now inspired to finally sew that pair of jeans. They say nothing worth having comes easy, and I felt that way when I was halfway through the project, but the finished product makes it all worth it. I am so happy I took up the challenge to make the Partner Overalls.
![]()
 Be kind and keep sewing, keep smiling and keep sparkling!
Tino xoxo
![]()
Commentaires
Laisse ton commentaire