How to alter the Julien pattern
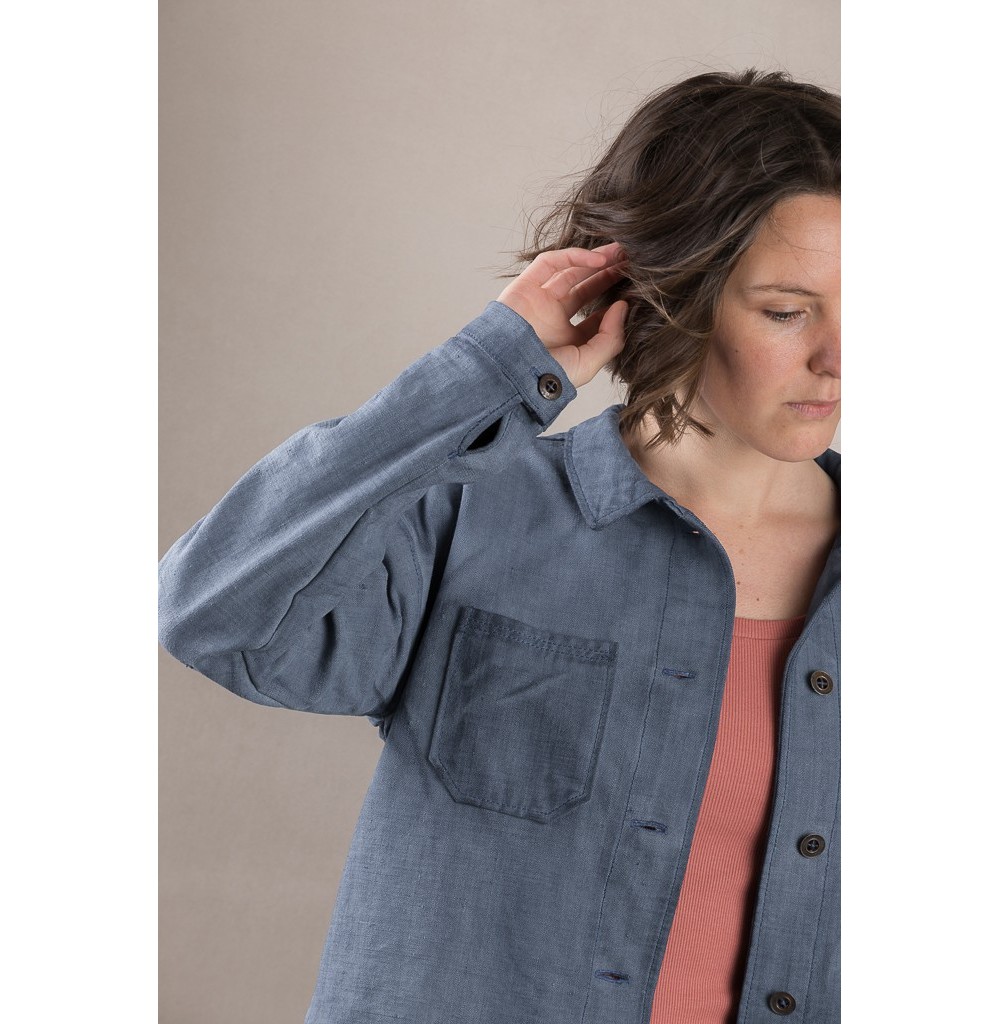
Ready to sew's patterns are drafted for a B cup and an average hight of 165cm so if you differ from that, you might need to do some pattern adjustments. In today's post we will see how to choose the right size and make any needed pattern modifications before you cut into your fabric.
- Lengthening or shortening the pattern
- Grading between sizes
- Enlarging sleeve
- Making a full bust adjustement
Lengthening or shortening the pattern
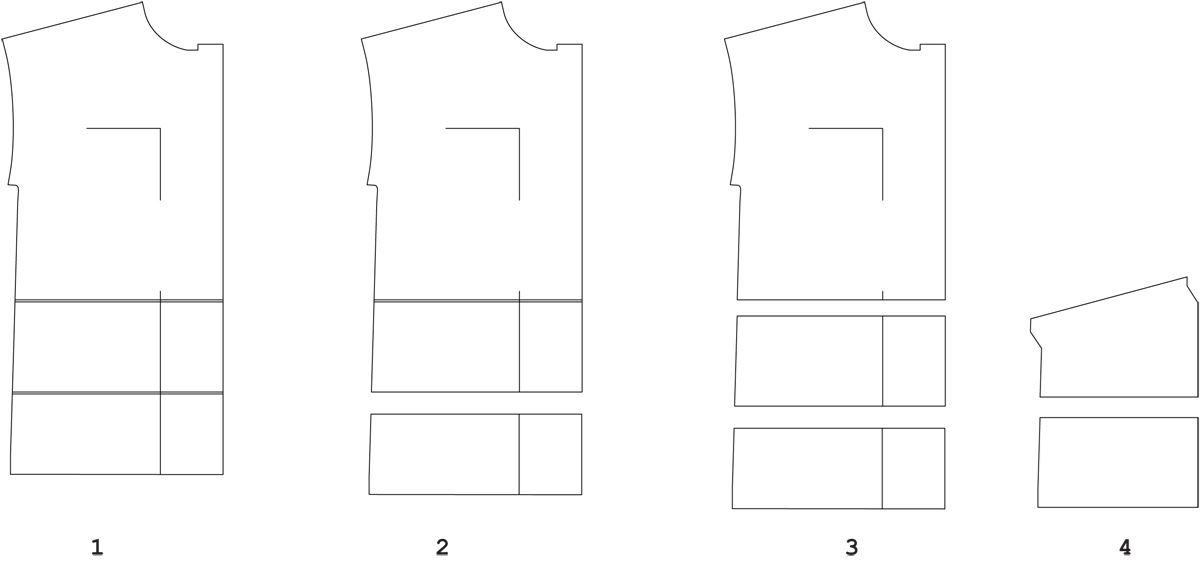 Lengthening and shortening your pattern pieces is pretty straighforward, find the lengthen/shorten lines and apply your length changes between them. In the case of the Julien jacket, I’ve included two lengthen/shorten lines, this way you can adjust and keep your proportions.
- The first line: you will want to work from this line if you need to make a small alteration (2cm max).
- The second line: You will want to work from this line and the first line if you need to make a big alteration, splitting the amount you need to adjust between the upper and lower adjustment lines.
Grading between sizes
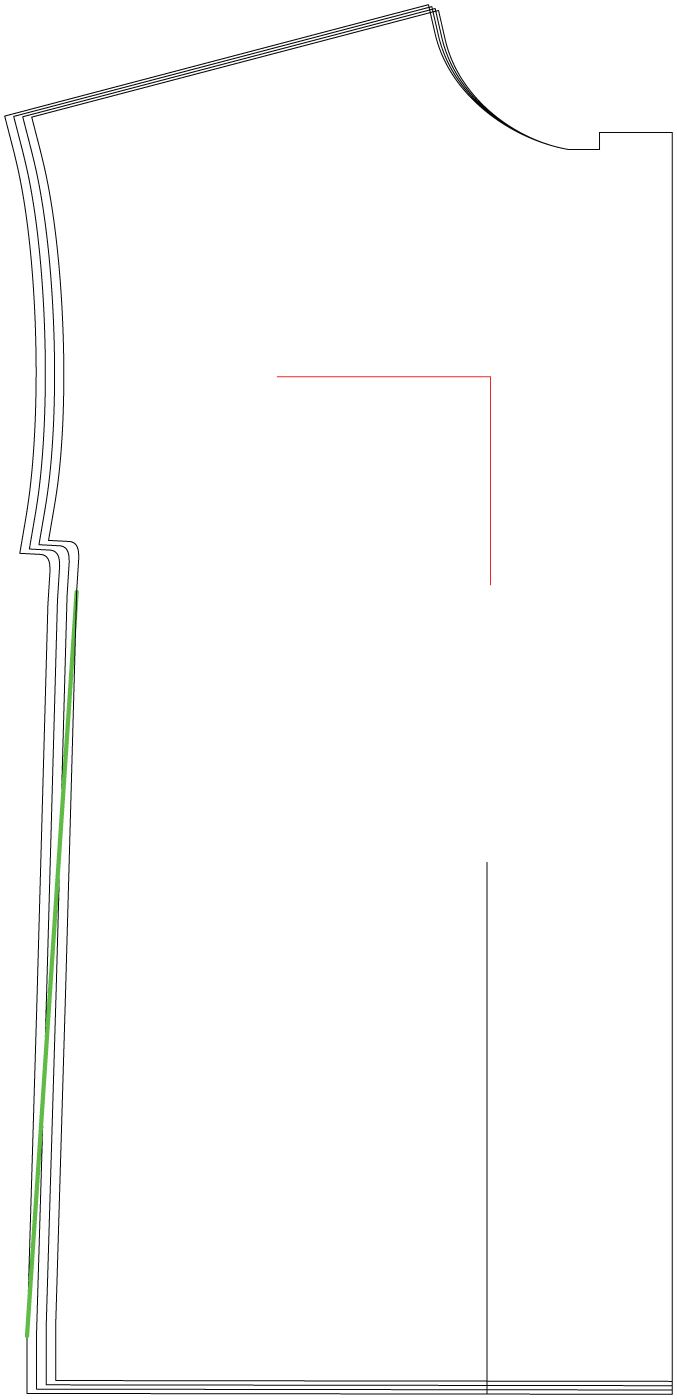
In this exemple, I’m blending from a 38 at the bust to a 41 at the full hips (I’ll be disregarding the waist measurement because the pattern has a pretty straight fit). You’ll want to draw a line from the underarm to the bottom of your bodice connecting the size 38 to 41.
Make sure that you make any changes to all affected pieces and trace the chest pocket from size 38 and the hand pocket from size 41.
Enlarging sleeve
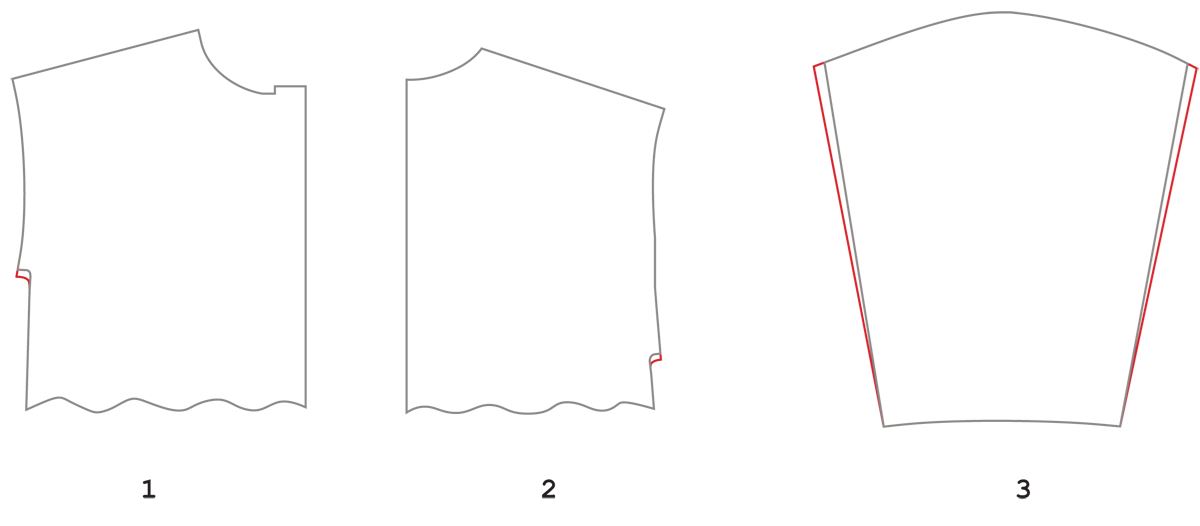
If you have larger biceps, you may want to measure the sleeve cap (minus the 3cm seam allowance) to decide if you’ll have enough room. The cuff is drafted with about 12cm of ease; if you’ll have less than that I would enlarge the cuff. To do that, drop the arm opening the desired amount on both sides equally. For example, if you need to add 2cm of ease, drop the opening 1cm on both sides. Make sure you add the same amount to the front and back sleeve cap so they fit the new larger arm opening.
Making a full bust adjustment
Ready to sew's patterns are drafted for a B cup so if you differ from that, you might need to do a bust adjustment. If you are a C cup you might be ok, but follow the steps below on measuring your high bust to work it out. When working with woven fabric it is very important to adjust the pattern, not doing an FBA will raise the front hem, making it shorter than intended and causing fit issues in other areas.
What is a bust adjustment?
A Full bust adjustment will create more space and ease at the front of the top only, which is done by increasing the size of the dart. It means instead of increasing the circumference of the top all the way around to accommodate the bust (which will make the armholes too big) it just adds more space at the front for the bust. We want to add more fabric so there is enough space for the fabric to go up and over the bust and also around the bust. A small bust adjustment will do the opposite. It decreases the amount of excess fabric over the bust by reducing the size of the dart.
What size should I pick?
Perhaps you have already made the garment and it fits you nicely over the shoulders, neckline, armholes but it is too tight over the bust and it looks like it is squashing your bust, you have draglines between the busts or you have coming from the bust into the side seams. With that situation, you are going to want to stitck to the pattern size you have already made but you are going to do an FBA to give you more space right over the bust area.
If you think you need to do a bust adjustment but you don't know what pattern size to pick first then you need take two measurements:
- The upper bust: This is the area of your chest right below your underarm.
- The full bust: This should be around your ribcage and over your bust apex, parallel to the ground.
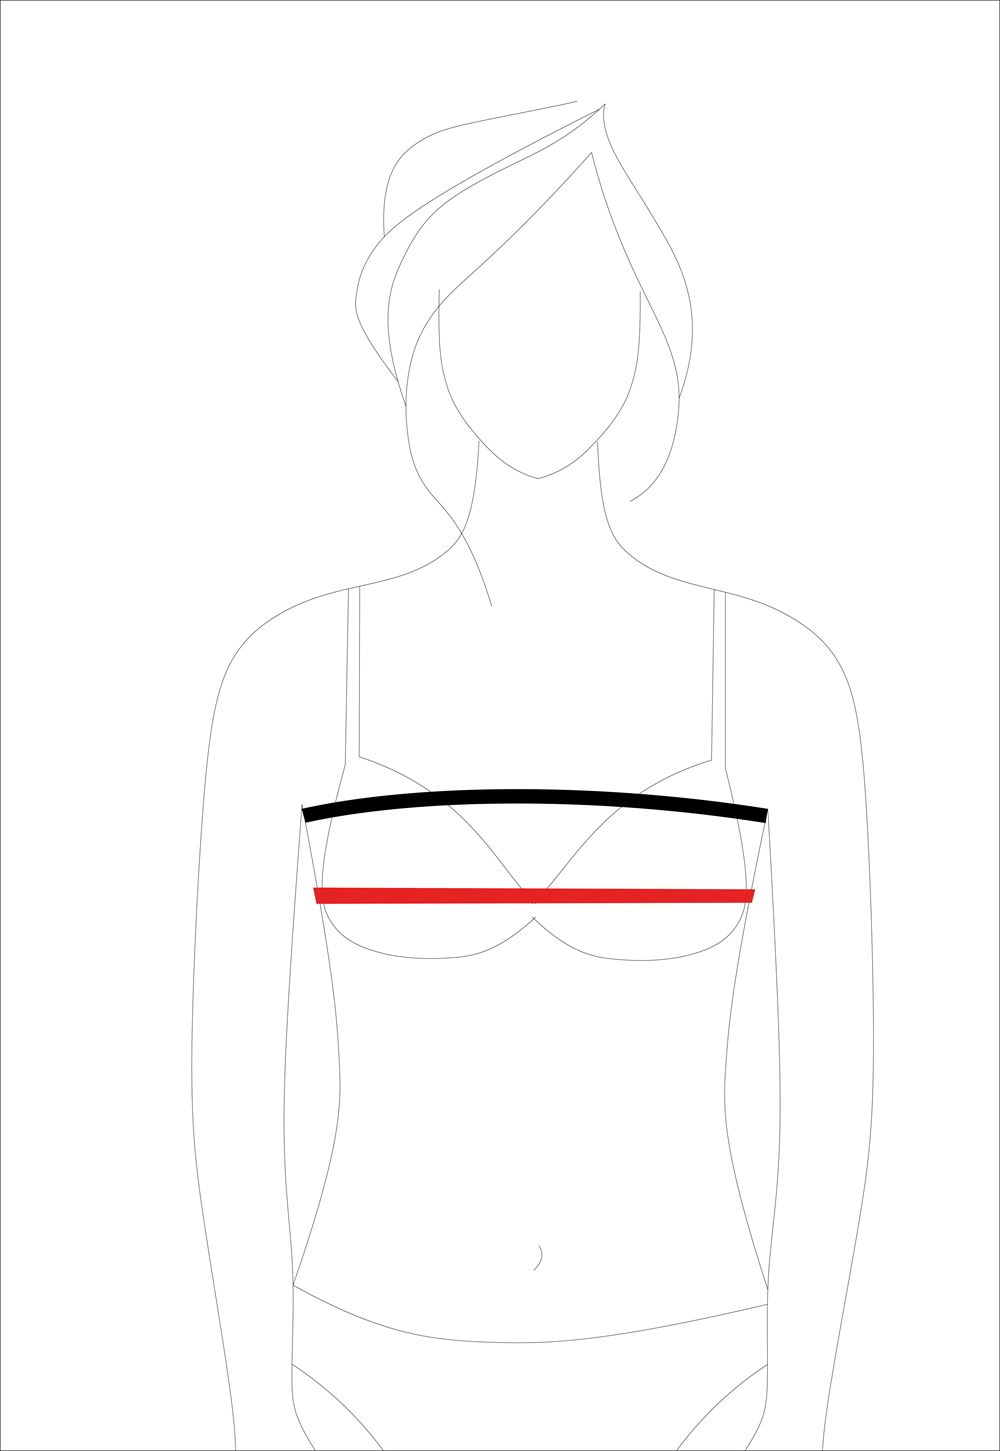
If the difference between your high bust measurement and full bust measurement is more than 5 cm (2 inches), then it will confirm that you need to do an adjustment.
2,5cm (1″) means you are an A cup
5cm (2″) is a B cup
7,5cm (3″) is a C cup
10cm (4'') is a D cup
Again, don’t worry if this is very different from your actual bra cup size! Choose your pattern size based on your high bust measurement + 5cm (2'') because the pattern is already drafted for a B cup.
Ex:
Your hight bust measurement is 87cm and your full bust measurement is 95cm then your cup size is C.
Hight bust measurement + 5cm (87cm + 5cm) = 92cm you will choose 40 in Ready to sew' size chart.
Full bust measurement - 92cm (95cm - 92cm) = 3cm, this is the amount you have to adjust the pattern by.
As you are working on half of the front bodice you need to half 3cm, which gives 1,5cm. This is how much you will adjust the pattern piece by, we call that the bust differential. I'm using the Julien jacket as an exemple for this tutorial but it works for any dartless pattern with kimono sleeves.

1 - Find the bust point on the front pattern piece. Trace the center front line on the pattern and align it with the center of your chest. Then align the shoulder and neckline of the pattern with your own (take into account the 15mm seam allowance). Mark the location of your bust point on the pattern.
2 - Draw a diagonal line from the bust point to the first notch on the arm opening.
3 - Draw a line straight down from the bust point to hem.
4 - Draw a straight line up from the side seam to the shoulder along the arm opening. (If you are working on a size larger than 46, this line will be a diagonal instead of a straight line. Mark a point 20mm before the shoulder end and draw a line from that point to the side seam just below the curve of arm opening).
5 - Draw a diagonal line from the bust point to the side seam just below the curve of arm opening.
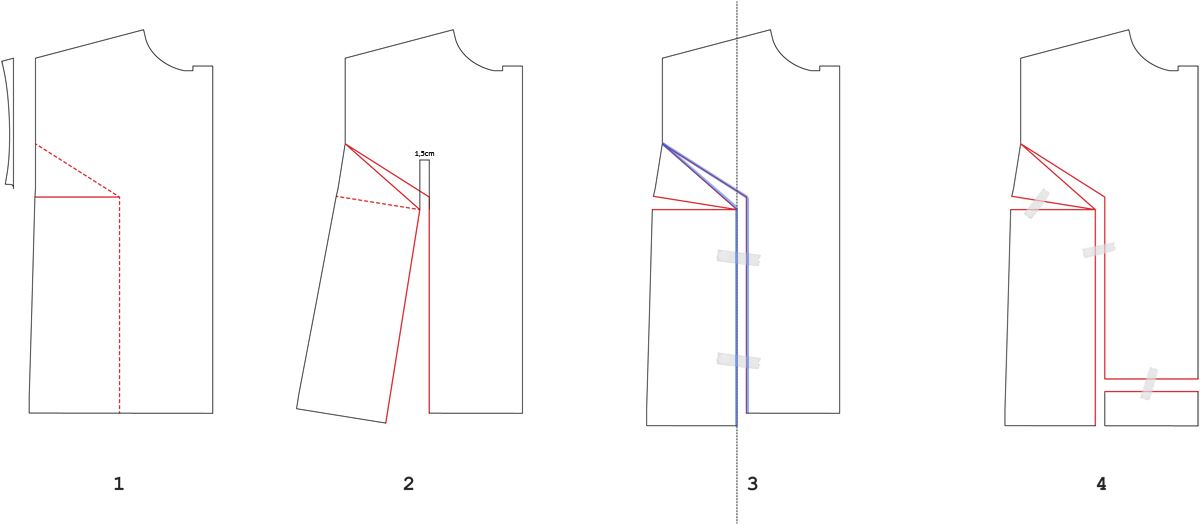 1 - Cut the arm opening on the line.
2 - Cut along the line from the underarm to the hem, Leave a little hinge on the end. Rotate out along the hinge until you’ve widened the pattern the amount necessary (bust differencial).
3 - Cut along the third line from side seam to bust point, leave a little hinge on the end. Rotate out along the bust hinge until the two blue lines are paralleles. You will have created a dart on the left side. Carefully tape down your pattern to another sheet of paper.
4 - The right part will now be shorter than the left. Cut along the "shorten-lengthen" line and slide this portion down until the bottom aligns on both sides. Tape down.
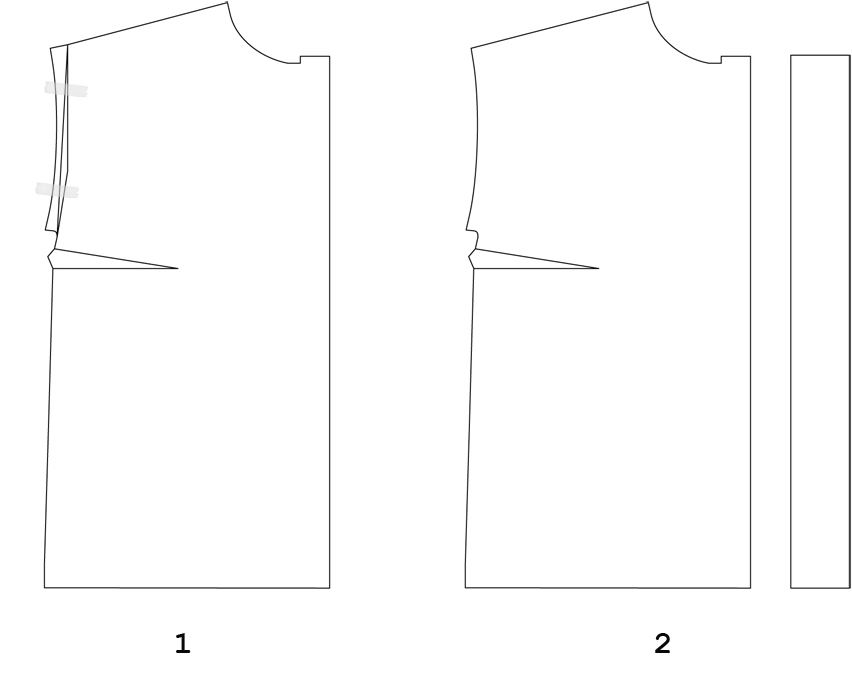
1 - Tape the arm opening back to the bodice.
2 - Trace your pattern on a new sheet and transfer all notches. Don't forget to label this new pattern piece so you won't forget the adjustements you've made. It can be something like (FBA = 3cm).
If you're working on the pattern Julien, you will nedd to adjust the button placket, button guide and hand pocket.
merci pour ce tutoriel. J'ai 2 petites questions :
1) Pour la poche main, est-ce qu'il faut l'allonger sur toute sa largeur ou seulement côté "milieu buste"? Parce qu'au final, la longueur côté du buste devant ne bouge pas après ce FBA sinon il faudrait aussi rallonger le buste dos?
2) Existe t-il des adaptations fortes poitrines sans ajout de pince? J'aime beaucoup le style "épuré" des patrons sans pinces et ça m'embête d'en rajouter, surtout dans le cas d'un tissu à motif. J'ai fait quelques recherches mais je trouve très peu de chose, peut-être parce que ça ne permet pas d'obtenir un résultat aussi seyant?
Merci d'avance!
Le patron de couture de la veste Julien est dessiné pour une morphologie de femme et a donc été testé sur femme uniquement. La carrure, le tour de cou ainsi que le tour de biceps d'un homme et d'une femme peuvent être très différents.
Si vous souhaitez le réaliser pour homme, je vous invite à faire une toile en partant du tour de poitrine de la personne en question et ensuite ajuster directement sur le corps.
Une gamme homme ou enfant n'est pas du tout prévue pour le moment.
Readytosew est une toute petite entreprise et je suis la seule à la gérer ;-)
Très bonne journée et bonne couture,
Raphaëlle
Je me demandais si cette veste pouvait être mixte et convenir à mon homme.... quelle taille coudre alors pour un homme qui met habituellement du M... Je suis encore débutante en couture et cherche des modèles pour mon compagnon et mon bébé... ce serait super si jamais vous avez le projet d'élargir votre gamme que j'apprécie d'ailleurs beaucoup!!
Merci d'avance pour votre retour!
Julia
Je n'avais pas encore fait la toile au moment d'écrire ce commentaire et finalement elle tombe très bien ! (je me suis inquiétée pour rien désolée)
Merci pour votre réactivité.
Hélène
La couture d'épaule de Julien étant de forme dolman, très tombante, on ne part pas vraiment sur des ajustements comme un patron avec une emmanchure classique. J'ai quelques questions, la largeur au niveau des biceps est elle suffisante/trop serrée ou trop large ? Faites vous un bonnet B ? Avez-vous choisis le modèle en fonction de votre tour de poitrine ? Pourriez-vous me décrire comment le vêtement tombe et ce qui vous fait dire que c'est trop large aux épaules ?
Merci par avance de vos réponses, Raphaëlle
Avez-vous un conseil d'ajustement dans le cas où les épaules sont très larges par rapport au reste du buste en général ?