Pattern hack: lining the Julien jacket, part 1

EDIT: the previous version of the Julien jacket, online until February 23, 2022 was not lined. If you want to keep the old version but line it, follow this tutorial.
Today we'll be showing a tutorial for how to line the Julien jacket. Thank you so much Michèle for working on this great tutorial, let's dive right in!
Workwear jackets are generally not lined. They are built to be sturdy but also very quick to make. However, there's nothing stopping you from sewing a nice lining to get a softer, slightly warmer jacket. Lining the jacket will also make it easier to sew the collar and hem for heavy fabrics such as corduroy, denim, moleskine or other heavy cotton canvas. Also, lining the jacket makes it even more versatile for fabrics like wool, which can irritate the skin
IMPORTANT: Remember to pick a thin lining or choose a bigger size if your lining is thick.

To be able to easily line the Julien jacket, we will need to alter the pattern.
You will need some big sheets of paper to work on. Make sure you are happy with the length of the jacket before you get started with drafting the facing and lining.
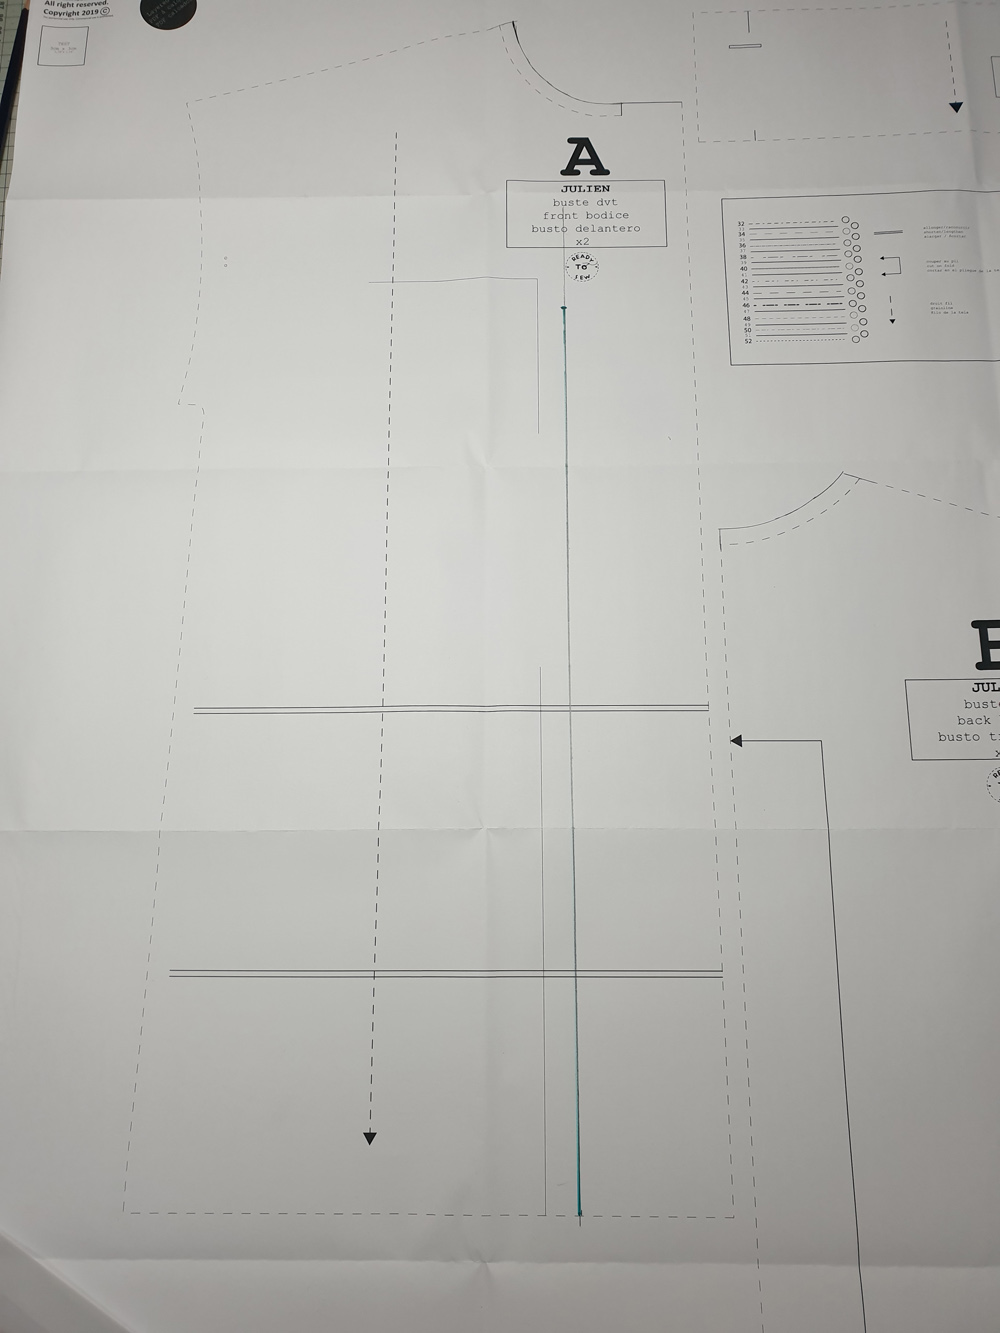
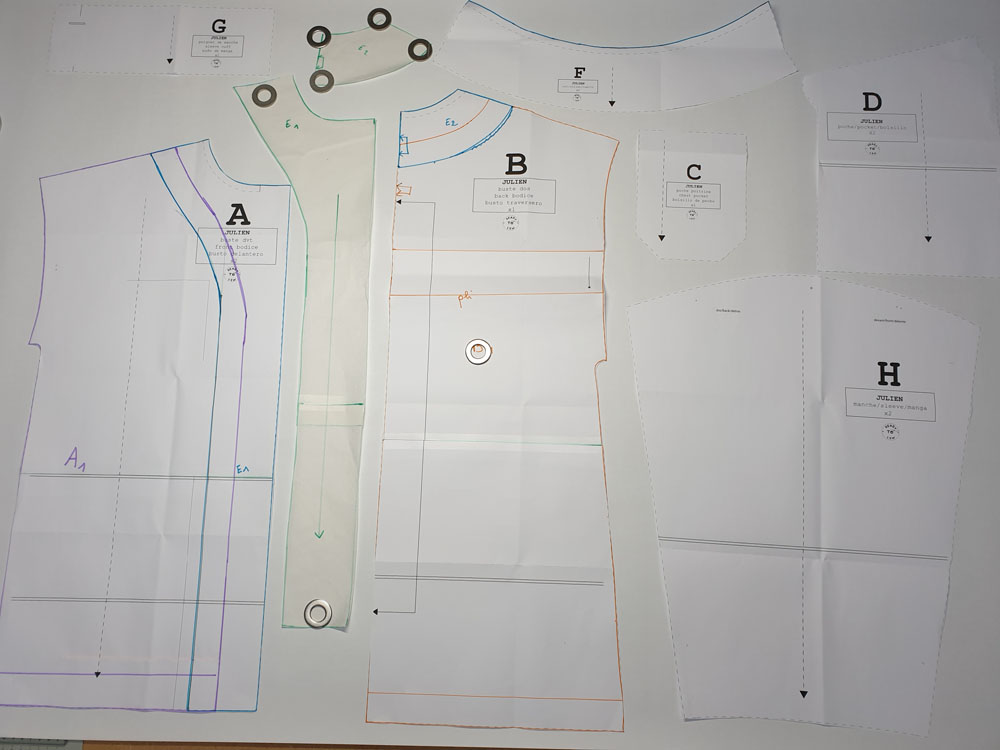
![]()
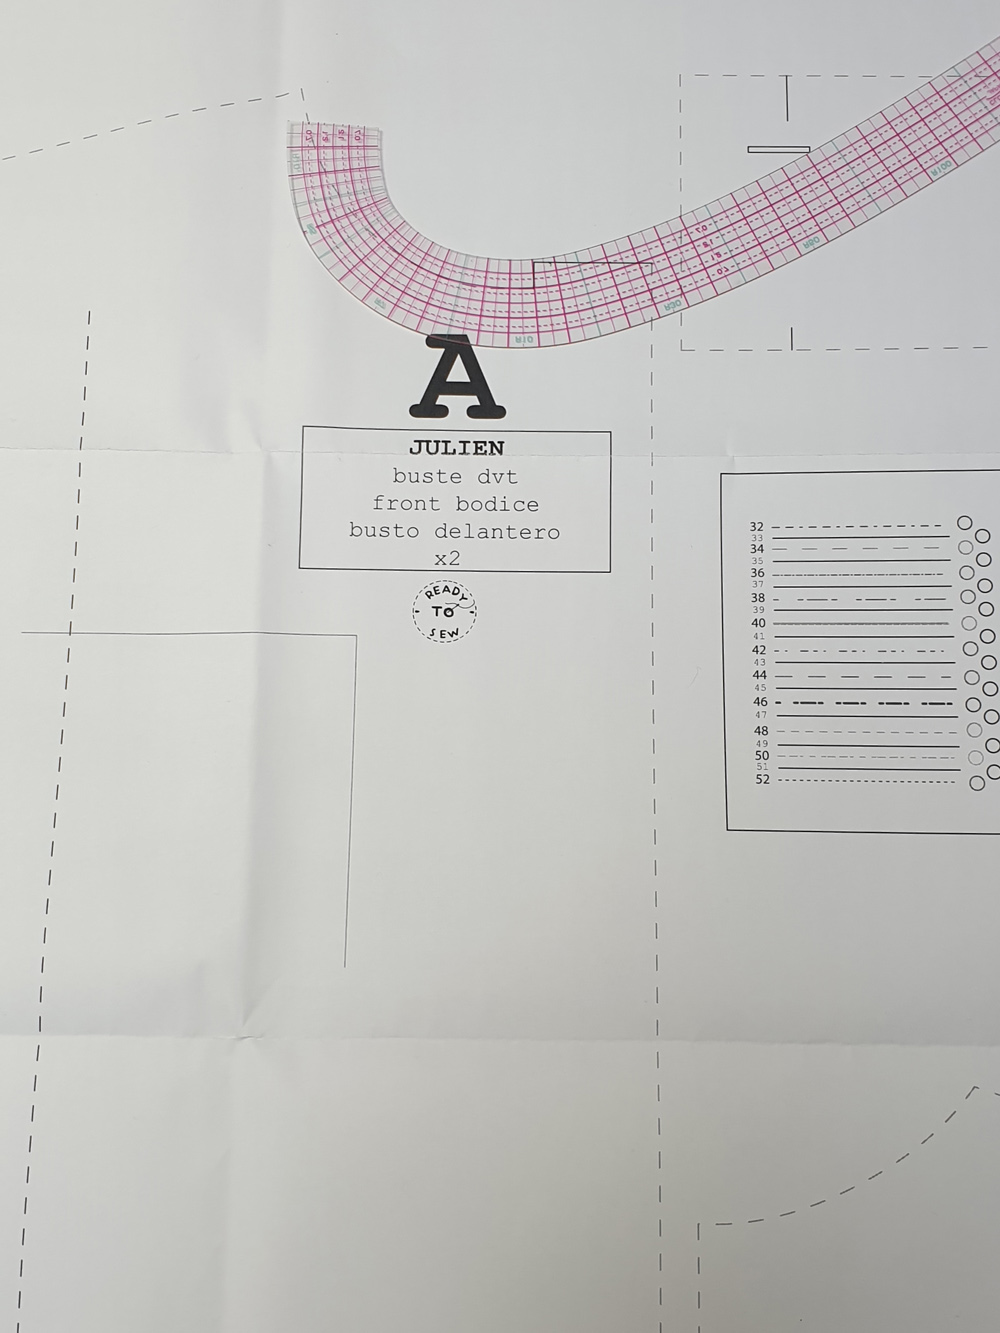
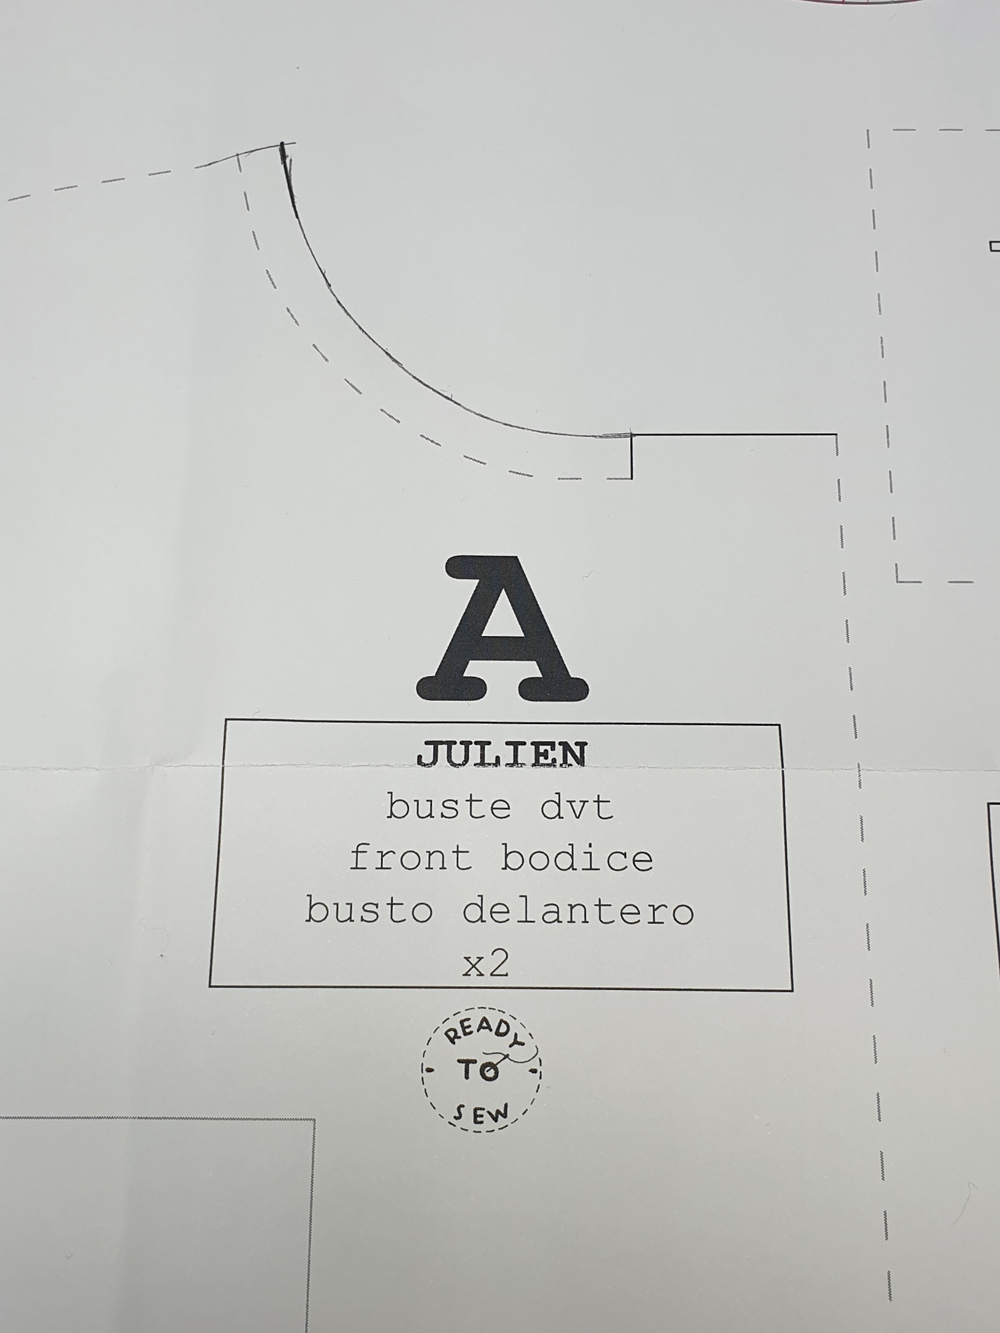 Front bodice A: trace a 15 mm seam allowance for the neckline (you will need to add 9 mm).
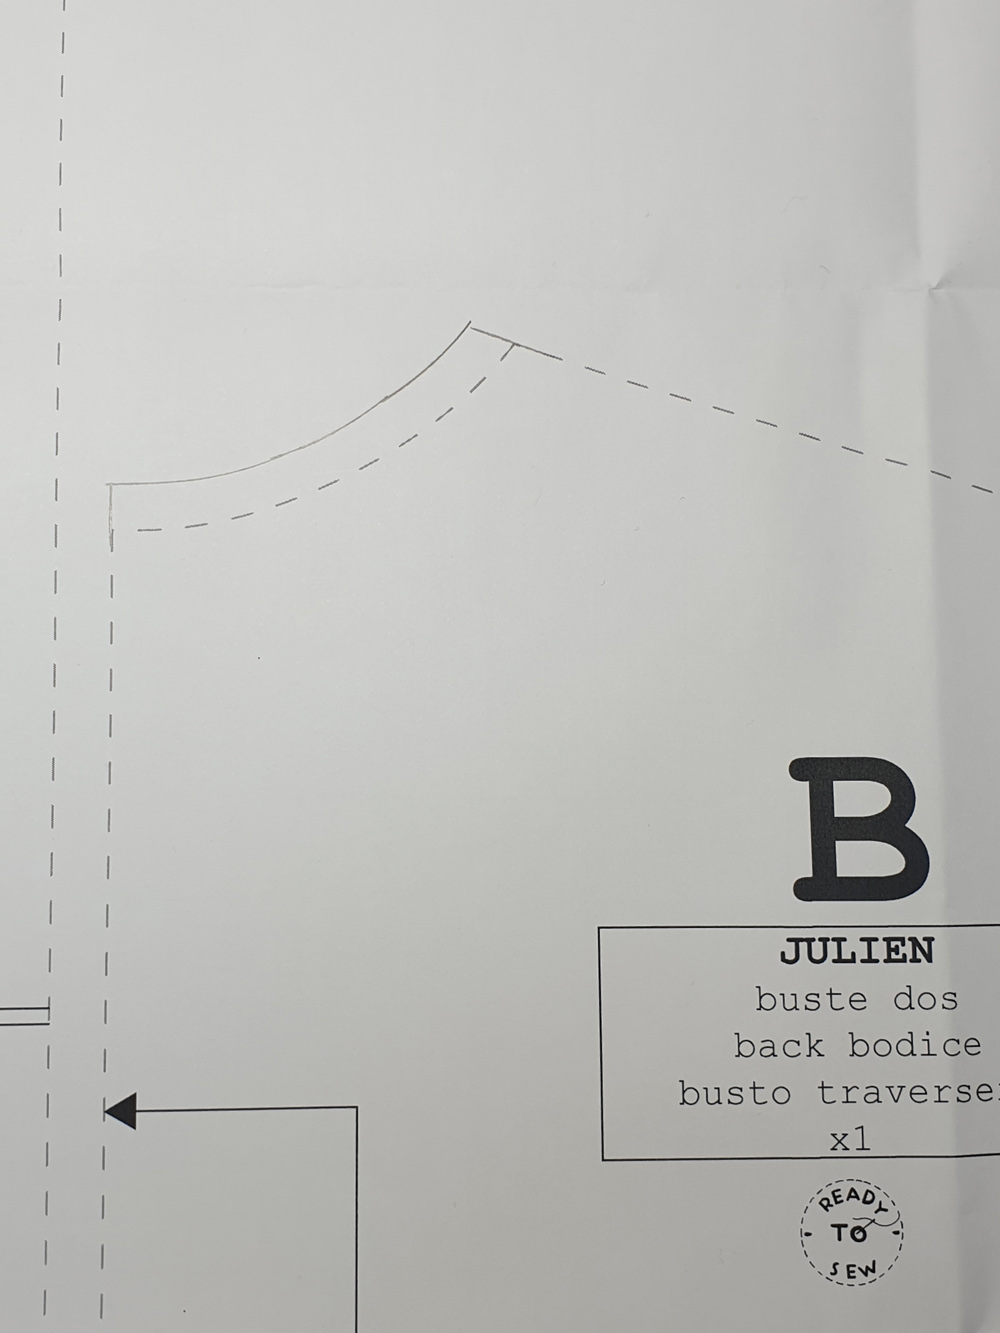
Back bodice B: trace a 15 mm seam allowance for the neckline (you will need to add 9 mm).
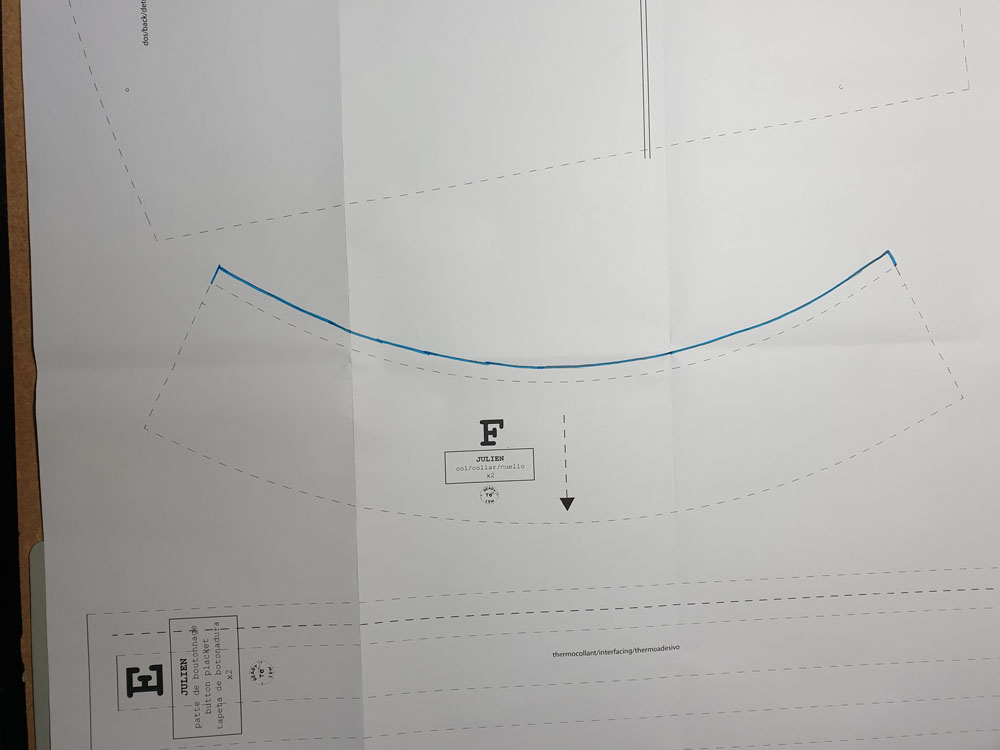
The collar F : trace a 15 mm seam allowance for the neckline (you will need to add 9 mm).
All seam allowances are now 15 mm.
Drafting the facing:
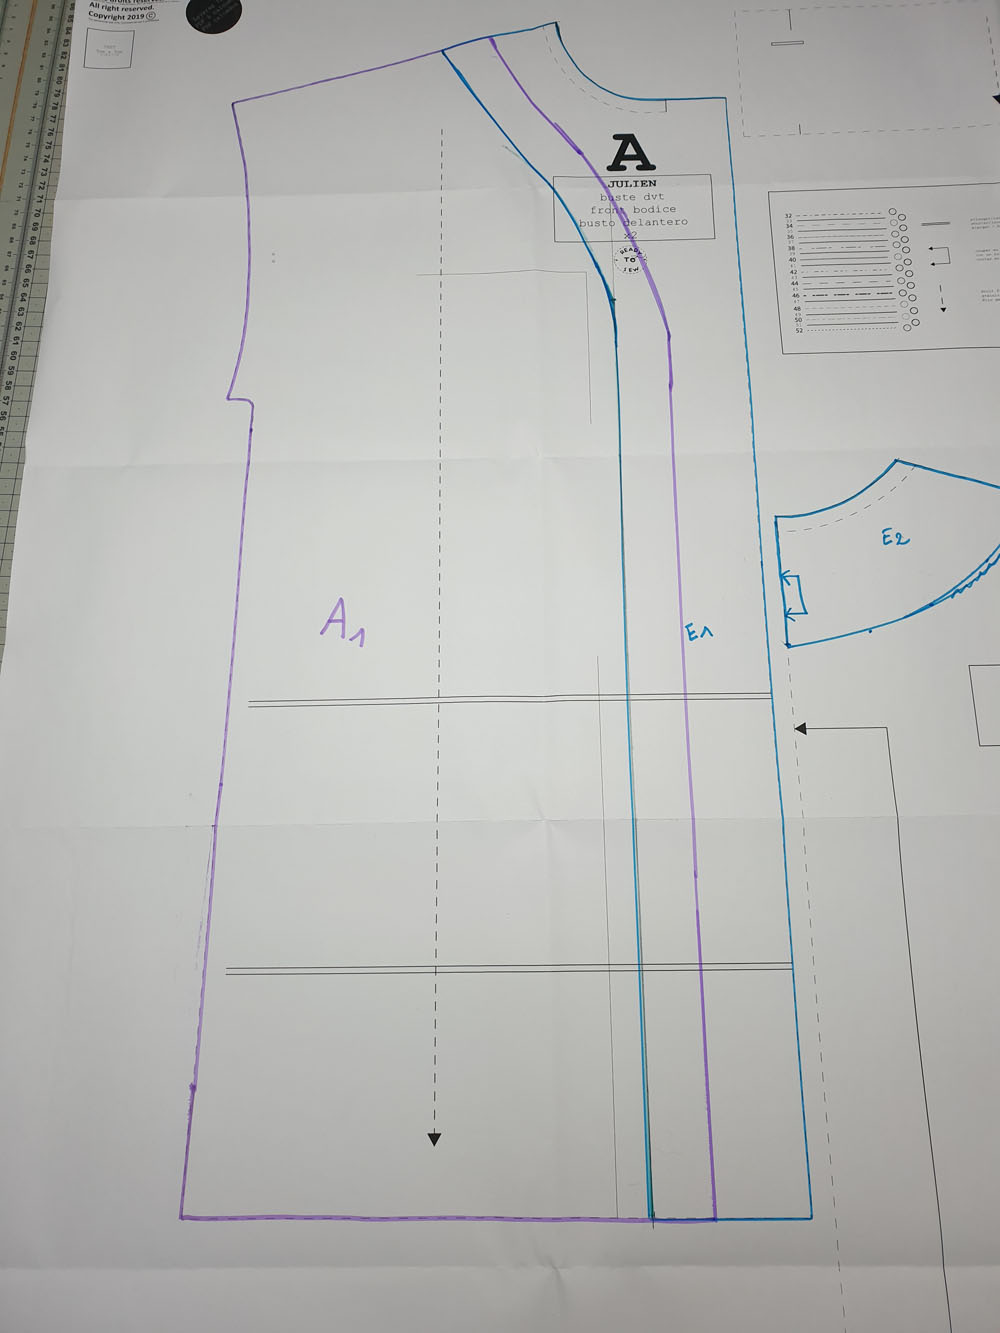
Draw the pattern piece E1: it's the front facing that will replace the button placket.
On the pattern piece A (the front), draw a vertical line 7.5 cm from the edge, stopping 15 cm from the top.

On the shoulder, draw a mark 7.5 cm from the neckline.
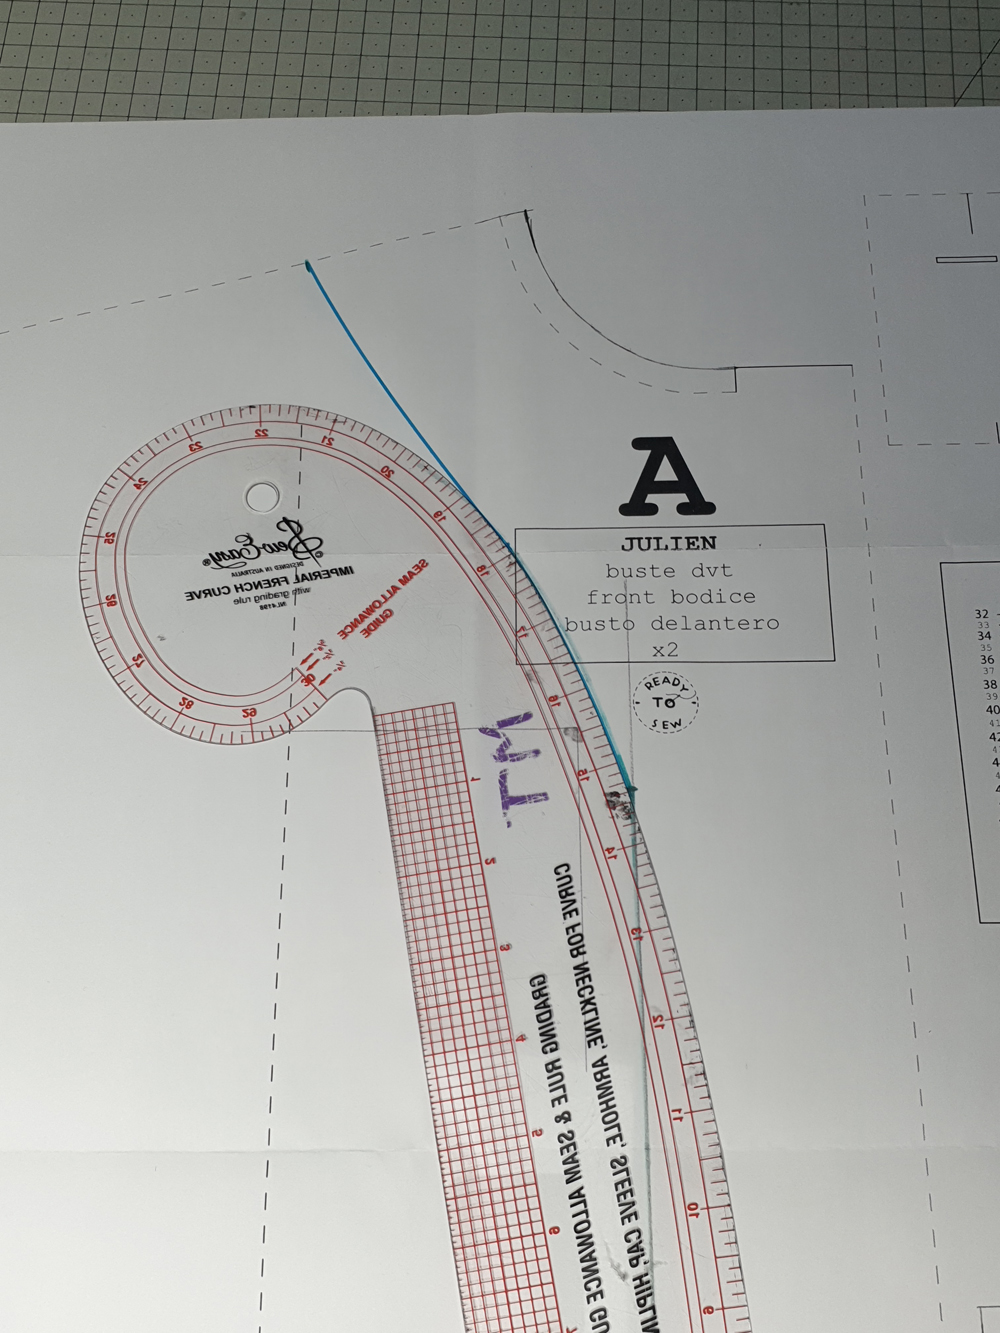
Using a curved platic ruler, trace the top of the facing.
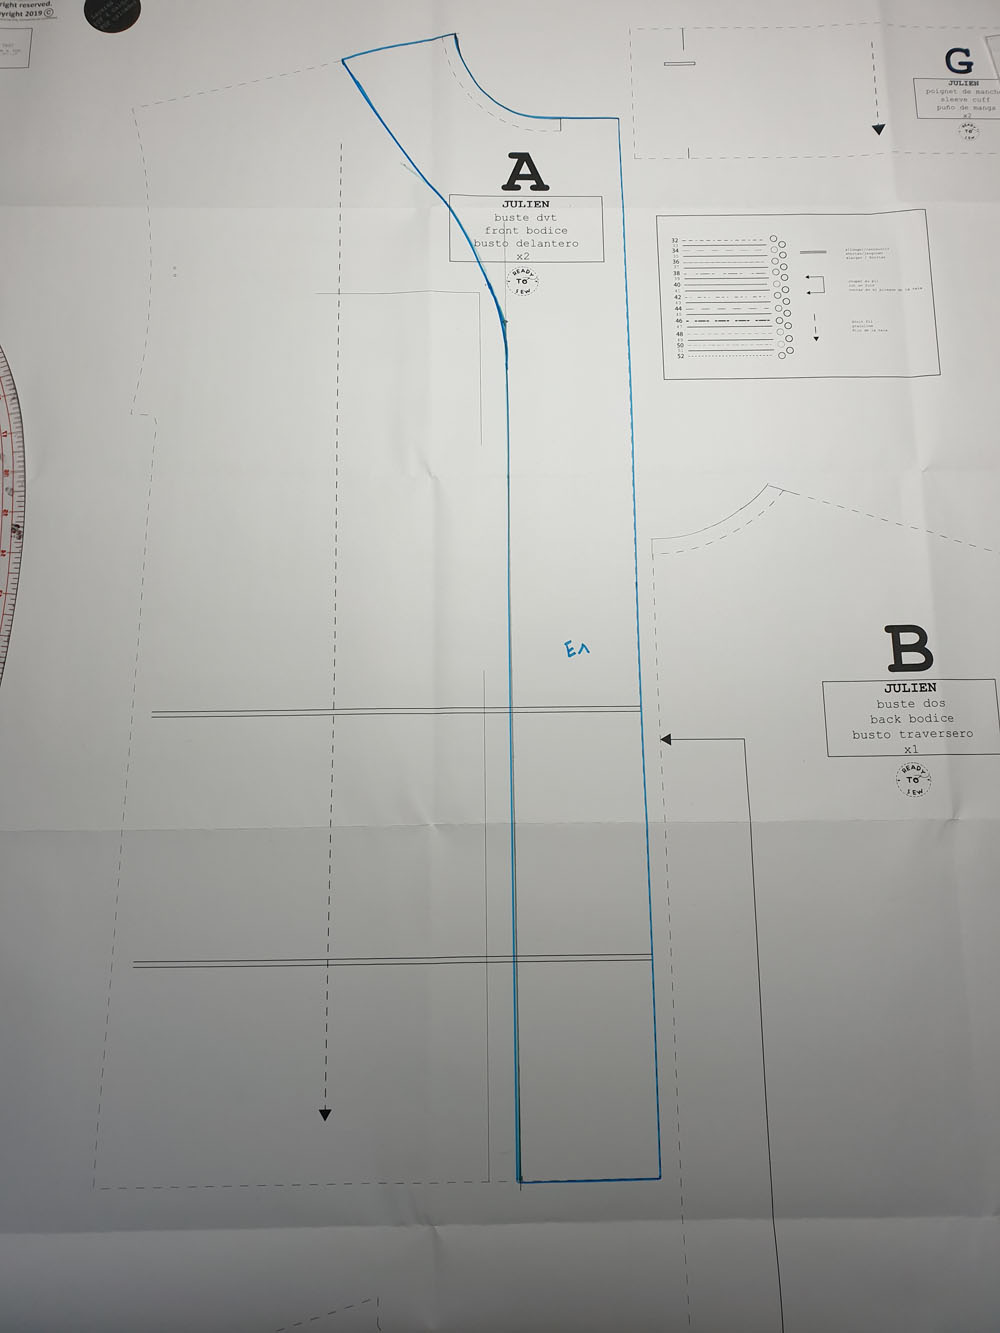
Voilà ! The front facing is finally finished.
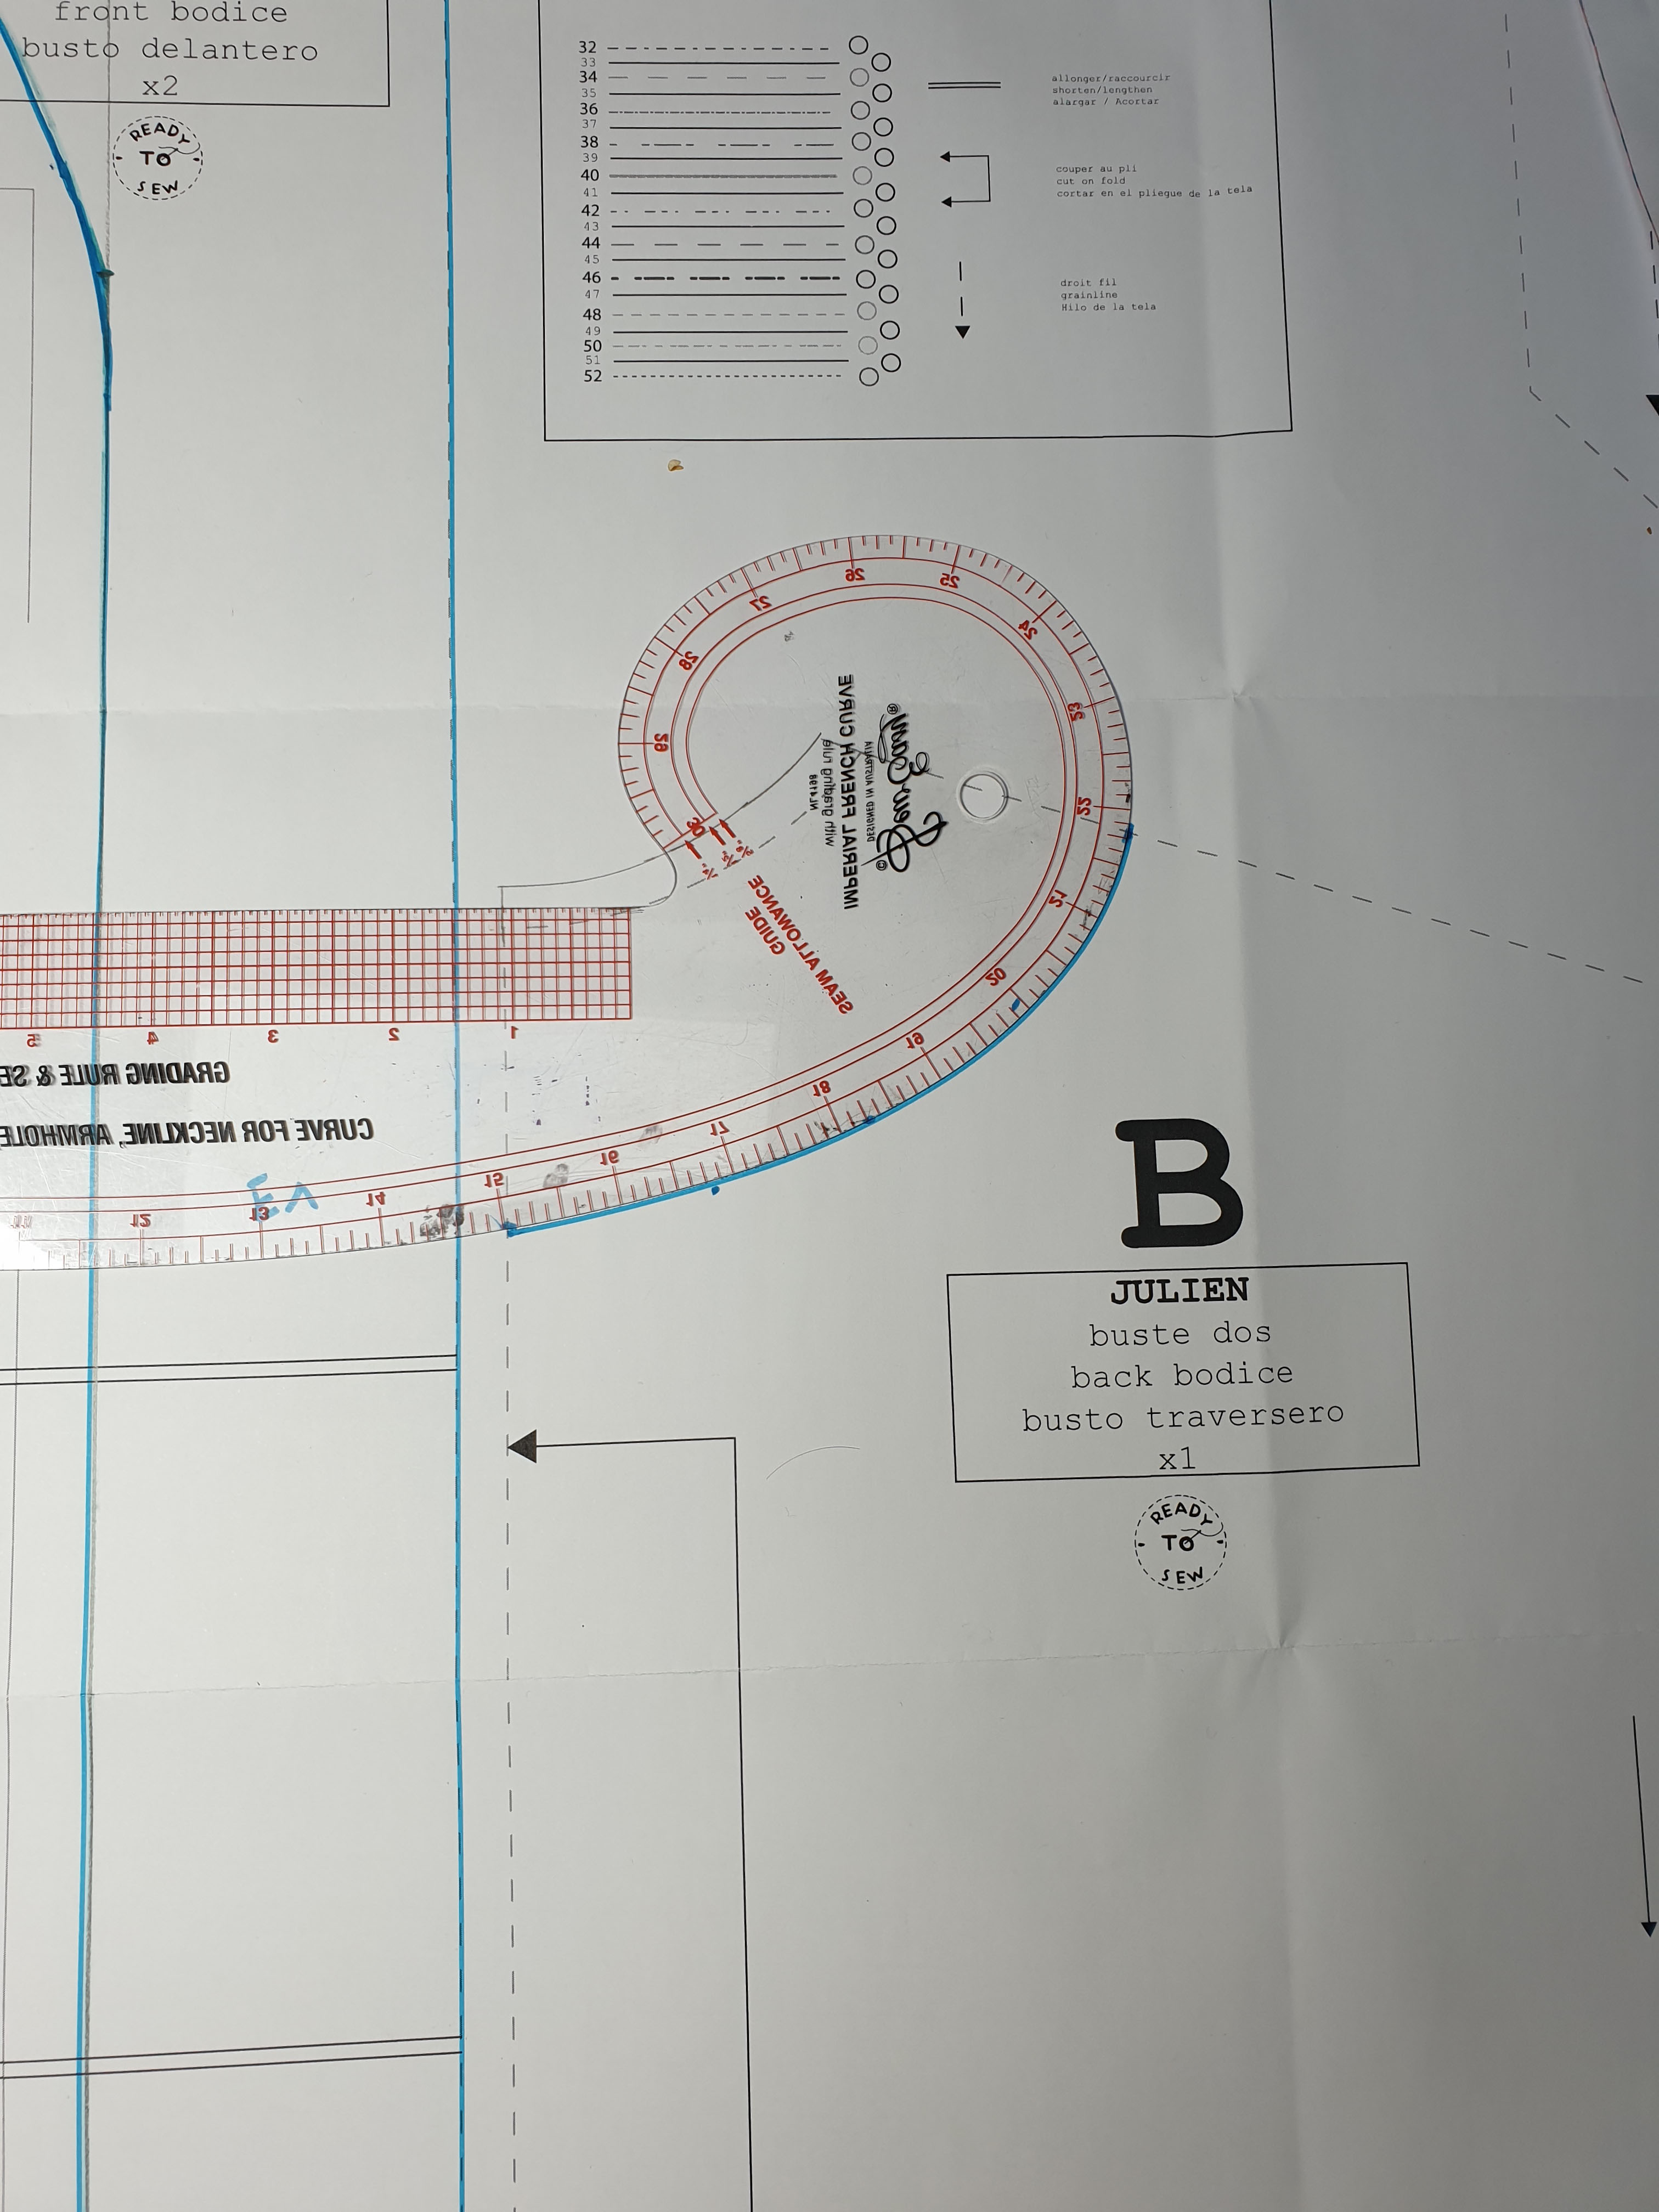
Draw the pattern piece E2 : It's the back facing.
On the pattern piece B (the back), draw a mark on the shoulder, 7.5 cm from the neckline and another mark on the center back, also 7.5 cm from the neckline. Join these two marks.
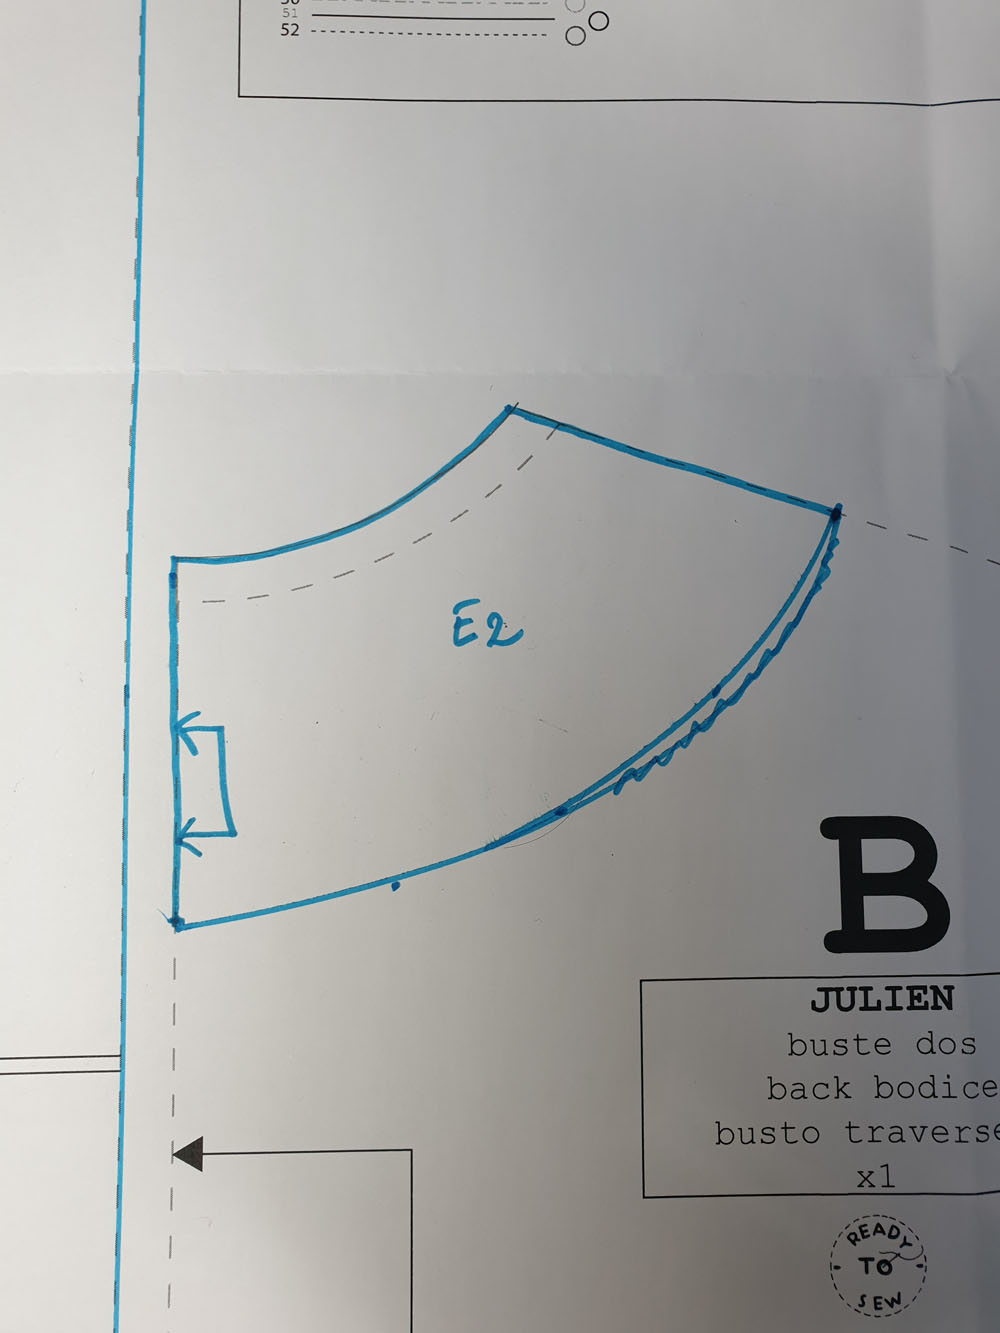
Indicate on the pattern piece that it will be cut on the fold.
Trace E1 et E2, those pattern pieces will be cut on the shell fabric.
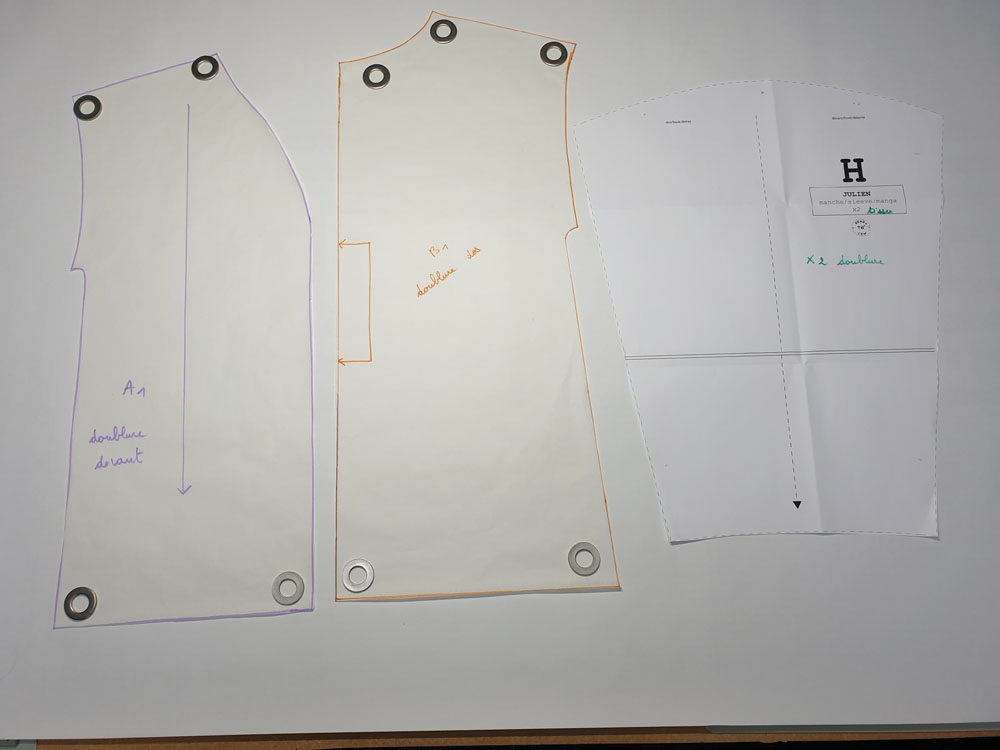
Drafting the lining:
Draw the pattern piece A1 : It's the front lining.
Draw a line along E1, 3 cm in from the facing. Then draw A1 (purple line)
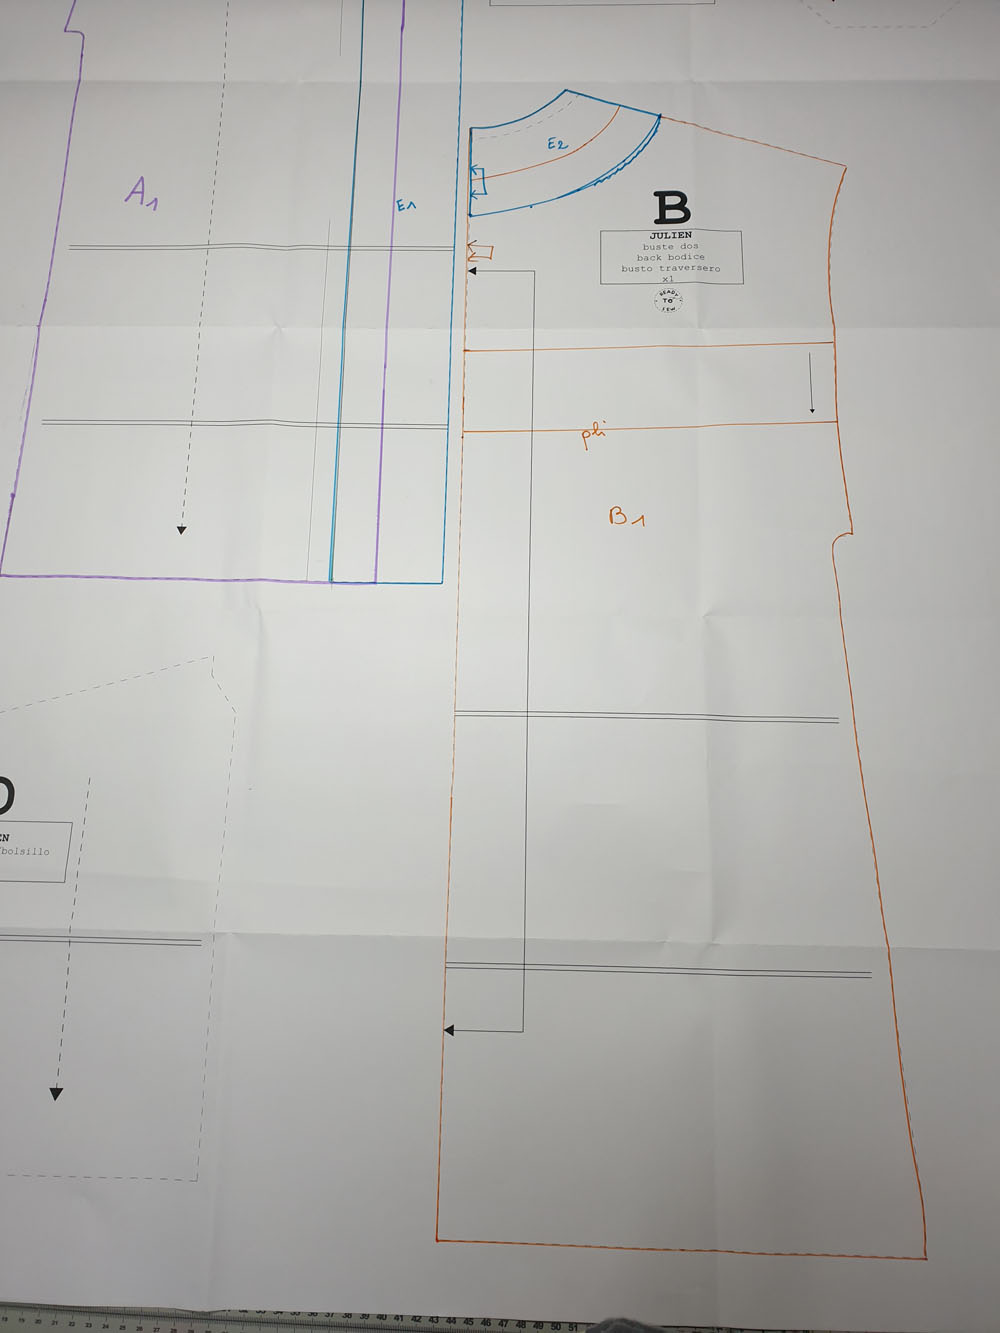
Draw the pattern piece B1 : it's the back facing.
Draw a line along E2, 3 cm in from the facing. Then draw B1 (orange line).
Also draw the lines of the horizontal fold of the back. This fold will be removed from the lining.
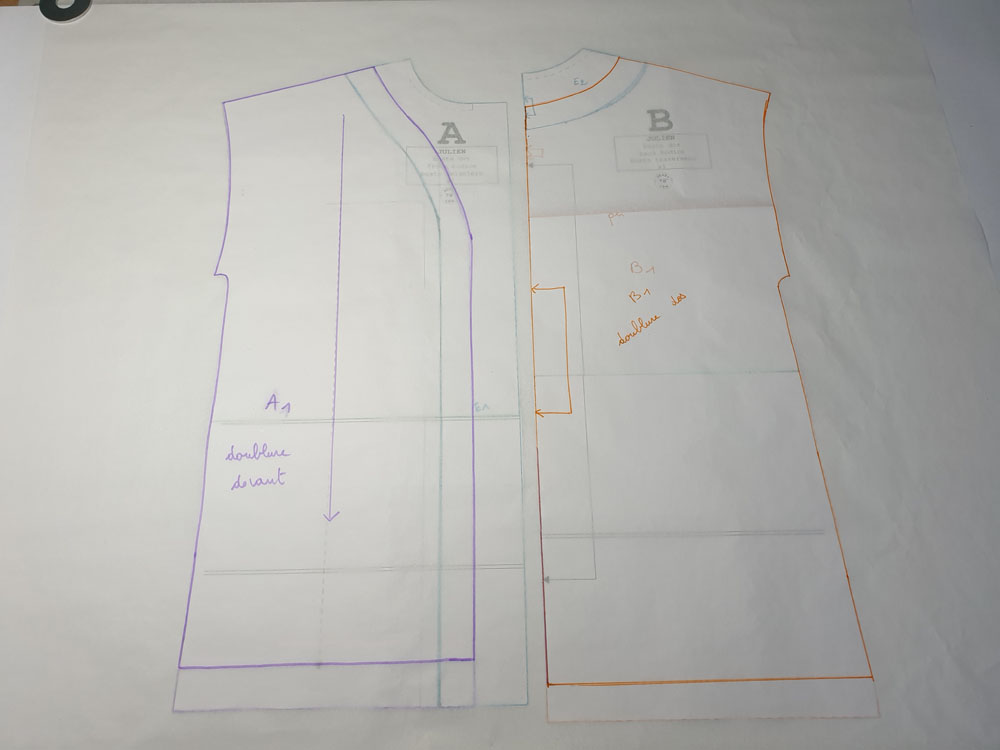
Trace pattern pieces A1 and B1 by removing 3 cm at the bottom and removing the fold on B1.
Pattern pieces to cut in the sheel fabric:
- A FRONT
- B BACK
- C SMALL POCKET
- D BIG POCKET
- F COLLAR
- G CUFF
- H SLEEVE
- E1 FRONT FACING
- E2 BACK FACING
Pattern pieces to cut in the lining :
- A1 FRONT LINING
- A2 BACK LINING
- H SLEEVE
![]()
J4ai acheter le patron de la veste julien, mais la version doublée. Est il possible d'avoir les explications du patron d'origine, c'est à dire non doublée svp ?