Jolene, FBA

Ready to sew's patterns are drafted for a B cup so if you differ from that, you might need to do a bust adjustment. If you are a C cup you might be ok, but follow the steps below on measuring your high bust to work it out.
What is a bust adjustment?
A Full bust adjustment will create more space and ease at the front of the top only, which is done by increasing the size of the dart. It means instead of increasing the circumference of the top all the way around to accommodate the bust (which will make the armholes too big) it just adds more space at the front for the bust. We want to add more fabric so there is enough space for the fabric to go up and over the bust and also around the bust. A small bust adjustment will do the opposite. It decreases the amount of excess fabric over the bust by reducing the size of the dart.
What size should I pick?
Perhaps you have already made the garment and it fits you nicely over the shoulders, neckline, armholes but it is too tight over the bust and it looks like it is squashing your bust, you have draglines between the busts or you have coming from the bust into the side seams. With that situation, you are going to want to stitck to the pattern size you have already made but you are going to do an FBA to give you more space right over the bust area.
If you think you need to do a bust adjustment but you don't know what pattern size to pick first then you need take two measurements:
- - The upper bust: This is the area of your chest right below your underarm.
- - The full bust : This should be around your ribcage and over your bust apex, parallel to the ground.
If the difference between your high bust measurement and full bust measurement is more than 5 cm (2 inches), then it will confirm that you need to do an adjustment.
- - 2,5 cm (1″) is a A cup
- - 5 cm (2″) is a B cup
- - 7,5 cm (3″) is a C cup
- - 10 cm (4'') is a D cup
Again, don’t worry if this is very different from your actual bra cup size! Choose your pattern size based on your high bust measurement + 5 cm (2'') because the pattern is already drafted for a B cup.
![]()
Ex: Hight bust measurement= 87cm - Full bust measurement= 95 cm - Cup size= C
- - Hight bust measurement + 5 cm (87 cm + 5 cm) = 92 cm you will choose 40 in Ready to sew' size chart.
- - Full bust measurement - 92 cm (95 cm - 92 cm) = 3 cm, this is the amount you have to adjust the pattern by.
As you are working on half of the front bodice you need to half 3 cm, which gives 1,5 cm. This is how much you will adjust the pattern piece by, we call that the bust differential. The following steps apply if you were doing a small bust adjustment too.

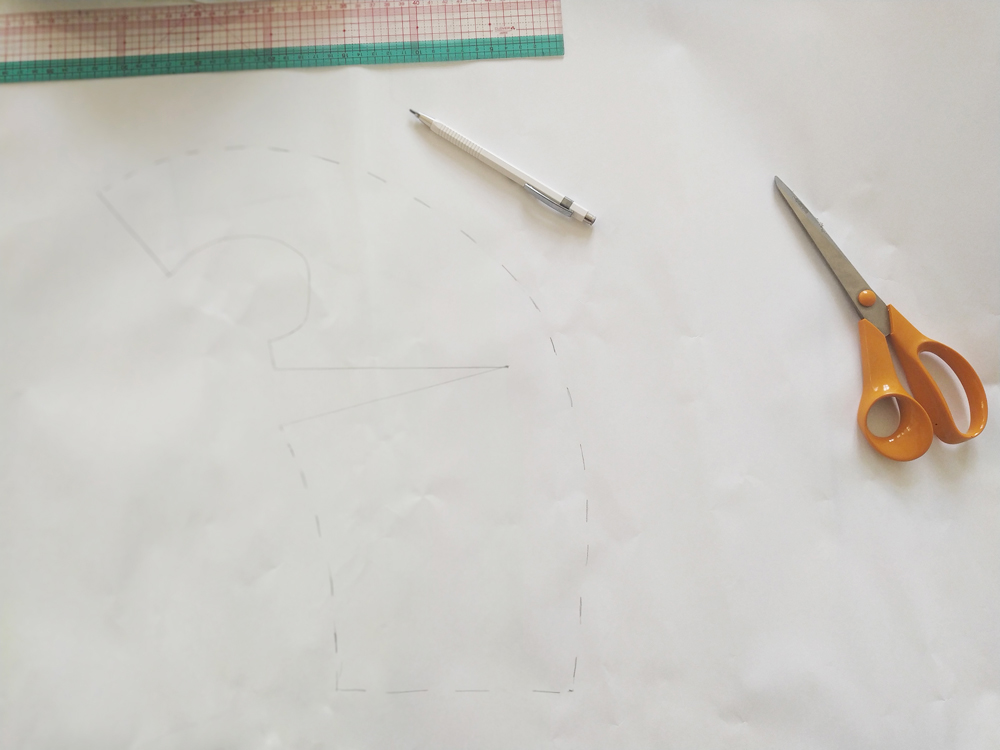
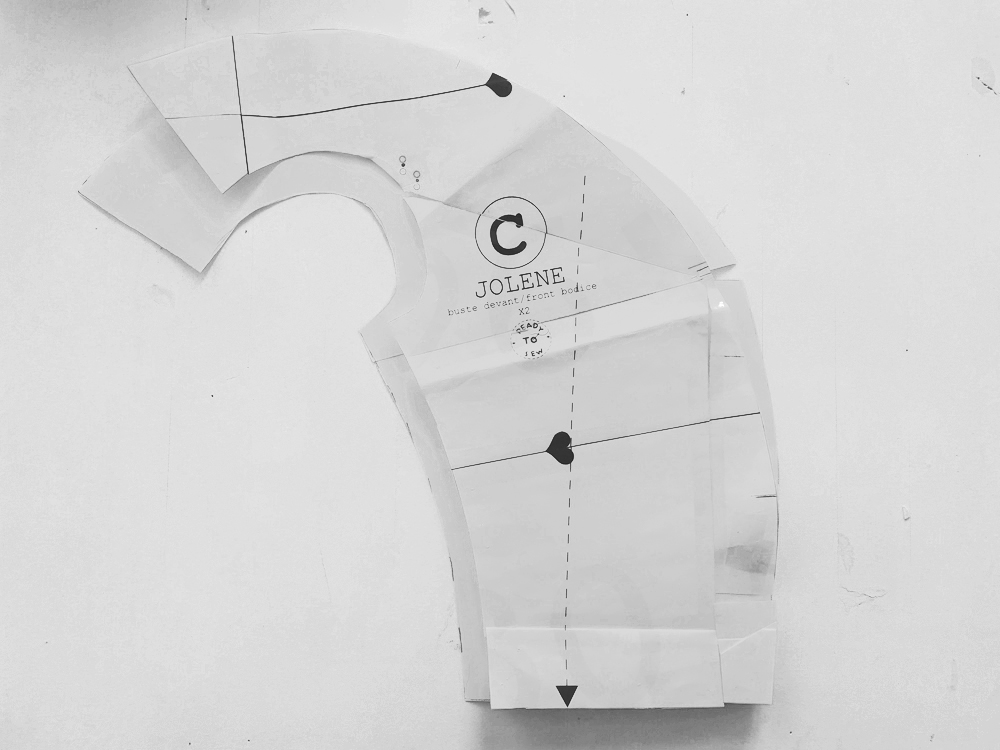
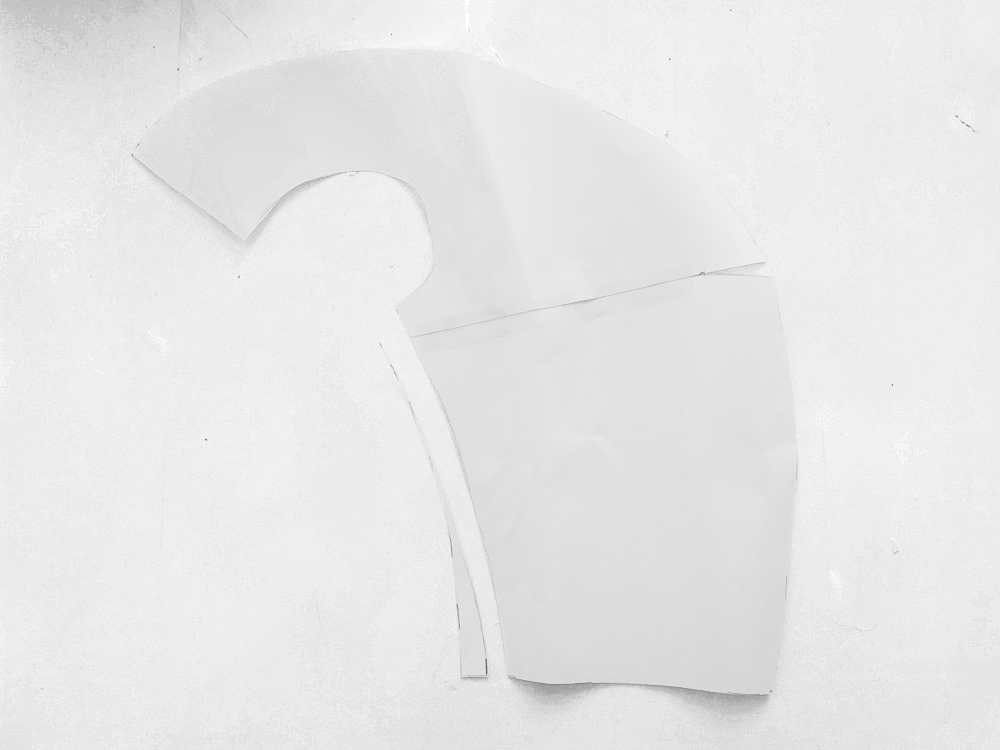
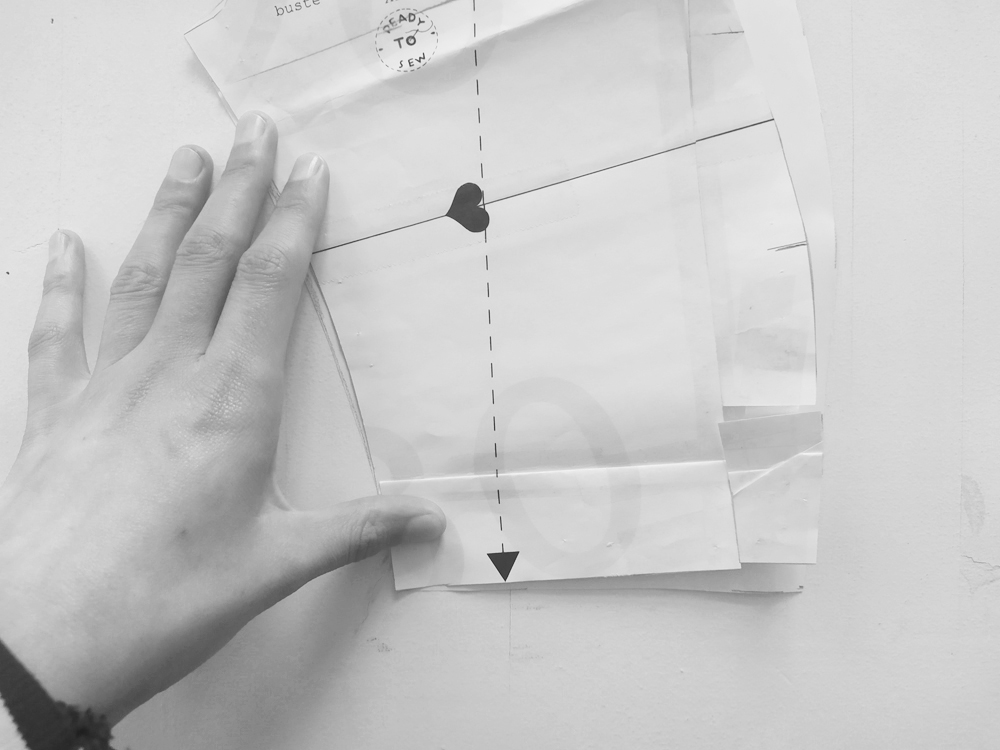
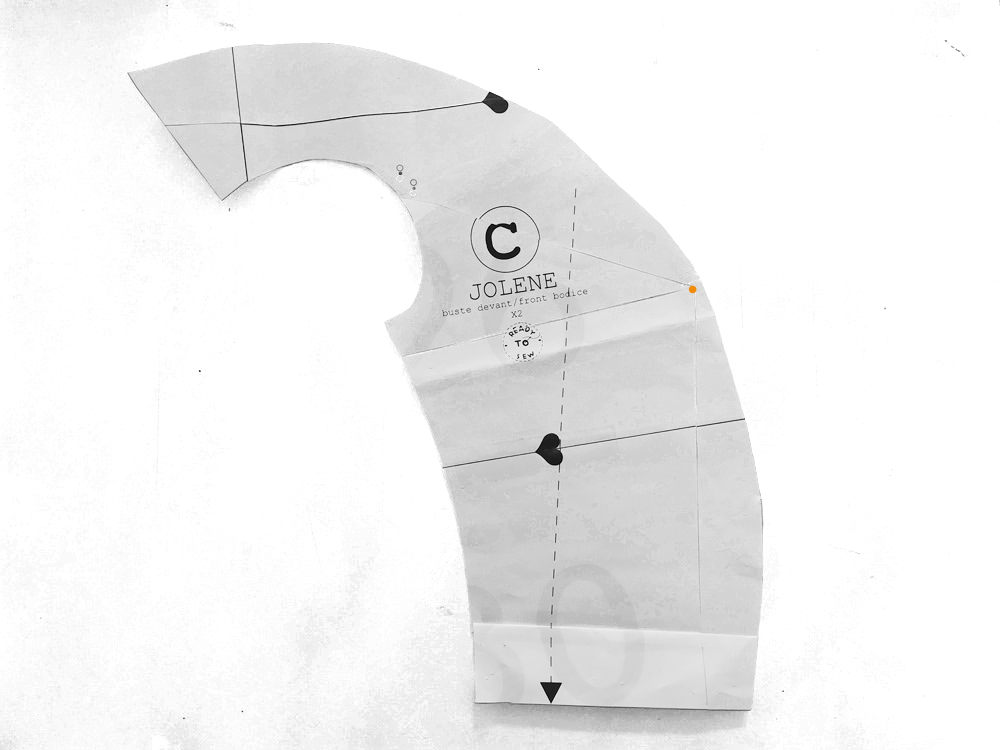 Mark the best apex on your front side bodice pattern piece. You can clearly see the bust apex on the Jolene bodice because it is where the pattern is a little pointy. The marking must be 1 cm from the border, following the seam allowance.
![]()
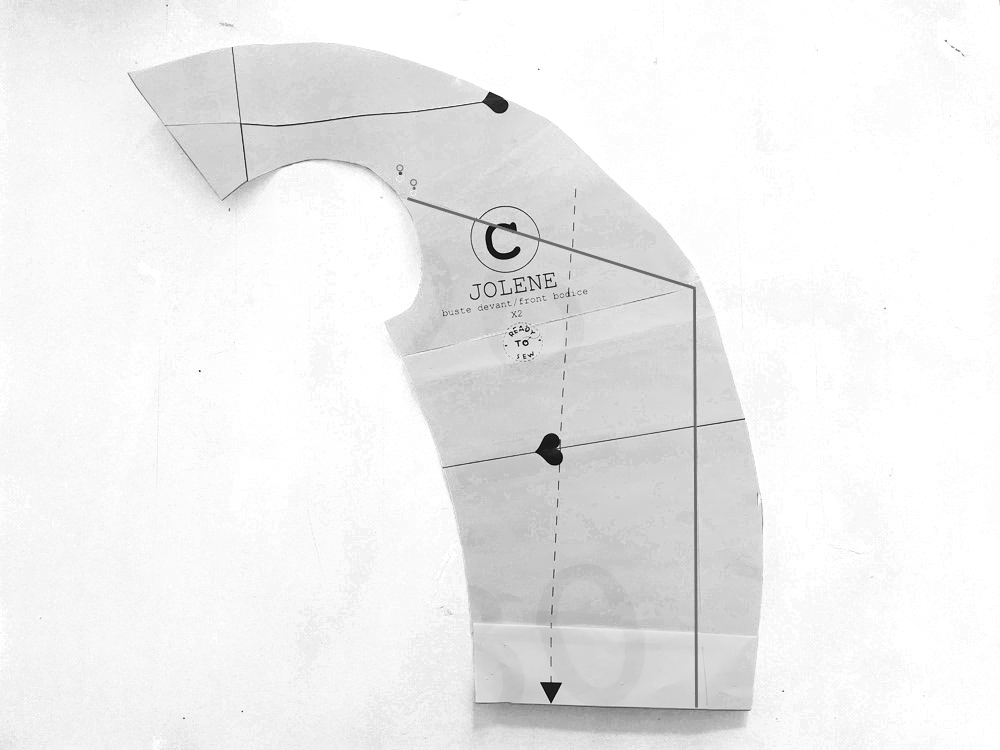 Then you will need to draw in three more lines.
- Line 1 needs to go from the waistline to the bust apex.
- Line 2 needs to be 3 mm of the front armhole marking to the apex point.
![]()
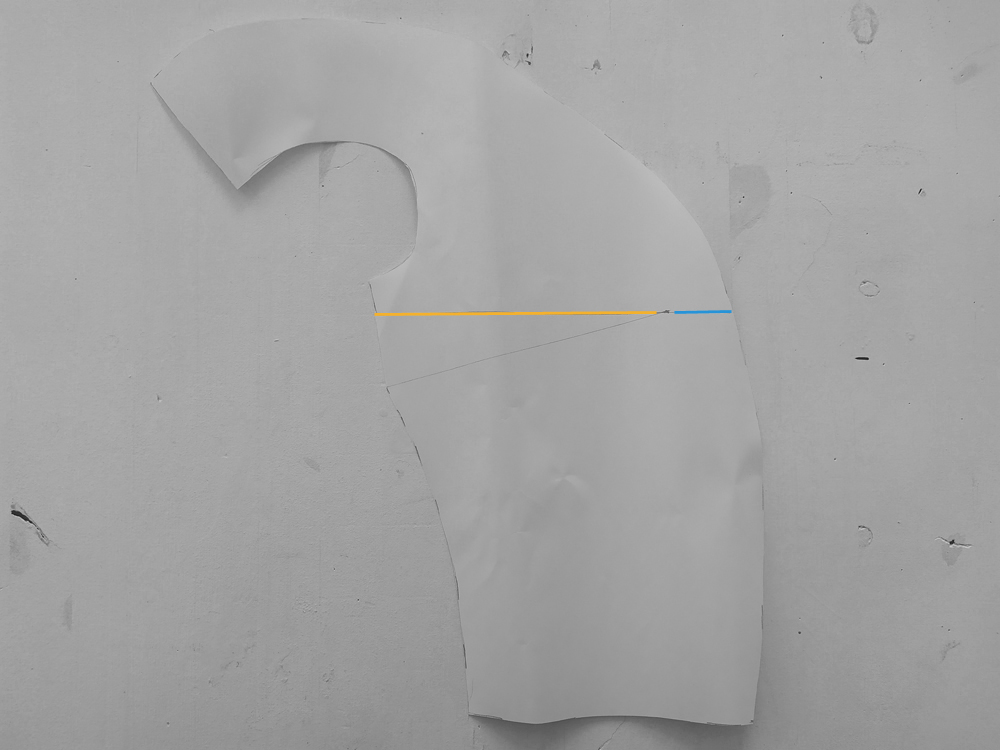
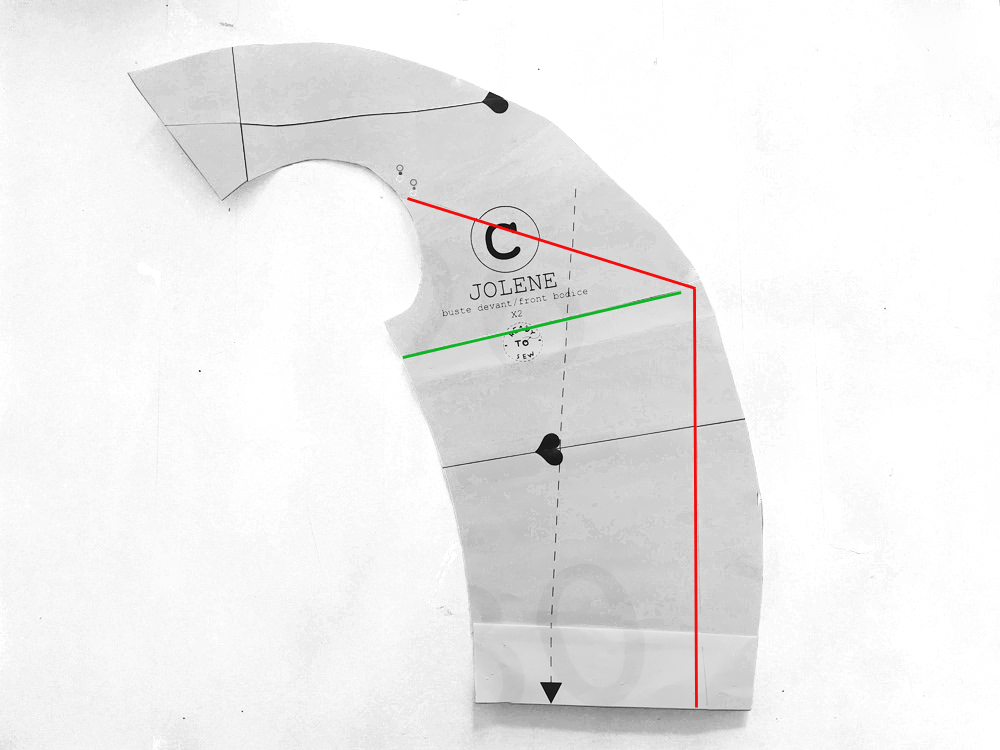 Line 3 needs to be from the bust apex to the side seam. The line should start approx 2 cm under the underarm.
![]()
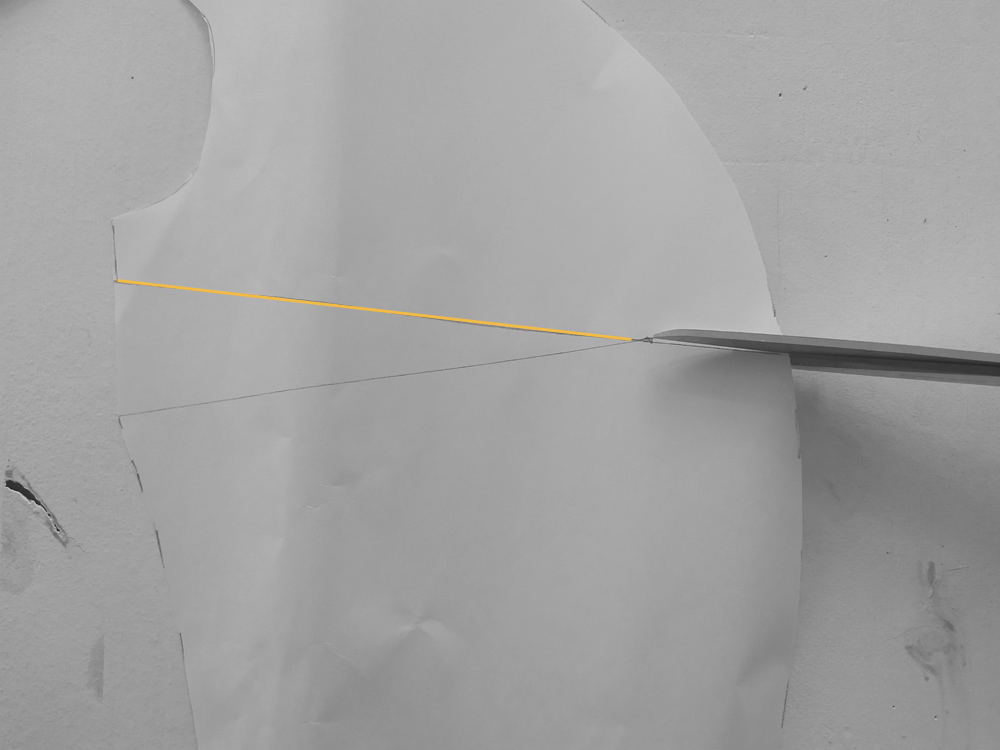
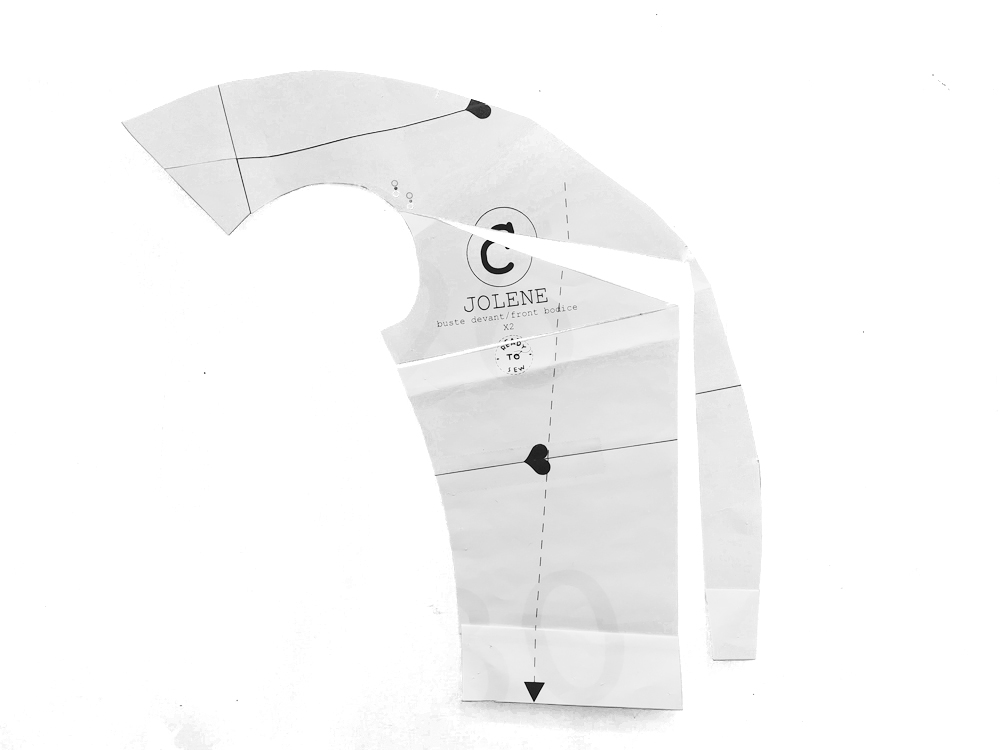 Cut through lines 1 and 2 (red), but on line 2 stop when you reach the seam allowance on the armhole. For line 2, cut through the seam allowance on the armhole from the other direction, but leave a small amount unsnipped so you can use this as a ‘hinge’ to move the pattern.
![]()
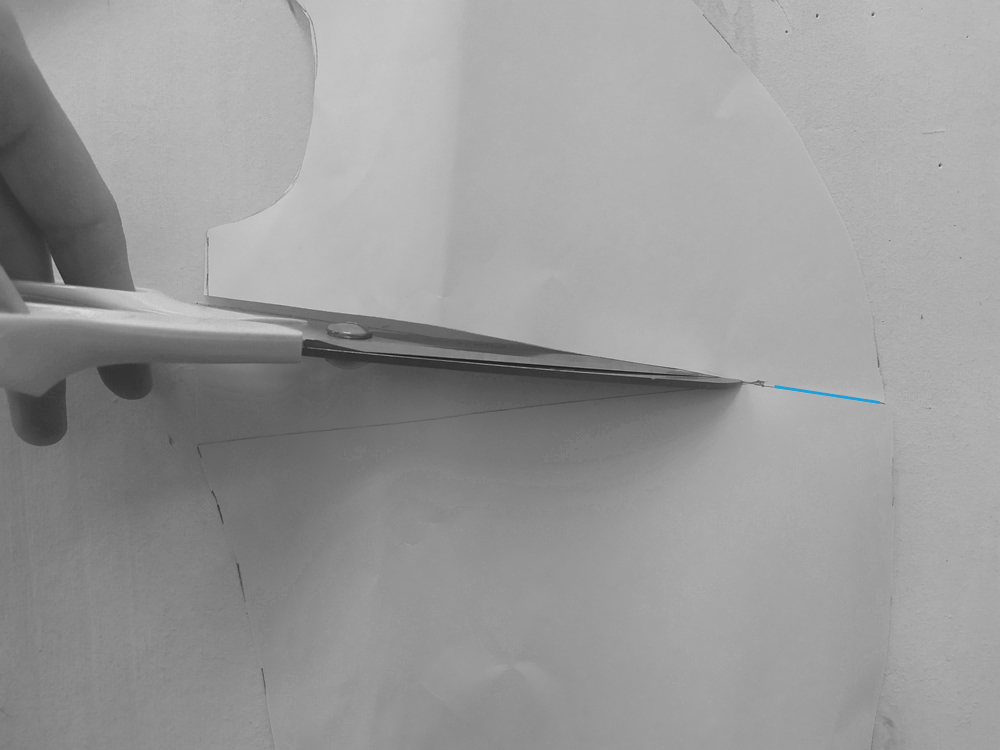
 Cut through line 3, but again leave a small amount uncut at the bust apex.
![]()
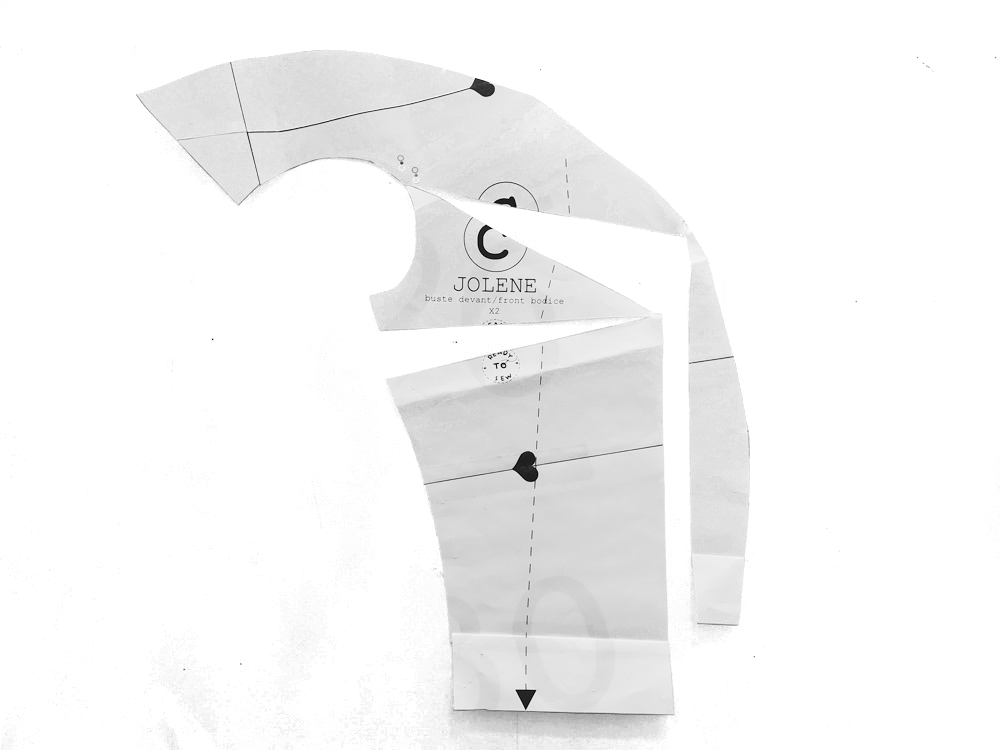
 Next you’ll need to pivot the pattern so that along line 1, there is the increase of 1,5 cm (or your own measurement) that we need, and this needs to be even all the way down to the waist. Line 3 will have opened up to accommodate the width you’ve added, so tape it in place where it has opened up.
![]()
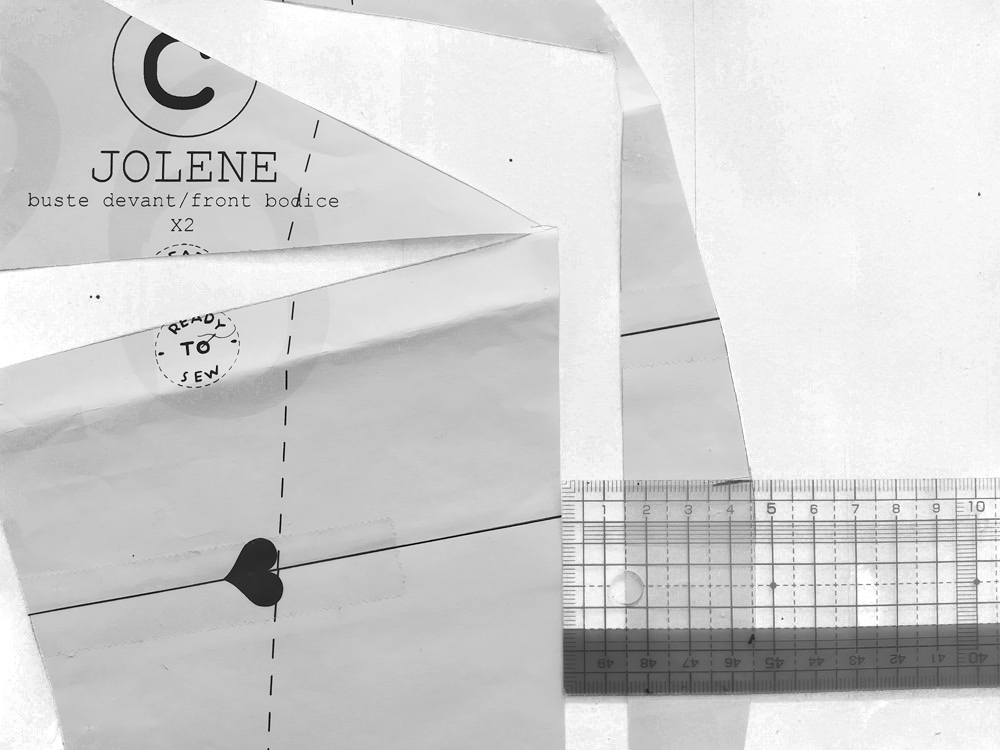
 As the waistline is now uneven, you need to adjust this. Snip off a little paper piece on the princess seam and slide it down until it is in line with both the princess seam and the waist line. Tape everything in place.
![]()
 Trace this new pattern piece on a piece of paper, copying only the outlines and the new dart.
![]()
 To close the dart that has been created, first extend line 3 across the seam allowance on the princess seam.
![]()
 Cut along the bottom of line three from the side seam, stopping when you reach the bust apex point. Then cut along this line from the other side, starting at the princess seam and stopping right before you reach the bust apex.
![]()
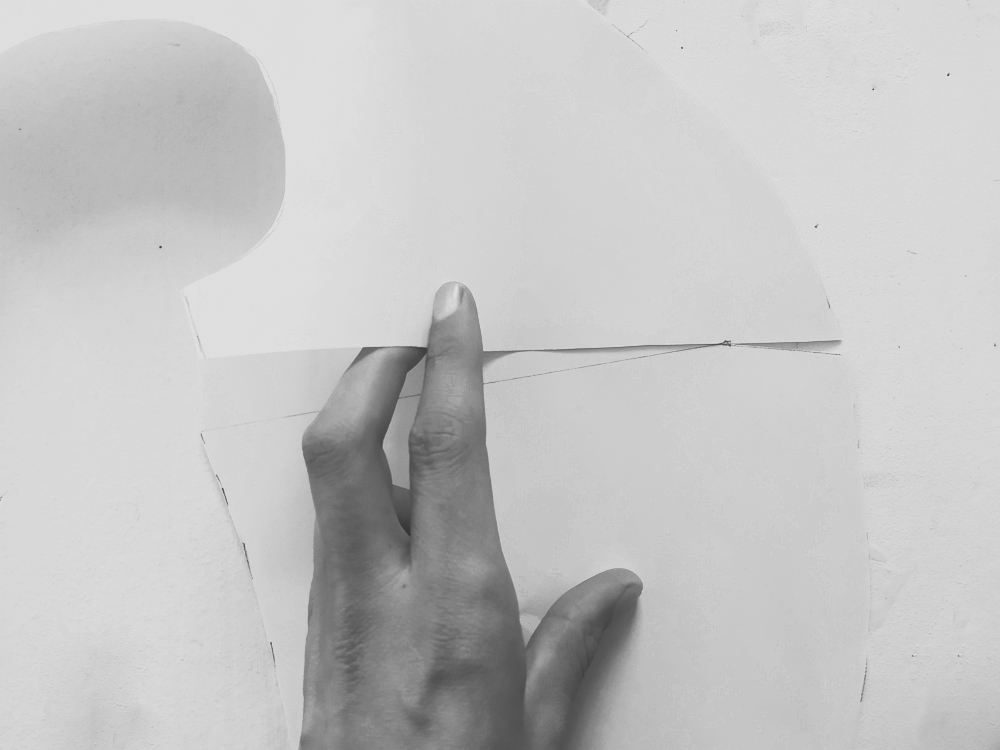
 Using the apex as a pivot point, fold the pattern piece closed at the side seam so that the top and bottom of line 3 meet again. The smaller cut on the princess seam should open to create a smaller dart, this will work as gathers later on. Tape the dart down.
![]()
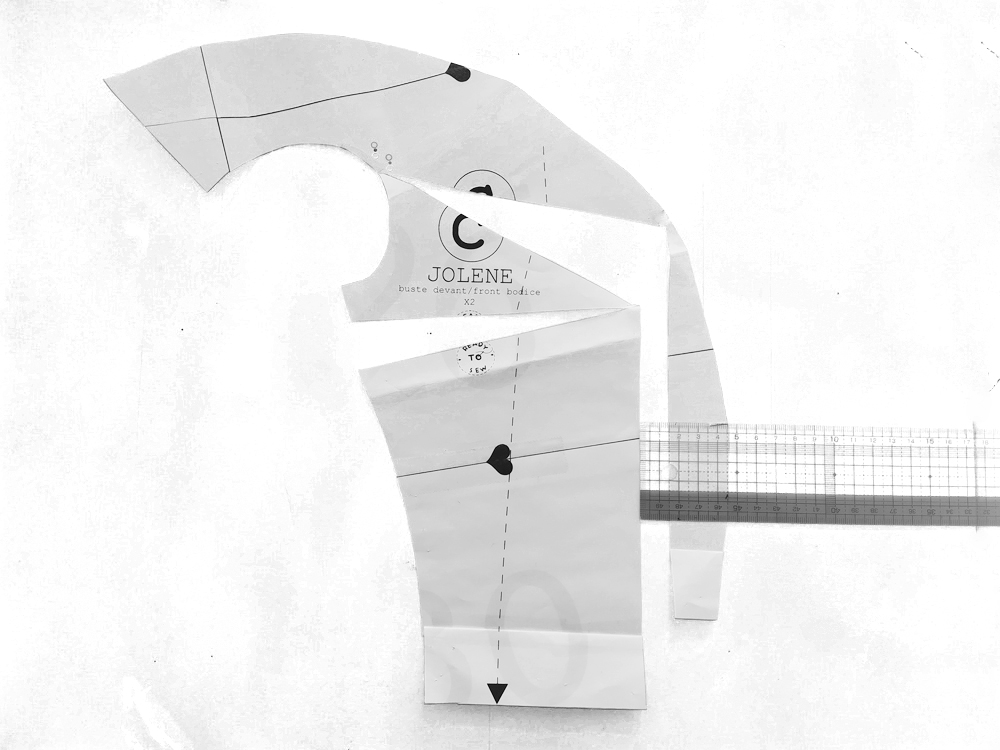
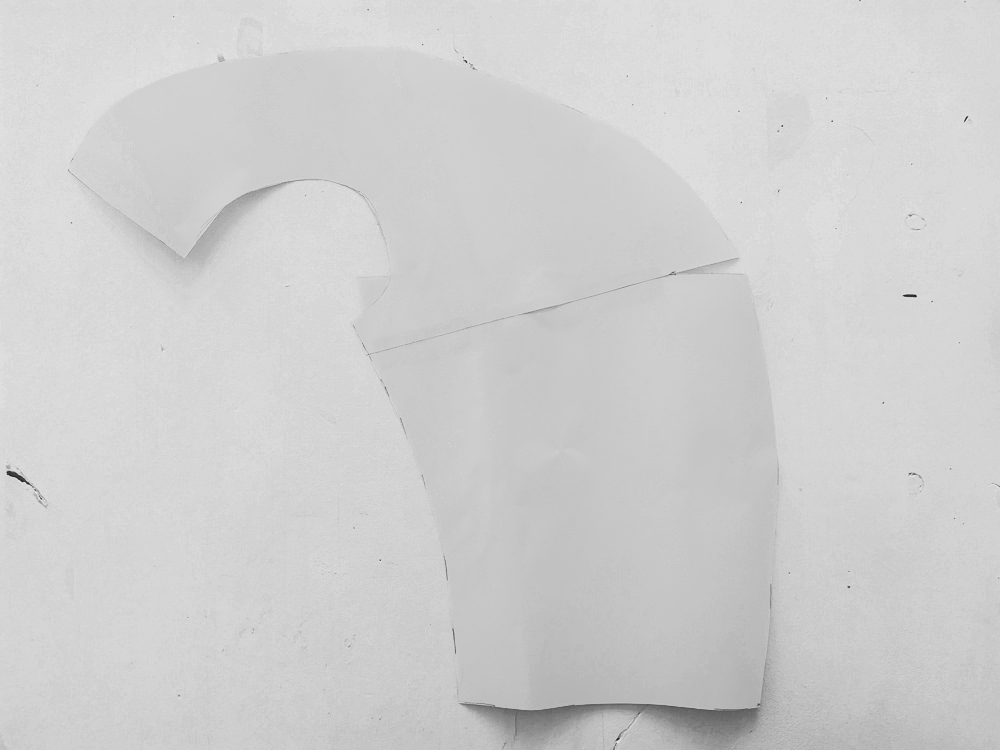
 The extra room that has been added at the waist now needs to be removed again, so you’ll need to draw a new cutting line at the side seam. Overlap the old pattern piece on the new pattern piece and trace the side seam.
![]()
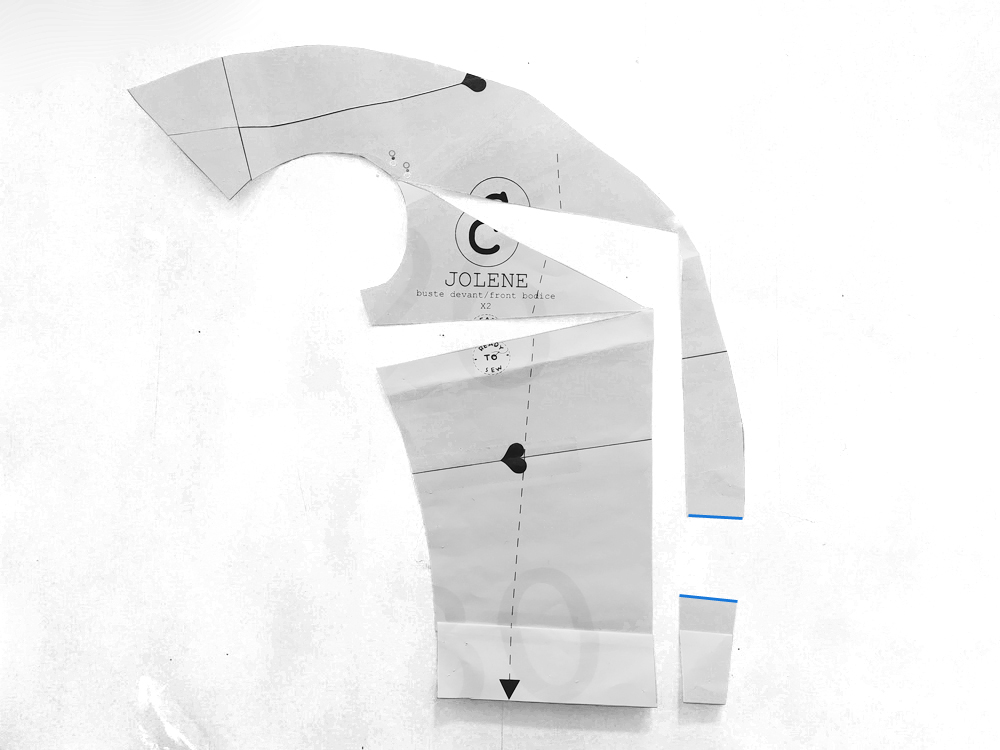
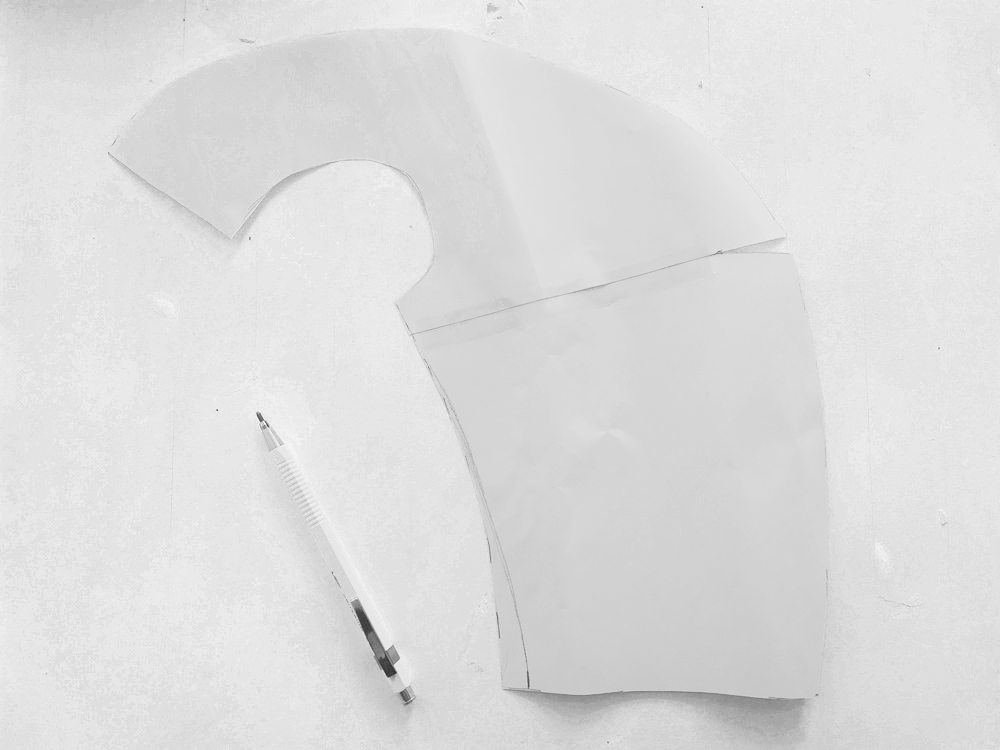
 Finally, to finish, you will need to add the same amount of length into the centre front panel using the "shorten-lengthen" line. Again, overlap the old and new pattern piece and measure the difference in length.
Comments
Leave your comment